Classic Homemade Apple Pie

Updated 22nd November 2023
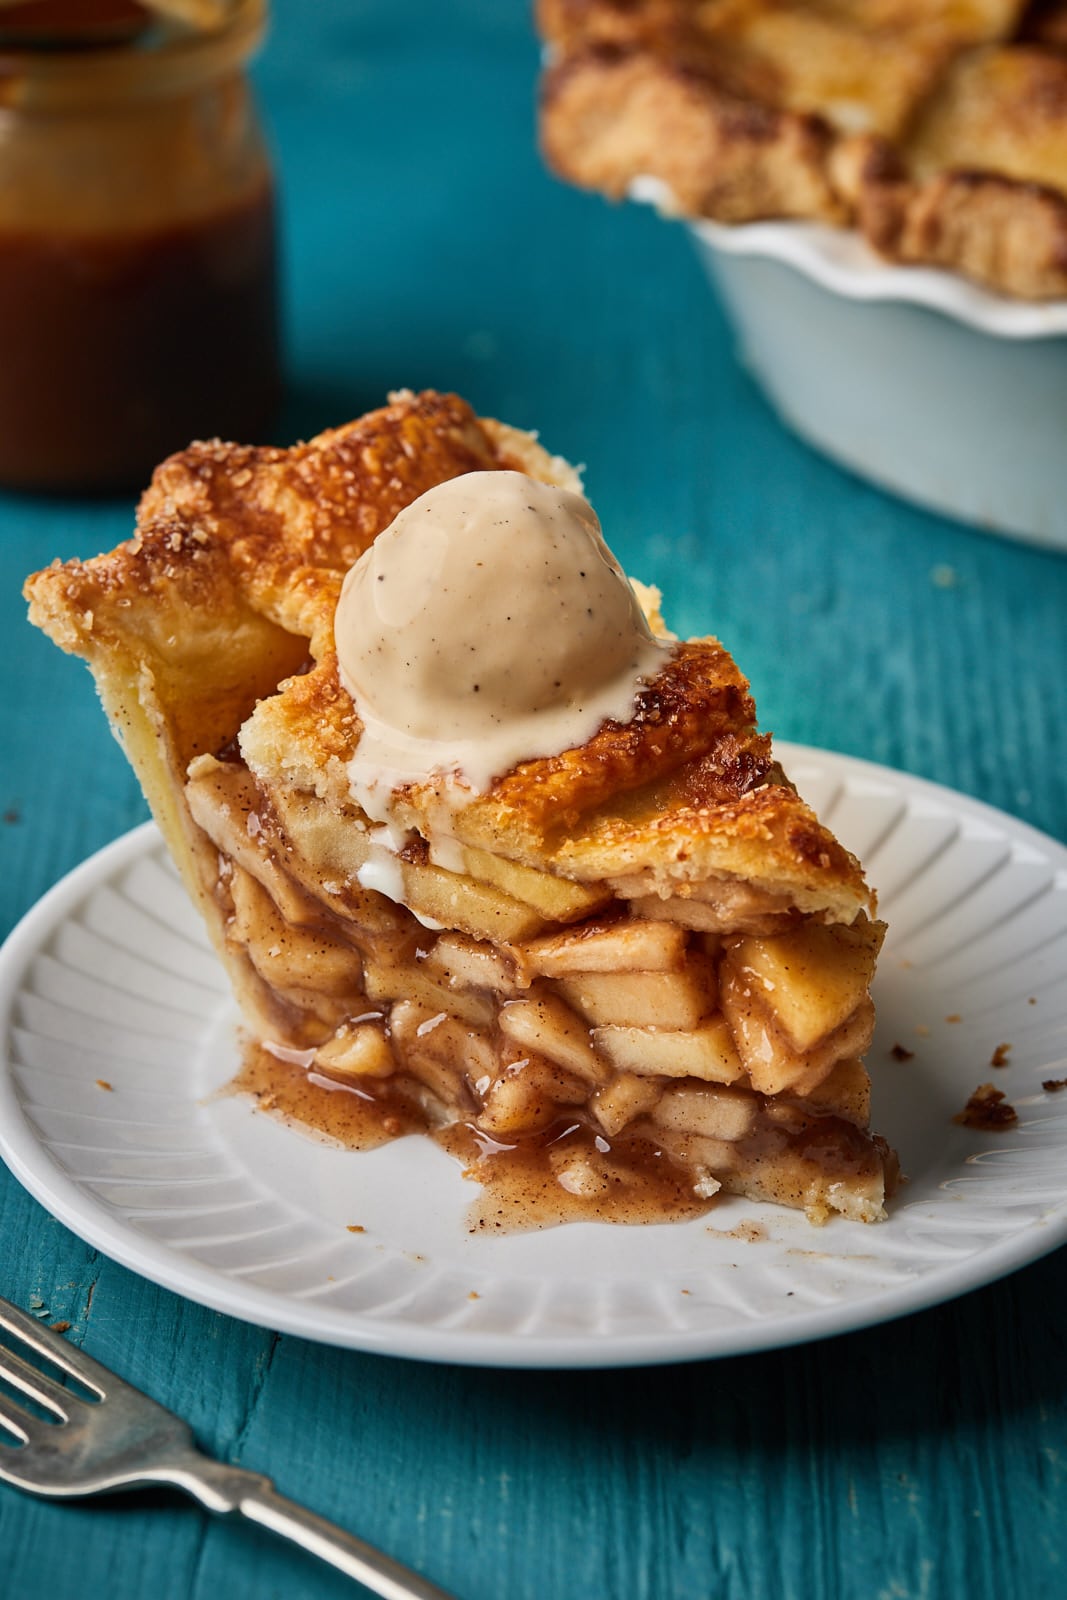
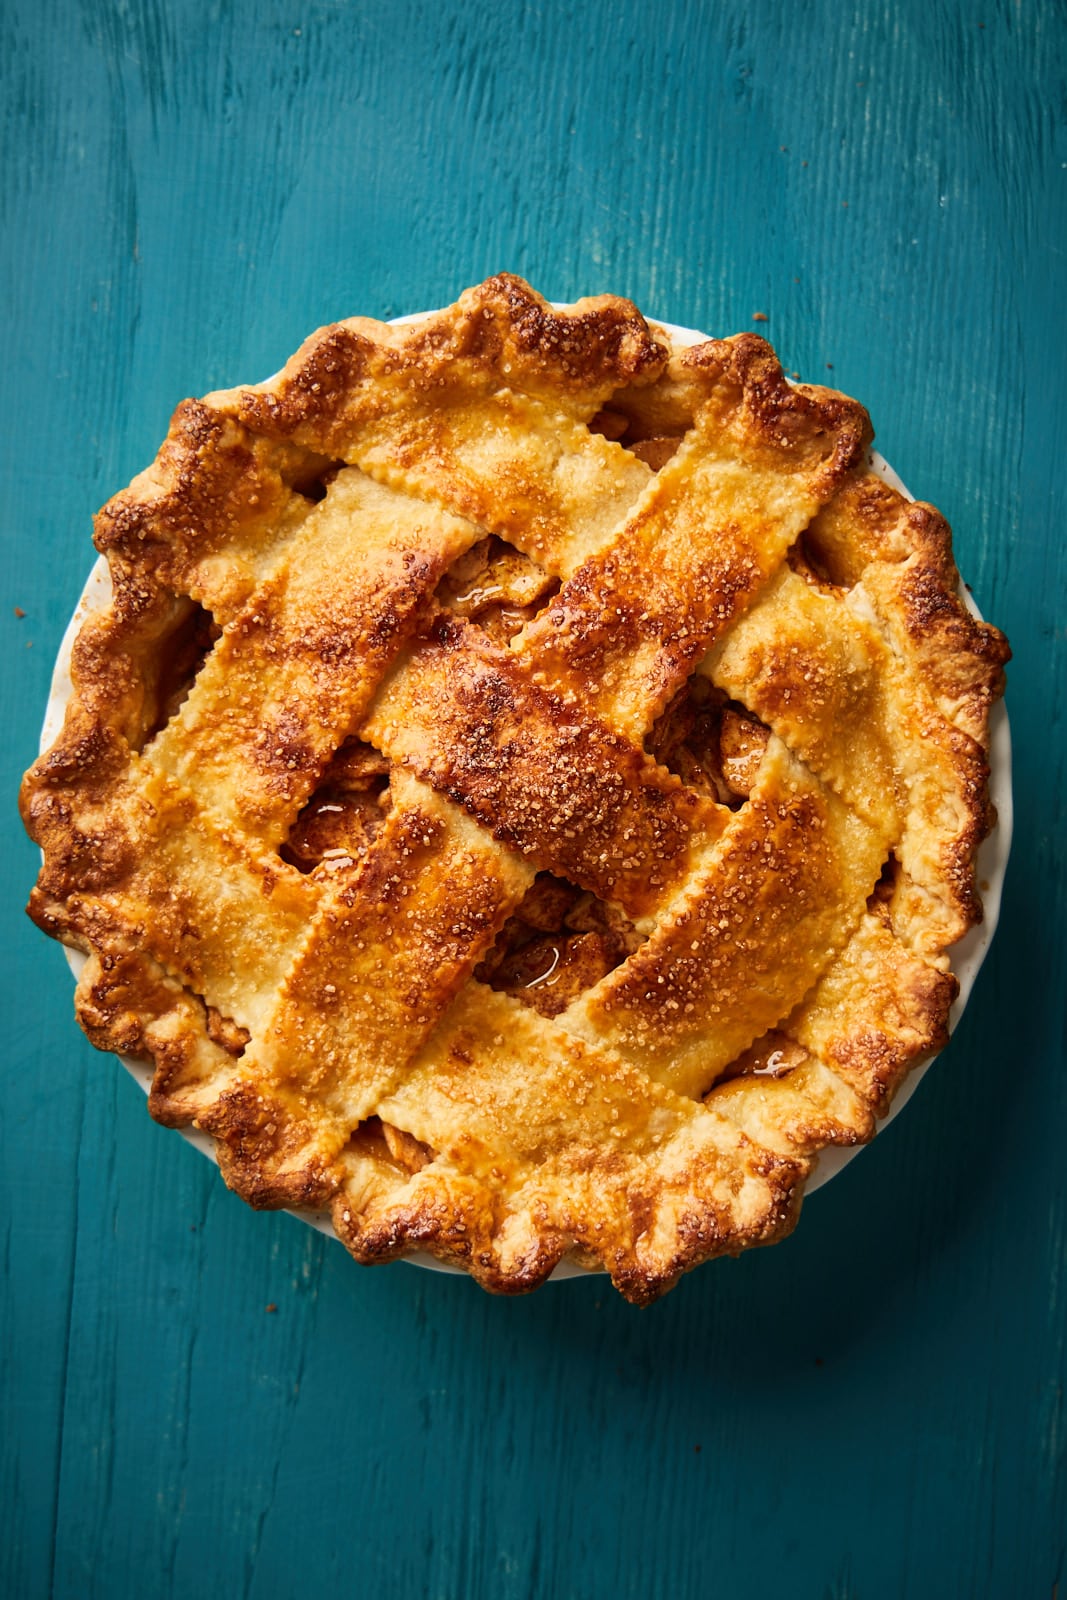
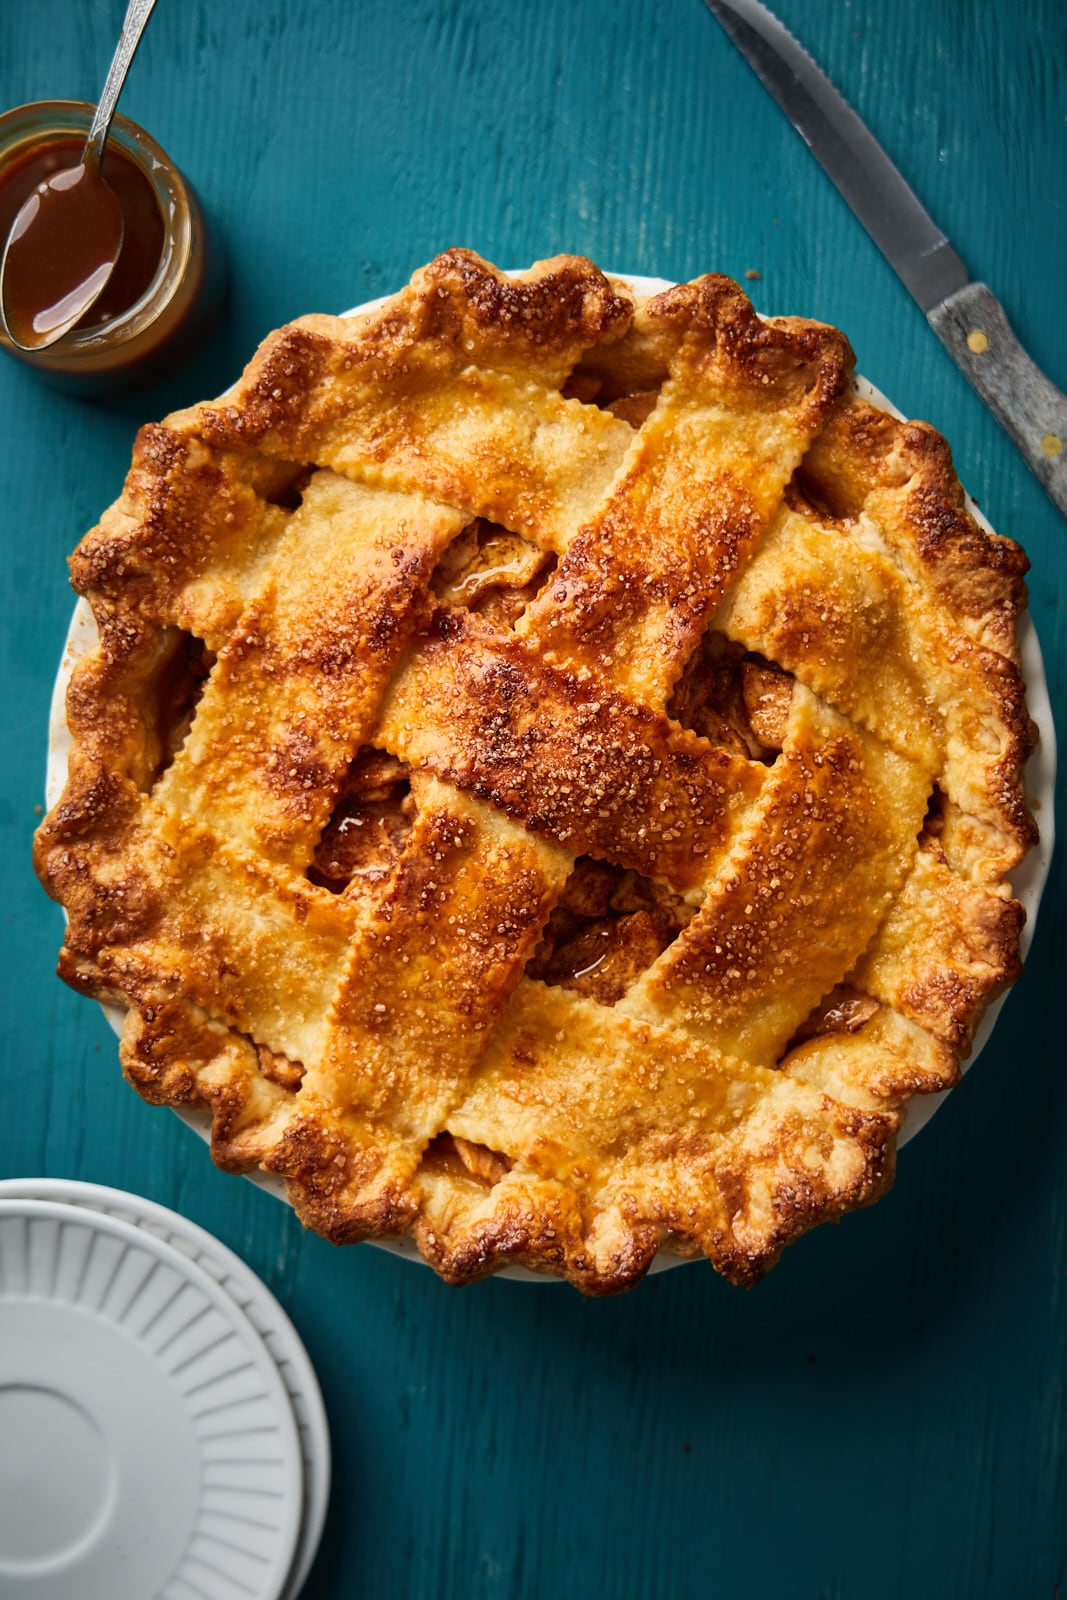
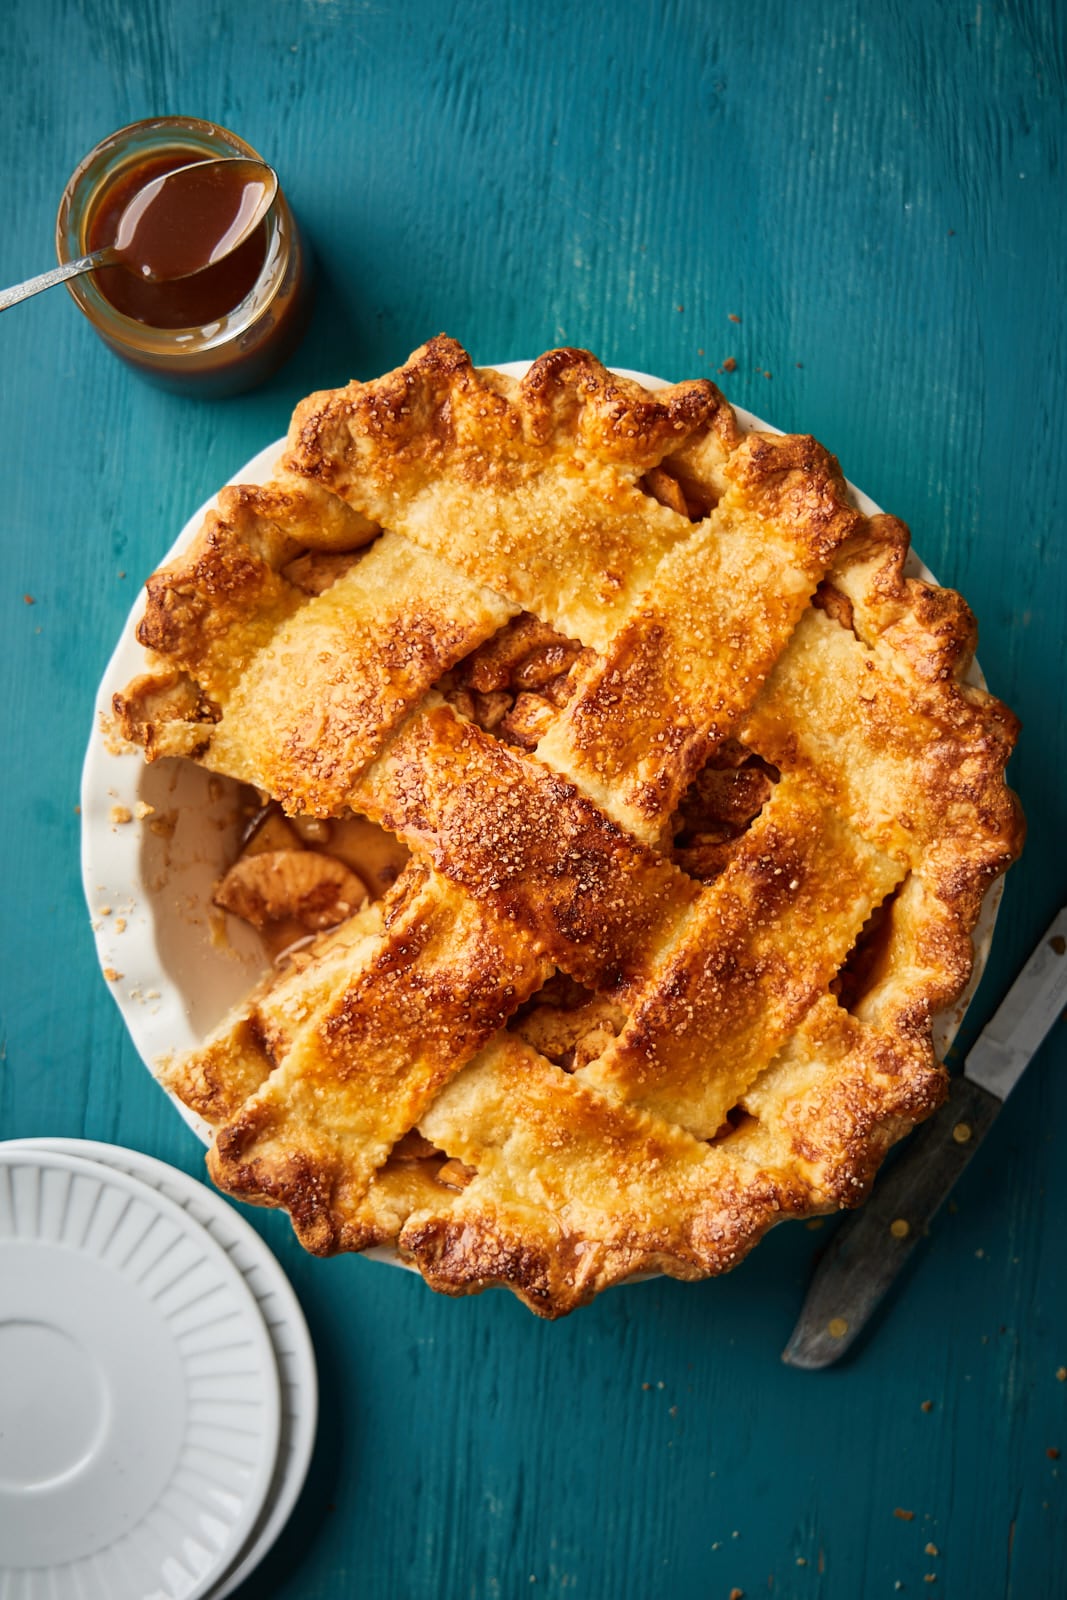
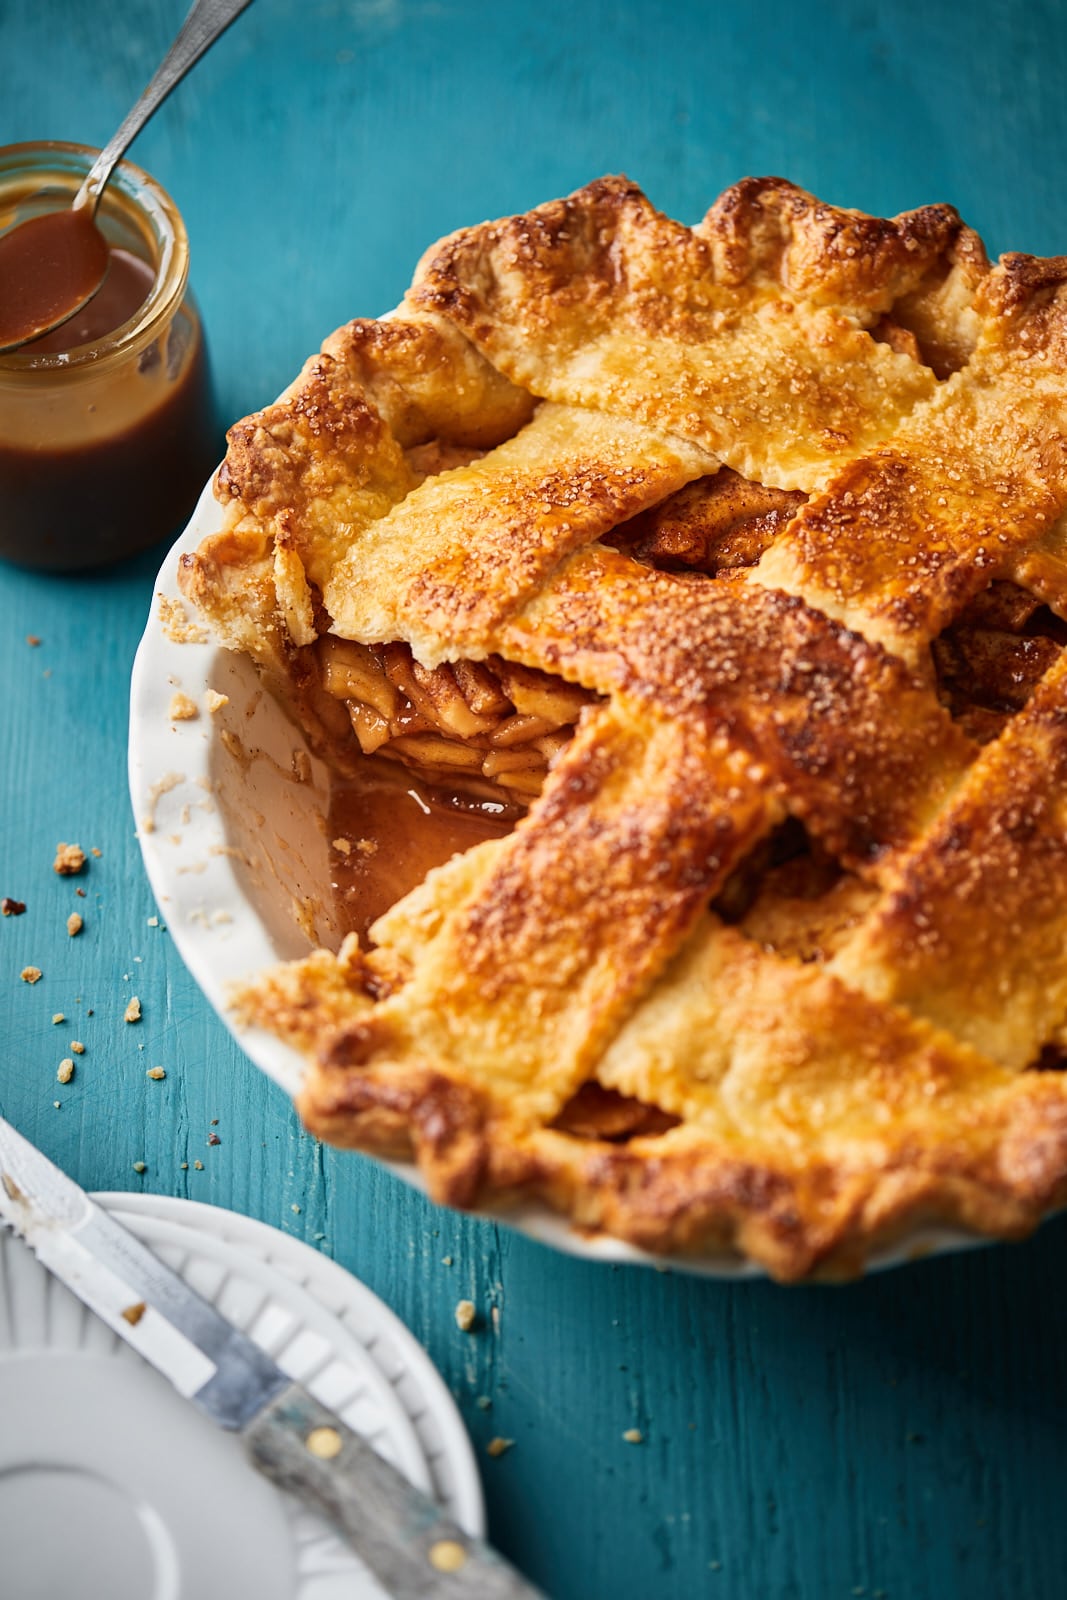
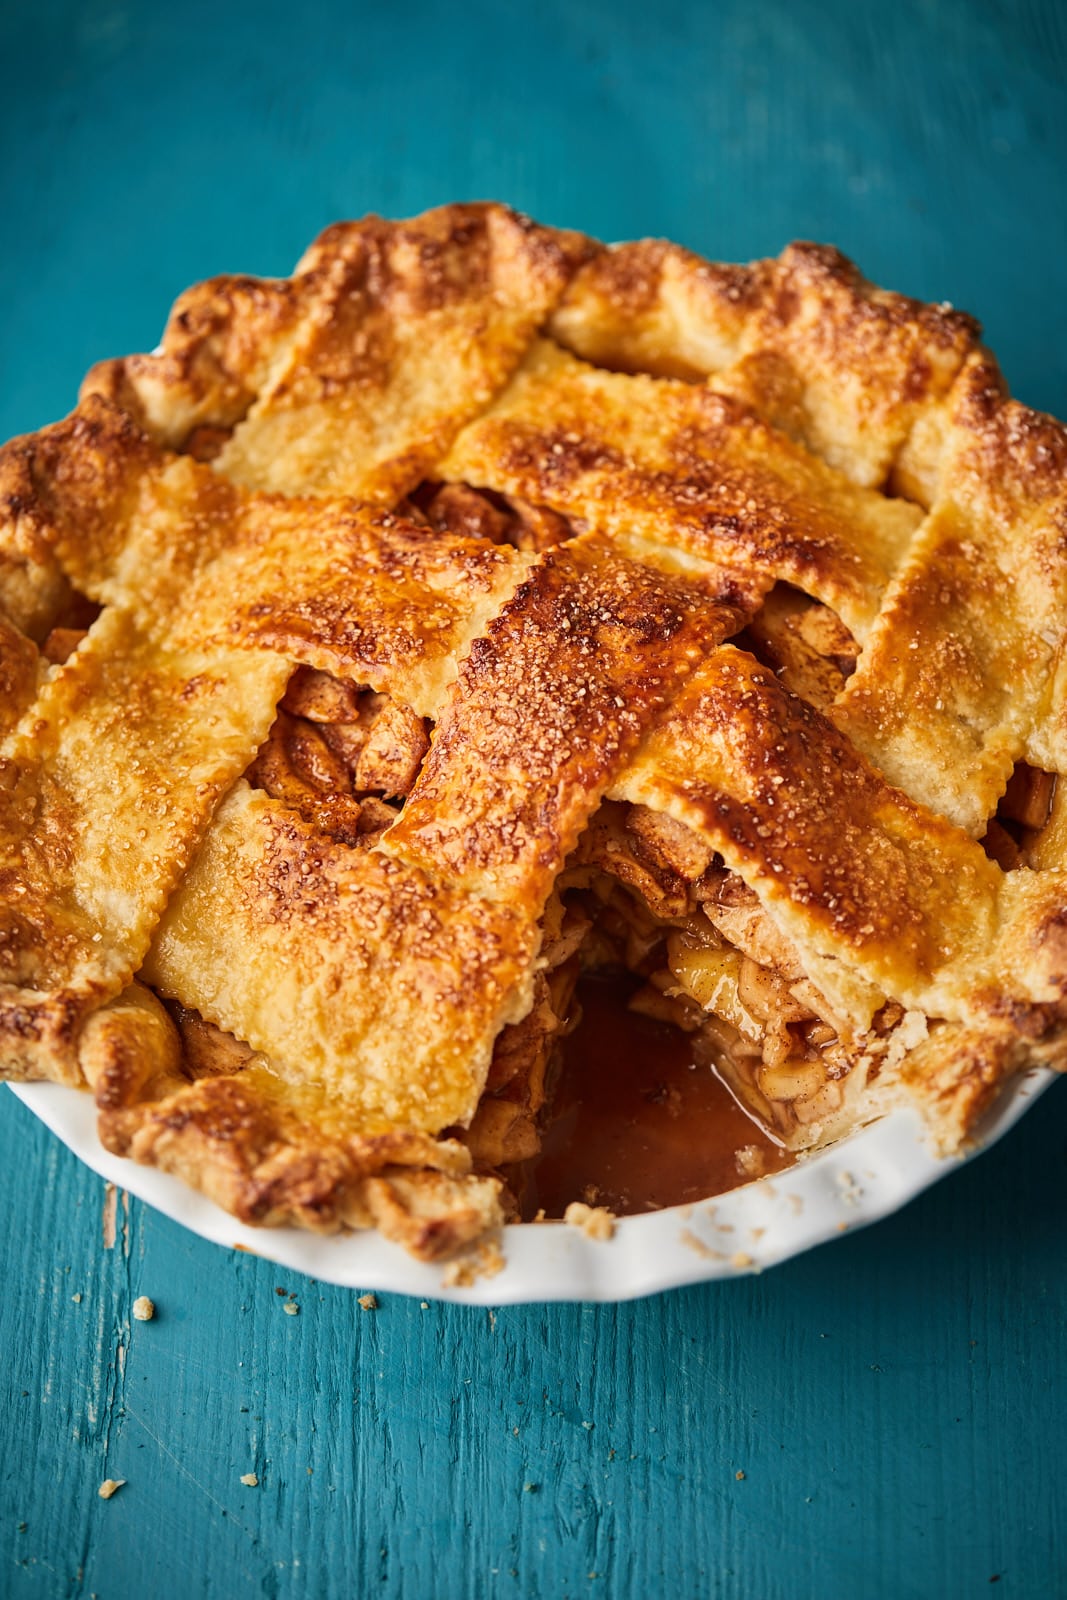
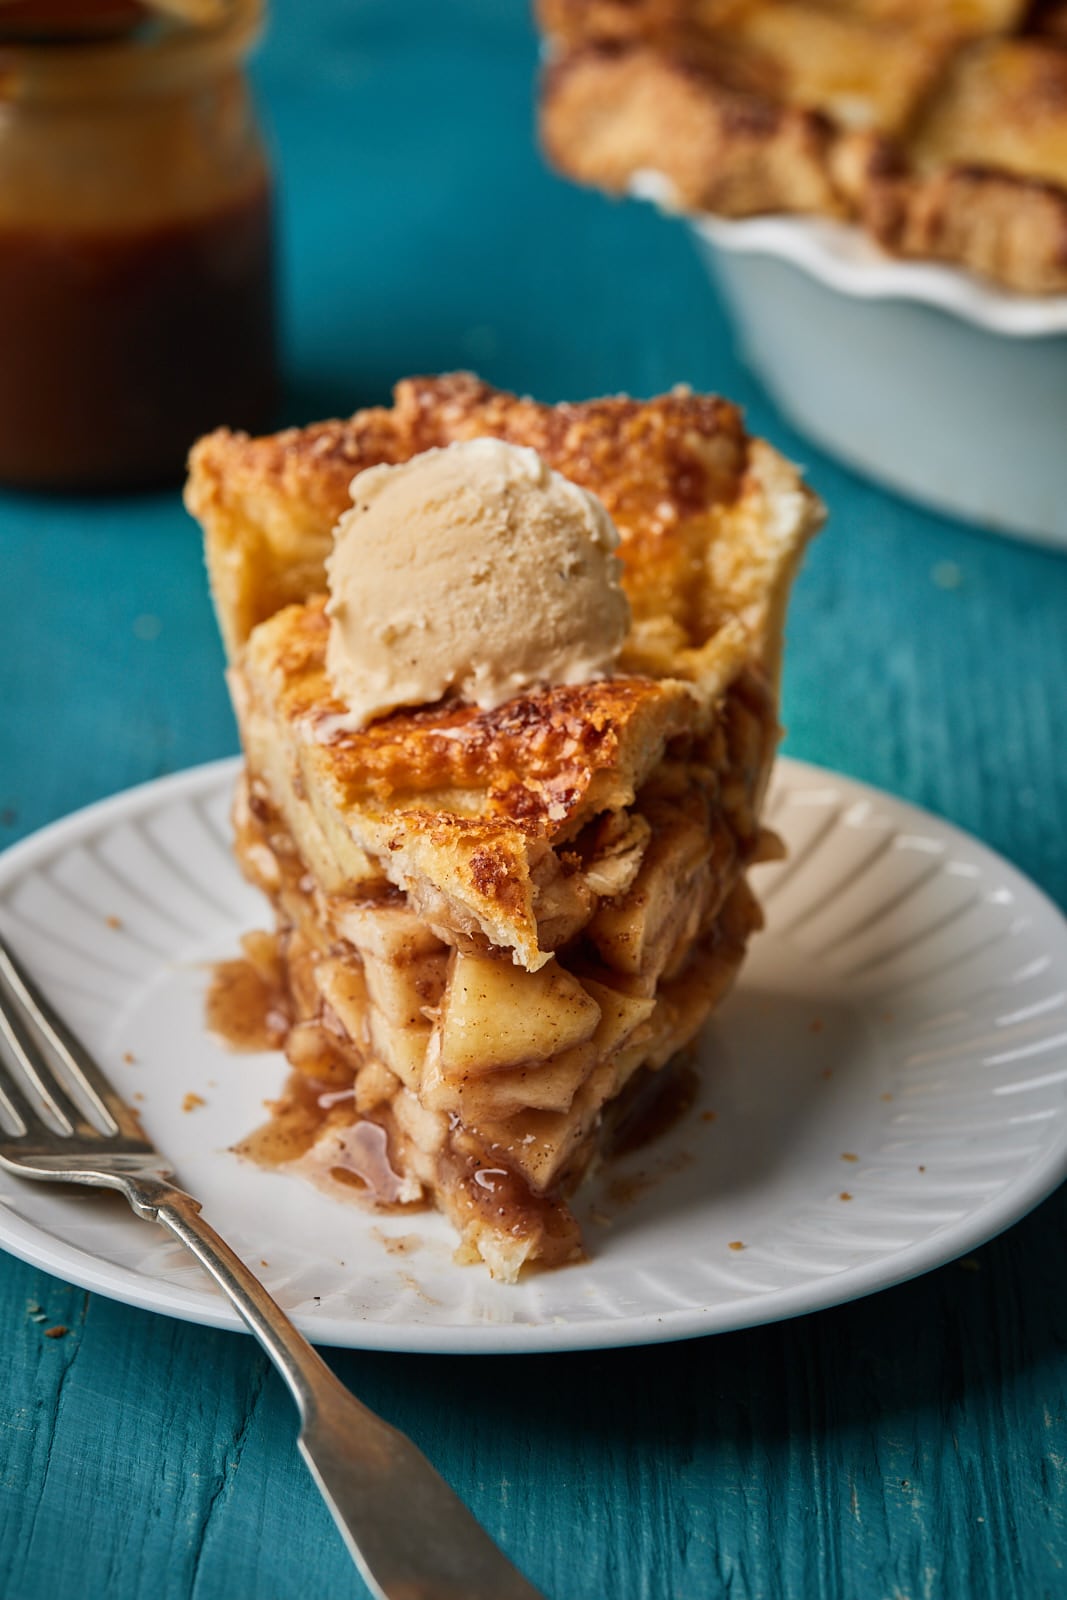
This deeply delicious deep dish apple pie recipe is full of layers of sweet spiced apples packed in a buttery flaky pie crust. The words “apple pie” always conjure up warmth, cinnamon spice aroma, and fall. This truly is the perfect pie for fall and special occasions. Add some vanilla ice cream and it becomes the ultimate and classic home-style dessert. There are a few steps to making this pie, but I promise that it’s not too difficult. The filling is incredibly easy to make and sweet, but not too sweet. I love to top this apple pie with a simple lattice design, but you could also cut out some pie crust to decorate the top or just cover it with a full piece of pie crust.
Apple Pie Filling
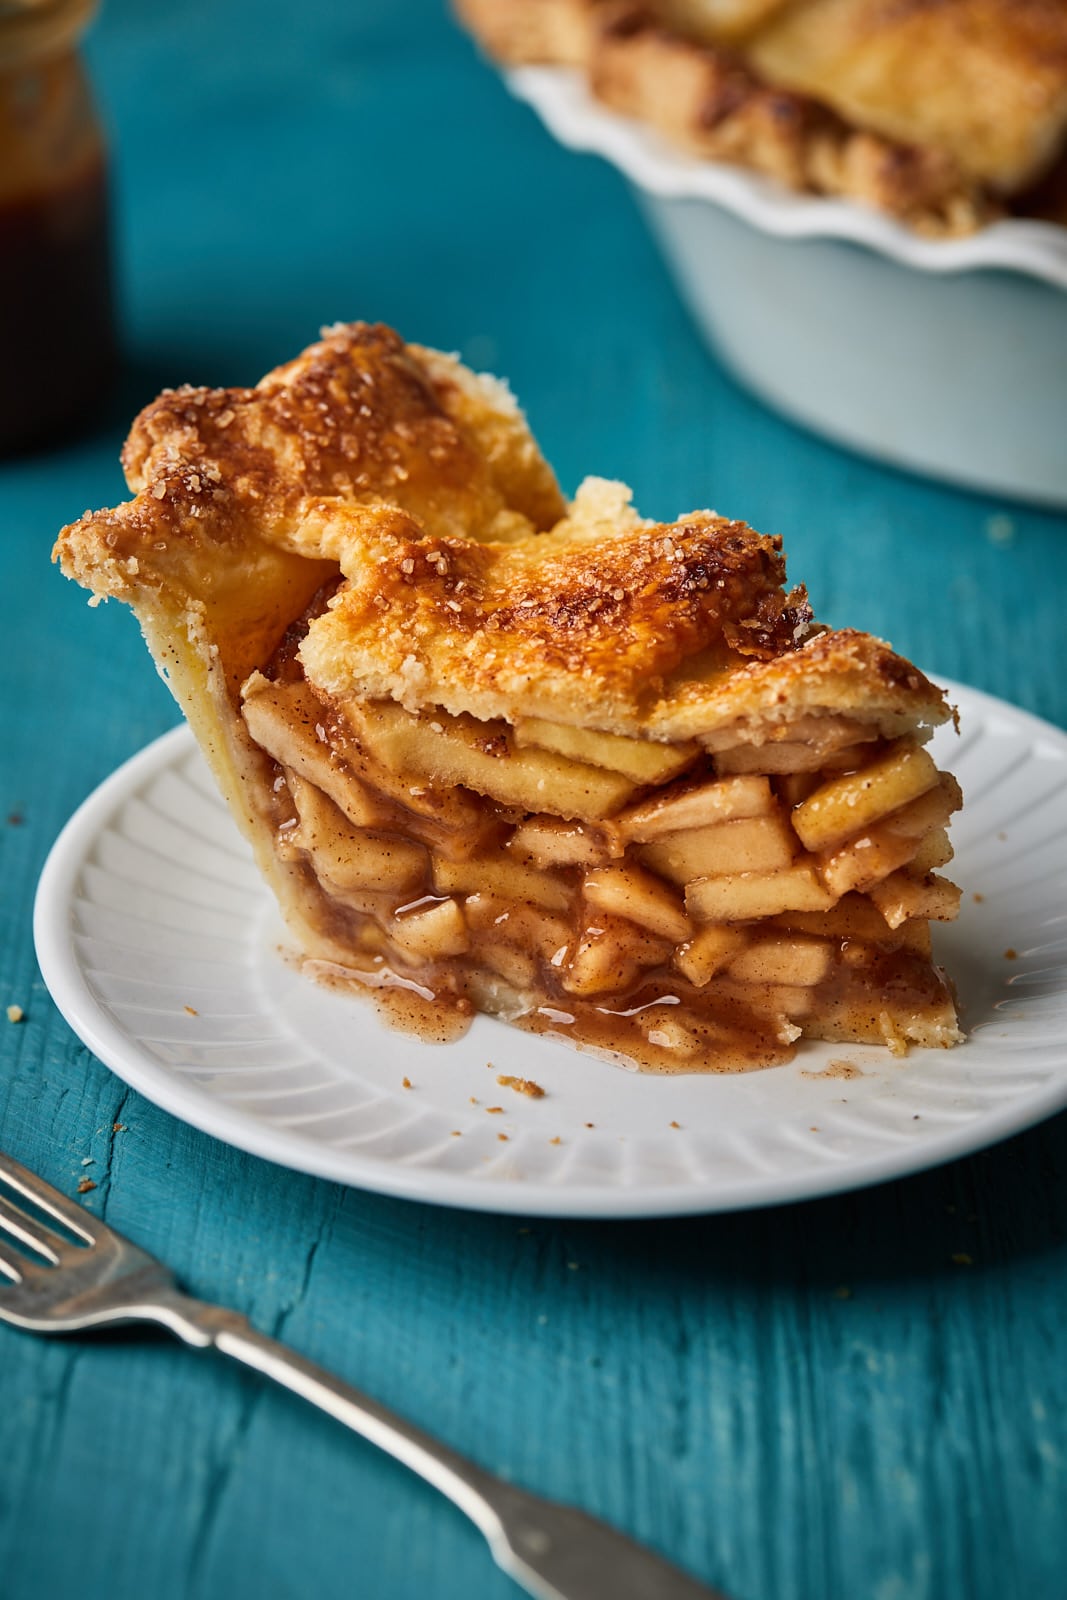
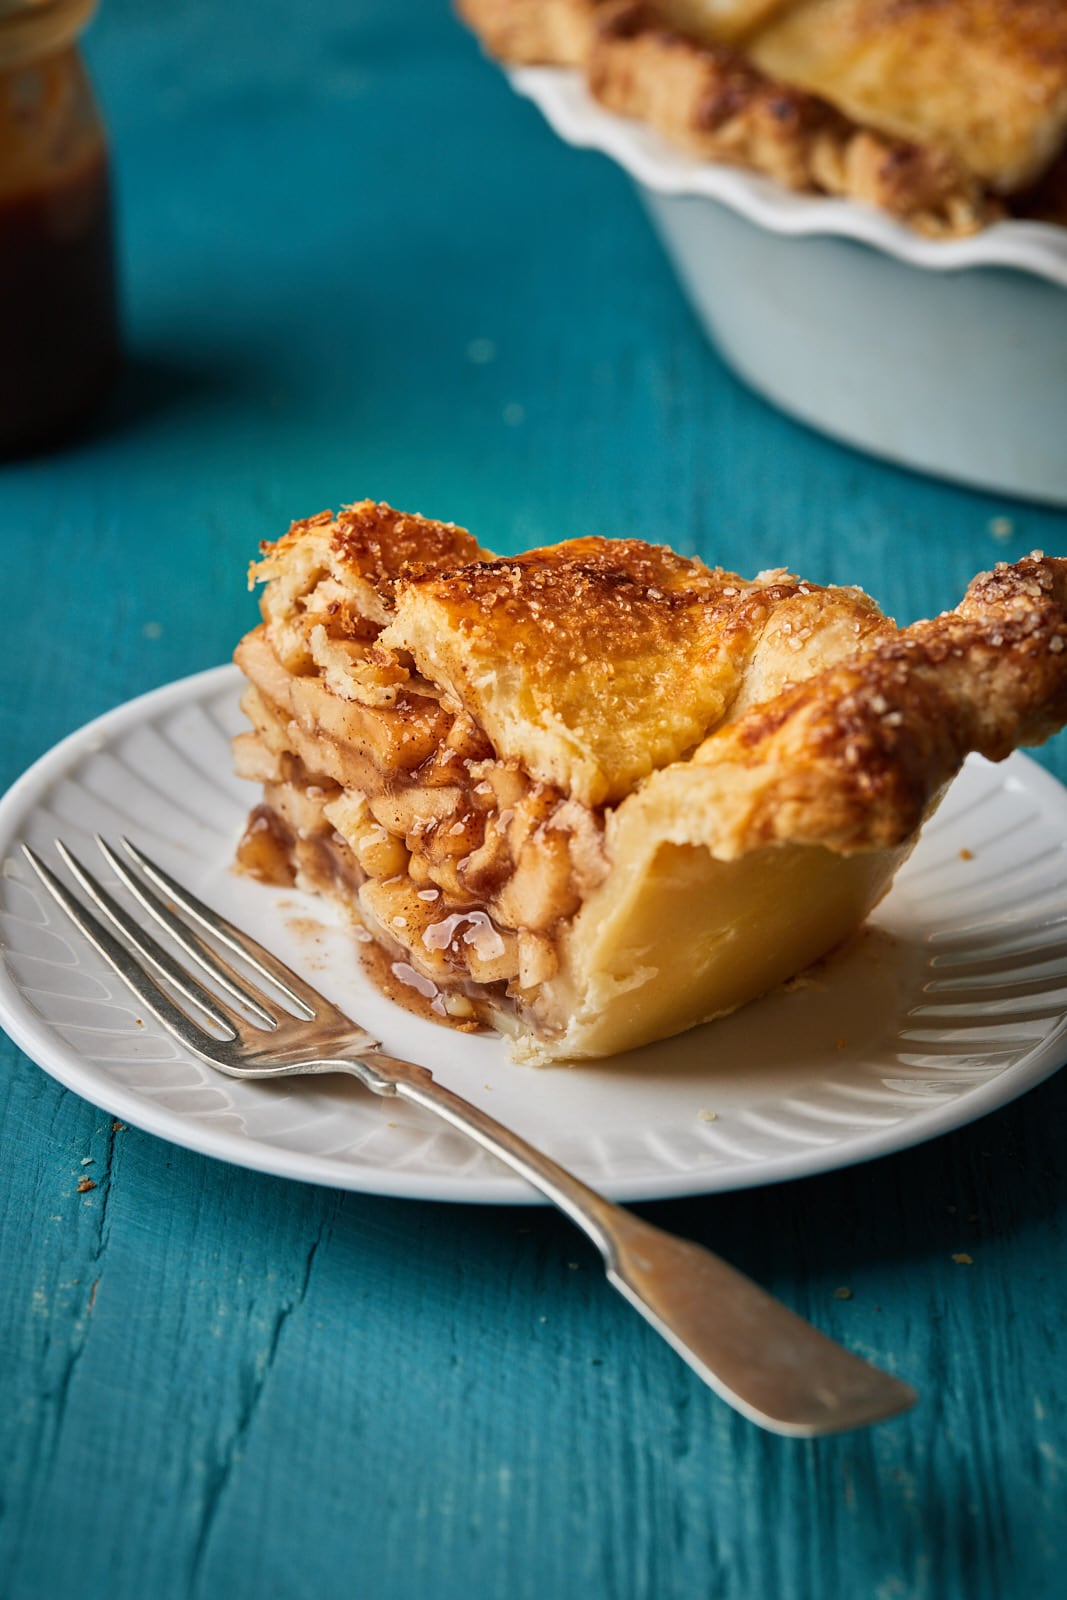
A lot of recipes out there call for precooking the apples for the filling. Apparently this reduces the chance of your filling slumping or shrinking and creating a large gap between the filling and the crust. It’s an added step and one I have always wanted to avoid so I did some research and according to Stella Parks - BraveTart book, macerating the apples for at least 1 hour to up to 4 hours helps. The apples soften, allowing you to put a lot more in the filling and leading to pie slices stacked to the brim with apples slices. You may think that 4.5 lbs of apples is too much but for this deep dish pie it’s the perfect amount. The recipe I came across with all this info is actually Smitten kitchens. She uses the same amount of apples in a regular 9 inch pie plate and piles the apple like 3 inched higher than the pie plate - sky high like a diner style apple pie. Feel free to try it out. I haven’t tried it in a regular pie plate cause I’m quite happy with it in the deep dish.
Apple Pie Dough
I opted for a very simple pie crust recipe. It’s an all butter pie crust with super basic ingredients - no extras like vodka, vinegar, cornstarch. Just plain flour, butter, sugar a pinch of salt and ice cold water. It never fails me and always turned out great for all my fruit pies. The key thing to a successful pie crust is making sure your butter and water is cold. You can use a pastry cutter or your hands to cut in the butter but I’m quite happy using the food processor. It’s quick and easy. But if you don’t have a food processor to make the pie dough - no problem. Just combine the dry ingredients in a large bowl and whisk them together. Then use fork or two butter knives or a pastry cuter to cut in butter cubes into the flour mixture. Use hands, fork or wooden spoon to mix in the cold water.
What Are The Best Apples to Make Apple Pie?
When it comes to what variety of apples to use in your apple pie try to stick to baking apples like Granny Smith, Pink Lady, Braeburn, Jonagold, Cortland, Honeycrisp, Jazz, or Fuji. The only ones I avoid are Red delicious or golden delicious apples and McIntosh apples especially as they lack crispness. I really like to do a combination for added flavour as they do each have a distinct flavour difference, small but enough. Variety is nice in pie so feel free to mix it up with sweet and tart apples. I peel them and core them and try to slice them the same thickness as well. I didn’t add lemon juice or zest in this pie and I have to say I really didn’t miss it. If you love that extra bit of tartness in your apple pie feel free to add a teaspoon or so in the filling. I used a simple blend of spices but if you like more of any of them feel free to adjust the amounts and if you like adding extra spices definitely feel free to do so. If you wanted to add a hit of salted caramel to your filling feel free to stir in a few spoonfuls of it into the filling. I personally love a simple classic version.
Apple Pie Recipe Ingredients
- PIE CRUST: Feel free to use the pie crust recipe I have included or your own homemade pie crust recipe - or feel free to use store bought ones you love.
- APPLES: You will need 4.5 lbs of apples peeled, cored and thinly sliced. Try to slice the apples roughly the same thickness for even baking. See above for the best apples to use for apple pie.
- SPICES: I use a blend of ground cinnamon, ground nutmeg, ground ginger, ground clove. Feel free to adjust amounts to taste and if you would like to add more warming spices like cardamon or all spice you can or you can even swap the spices with apple pie spice.
- CORNSTARCH: Cornstarch or tapioca starch help thicken the juices the apples release.
- SUGAR: I use a combination of brown sugar and granulated sugar for a nice flavour.
- CREAM & EGG (EGG WASH): The combination is for the egg wash over the pie dough. If you don’t have cream you can use milk or water. The egg wash is optional but gives the pie a nice shiny finish
- TURBINADO SUGAR: Or coarse sugar or sanding sugar is optional but I use it to sprinkle over baked goods including pie to give them a little texture and crunch and a nice finish
- CRUST DUST: This is a combination of sugar and flour that I sprinkle on the bottom/base of the pie crust which helps prevent the base of the pie from becoming soggy. It’s optional but recommended. I use all purpose flour and either granulated sugar or brown sugar
- OPTIONAL ADD INS: Feel free to add touch of freshly squeezed lemon juice and zest, or a splash of pure vanilla extract, a tablespoon of caramel sauce, or even a splash of rum or bourbon for extra flavour.
How To Make Homemade Apple Pie
This tasty Apple Pie is quiet easy to make and here are the simple instructions (full details in recipe card below)
- PREPARE FILLING: Peel, core and slice apples and toss them with the sugar, spices and let them sit for 1-4 hours while you make pie dough.
- MAKE PIE DOUGH: You can use store bought pie dough/pie crust for this recipe if you prefer or even use your own recipe. For a tried and tested simple all butter pie dough recipe please refer to the recipe card below - recipe, directions for making dough, rolling it out included.
- ROLL OUT PIE & CHILL: Roll out the pie dough, fit into pan, sprinkle bottom of crust with crust dust. Chill pie crust while rolling out the second layer/top layer of pie dough - create lattice or cut outs or leave whole.
- FILL PIE WITH APPLES: Toss the apples with the starch. Empty into pie. Place top layer of pie dough over apples (lattice, cutouts or whole layer cutting vents into the top as needed), trim, tuck and flute edges, brush pie dough with egg wash and chill pie while you preheat oven.
- BAKE PIE: Carefully transfer pie to oven and bake at 400°F for 20-25 min then REDUCE TEMPERATURE to 350°F and continue baking for another 40-45 minutes until pie is deeply golden brown and juices are thick and bubbly and internal temperature is approx 195 ° F. I place a pie shield on top of the pie or tent loosely with foil to prevent the edges and top from browning too quickly at the 20-30 minute mark
- COOL PIE: Remove pie from oven when done and allow to cool completely on cooling rack for 3-6 hours before slicing and enjoying
Storage, Make Ahead & Freezing Homemade Apple Pie
- STORAGE: Leftover pie can be wrapped tight with plastic wrap and aluminum foil stored in the fridge for up to 5 days.
- MAKE AHEAD: The Pie Dough - can be made in advance and stored wrapped in plastic wrap in the fridge for up to 3 days. It can also be wrapped and frozen for up to one to three months. Thaw in the fridge overnight and then roll out as directed. The Entire Pie can be made and baked the day before which will allow plenty of room for filling to cool and set making this a great make ahead pie recipe.
- FREEZING: Baked pie freezes well for up to 3 months. Thaw overnight in the refrigerator and allow to come to room temperature before serving. Here is how to do It - Bake and cool pie as directed. Place your pie into the freezer to allow it to initially freeze, for 1-2 hours or preferably overnight. Then, wrap your frozen pie in a layer of plastic wrap, followed by a layer of aluminum foil. Place the wrapped pie into a freezer-safe storage bag, squeezing out any excess air. Thaw it by moving it to the fridge overnight (or up to 24 hours). Remove wrappings and serve chilled or reheated or let come to room temperature before serving.
So what are you waiting for? Put that abundant Fall apple harvest to use with this tasty classic. This delicious, easy to make from scratch apple pie recipe has a flaky butter crust and tender apple filling that’s bursting with flavor and perfectly sweet. It’s also a fantastic recipe to make the day before so that you have dessert ready the next day. Happy baking!
More Pie Recipes You Will Love
Recipe
Ingredients
For the All Butter Crust (DOUBLE PIE CRUST)
- 2 ½ cups all-purpose flour
- 2 tablespoons granulated sugar
- 1 ½ teaspoons salt
- 1 cup unsalted butter, cubed, and chilled (2 sticks)
- ¾ cups very cold water, divided
For Egg Wash (optional)
- 1 egg
- 1 tablespoon cream for egg wash
- Turbinado or coarse sugar for sprinkling over pie
For Crust Dust
- 1 tablespoon all purpose flour for base of pie crust
- 1 tablespoon of brown sugar or granulated sugar for base of pie crust
For the Filling
- 4 ½ pounds baking apples of choice peeled cored and sliced thin (approx ¼ inch thick)
- ½ cup light or dark brown sugar
- ¼ cup granulated sugar
- ¼ teaspoon fine sea or table salt
- 2 teaspoons ground cinnamon
- ¼ teaspoon ground or freshly grated nutmeg, to taste
- ¼ teaspoon ground ginger
- ⅛ teaspoon ground cloves
- 3 tablespoons tapioca flour or corn starch
Directions
For the Homemade Pie Crust
- In a food processor, pulse together the flour, sugar and salt.
- Add butter and pulse until butter is evenly distributed and resemble the size of small peas.
- Add half of the water and pulse. The mixture will be shaggy at this point. From here, add 1 tablespoon of water at a time until the dough comes together.
- Flour your counter and empty the dough onto it. Knead a few times just until it comes together. Divide dough in half forming two discs. Wrap the discs in plastic wrap and transfer to the refrigerator to chill for at least 1 hour, ideally overnight.
For the Filling
- Combine sugars, salt, and spices in a very large bowl. (DO NOT add the starch)
- Add apple slices to bowl. Toss to coat the slices as much as possible. Set aside for 1 to 4 hours at room temperature.
Assembling the Apple Pie
- Remove the first disc of dough from the refrigerator and allow to come to room temperature (5min). Dust your work surface and rolling pin with a little flour. Begin to roll the dough, being sure to rotate it every so often to avoid sticking, to a 13-inch round. Wrap the dough around the rolling pin and unroll it over the pie dish/pie pan for the bottom crust
- Gently fit the dough into the bottom and up the sides of the pie tin without pulling or stretching it. Trim the dough around the pie tin, leaving about a ½-inch overhang.
- Sprinkle the base of the dough with remaining flour and brown sugar / crust dust. Transfer the pie shell to the refrigerator while you roll out the second disc.
- Stir tapioca or cornstarch into apple pie filling.
- Remove crust from fridge and pour filling into it use your hands to pack the softened apples. Pour any juices that have accumulated carefully over apples.
- Roll out your second pie dough disc into 13 inch round and cut 2-3 inch strips strips if making a lattice crust Or place over the filling if leaving whole. Trim the top crust or lattice strips to the edge of the pie dish. Fold the overhang from the lower crust over or under to form a thick rim, and crimp it together with your fingers or a fork to seal it.
- Whisk the eggs and cream together and brush top crust and edges with it, then sprinkle with sugar if desired. If your top crust is in one piece, cut a few vents in it with a sharp knife.
- Transfer to the freezer for 10-15 minutes or the fridge for 30 minutes to chill. Meanwhile, preheat the oven to 400°F. (make sure your baking dish is tempered if your’e putting into the freezer then straight into oven otherwise stick to chilling in the fridge to prevent the dish from shattering)
- Transfer the pie to a baking sheet (optional) and place in the oven and bake for 20 to 25 minutes, until the edges are just lightly brown. (use pie shield or tent with foil if browning too quickly)
- TURN HEAT DOWN to 350°F and bake for another 40 to 45 minutes, or until the edges and top are deep golden brown. Be sure to check on it occasionally if at any time the pie crust begins to turn too dark, use foil to cover those areas to stop browning. Internal temperature of pie should be: The pie is done when an internal thermometer inserted into the middle of the pie reads 195 ° Fahrenheit (90C)
- Once done allow to cool for at least two hours so it can firm up before slicing the pie. Serve as is or with scoop of vanilla ice cream or whip cream and drizzles of caramel sauce
- Cover leftovers tightly and store in the refrigerator for up to 5 days.
Recipe Notes
- Make Ahead: Make 1 day in advance – after it cools, cover tightly and keep at room temperature. The pie crust dough can also be prepared ahead of time and stored in the refrigerator for up to 5 days or in the freezer for up to 3 months.
- Freezing Instructions: Baked pie also freezes well for up to 3 months. Thaw overnight in the refrigerator and allow to come to room temperature before serving. Prepared fillings can also be frozen up to 3 months, thaw overnight in the refrigerator before using.
- When you are placing your crust into the pie plate make sure to do so without stretching it, just lift and press it into place. This will help prevent and shrinkage or irregularities.
- I like to use and recommend using a tempered glass baking dish for the pie as you can easily check the crust and see how it looks, especially helps you gauge when pie is done as ovens and cooking time will vary depending on oven and baking dish you use. Or use a metal pan. Ceramic dishes insulate heat more and crust may not be as crispy or flaky and may require more baking time. Tempered glass and thick borosilicate glass pie plates or metal are best for extreme temperature changes so the pie can go from the freezer to the oven without worrying about the pie plate shattering. When in doubt chill pie in fridge (for longer) instead of chilling in the freezer.
- I strongly recommend using an instant read thermometer to help know when the pie is done and that it will set without being runny. Internal temperature of pie should be: The pie is done when an internal thermometer inserted into the middle of the pie reads 195 ° Fahrenheit (90°C)
Adapted from Cozy Kitchen and Smitten Kitchen