Tsoureki (Greekstyle Sweet Brioche Bread) Sweet Mahlab Bread
 Greek
Greek
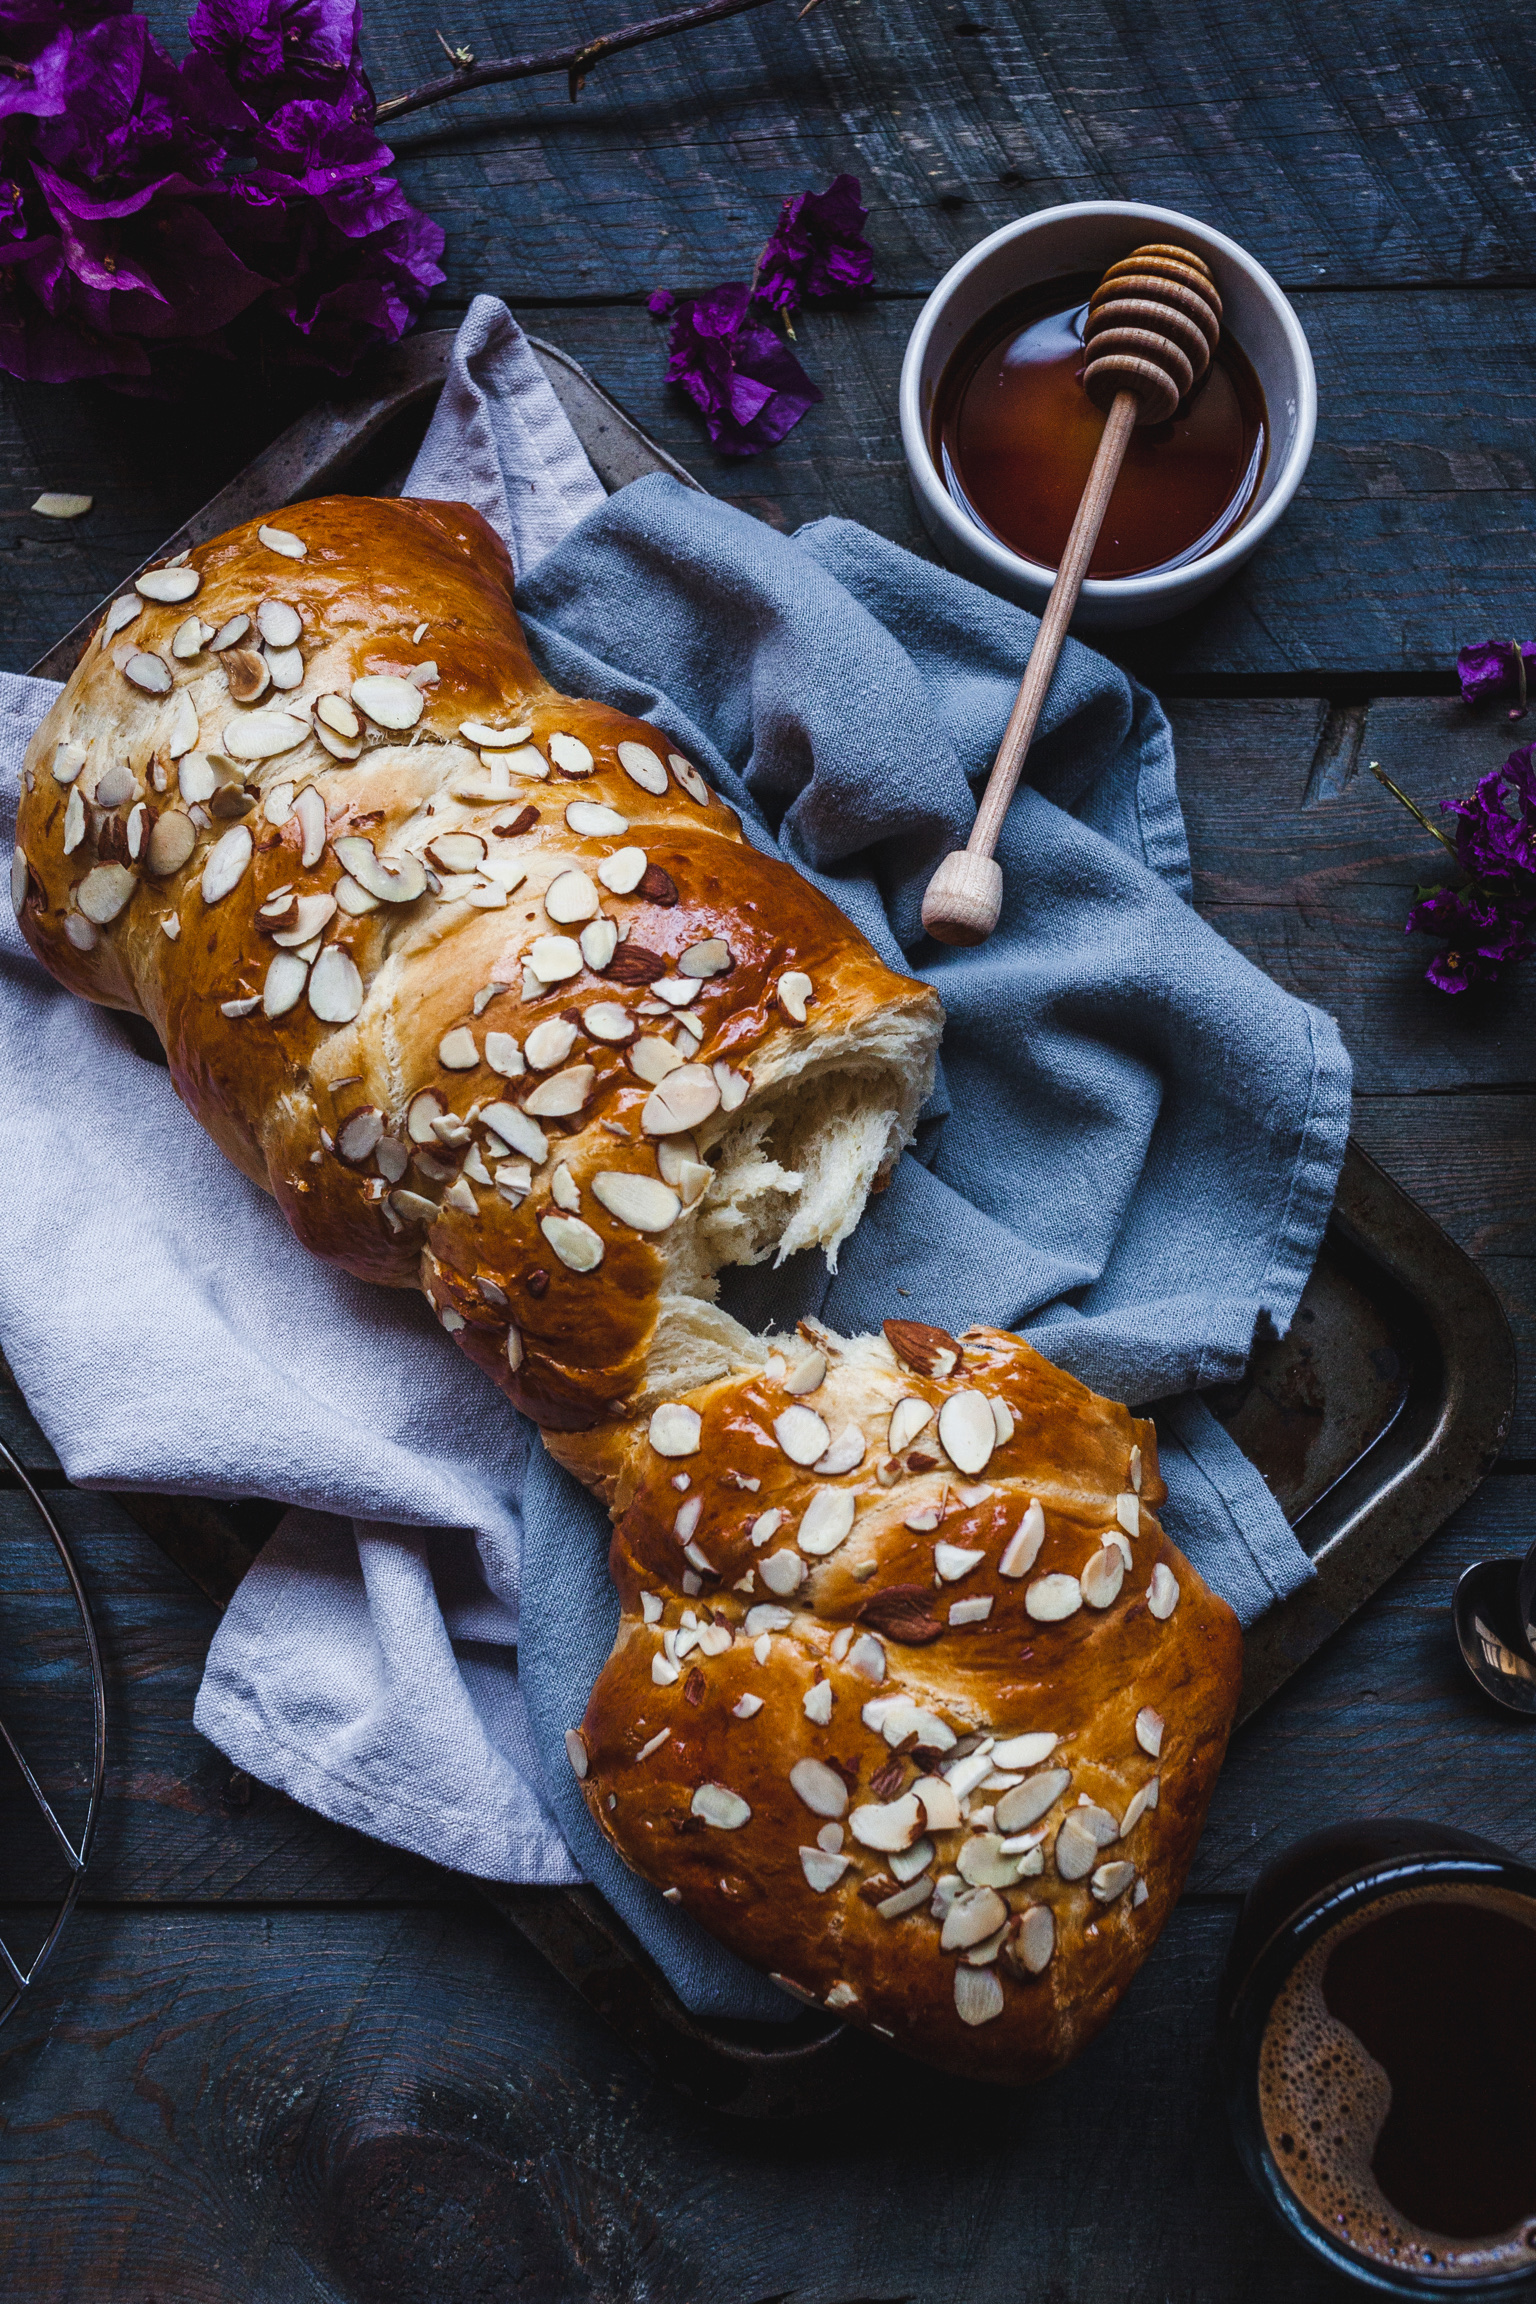
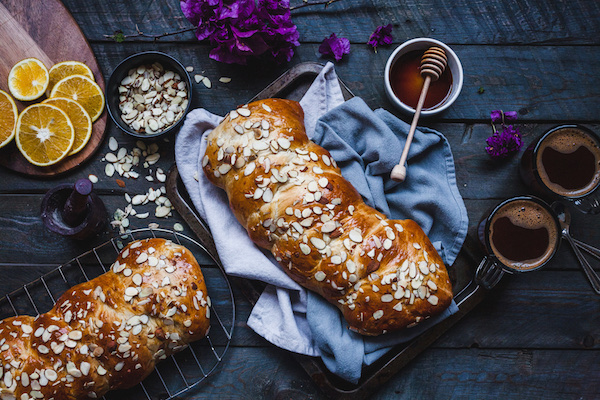
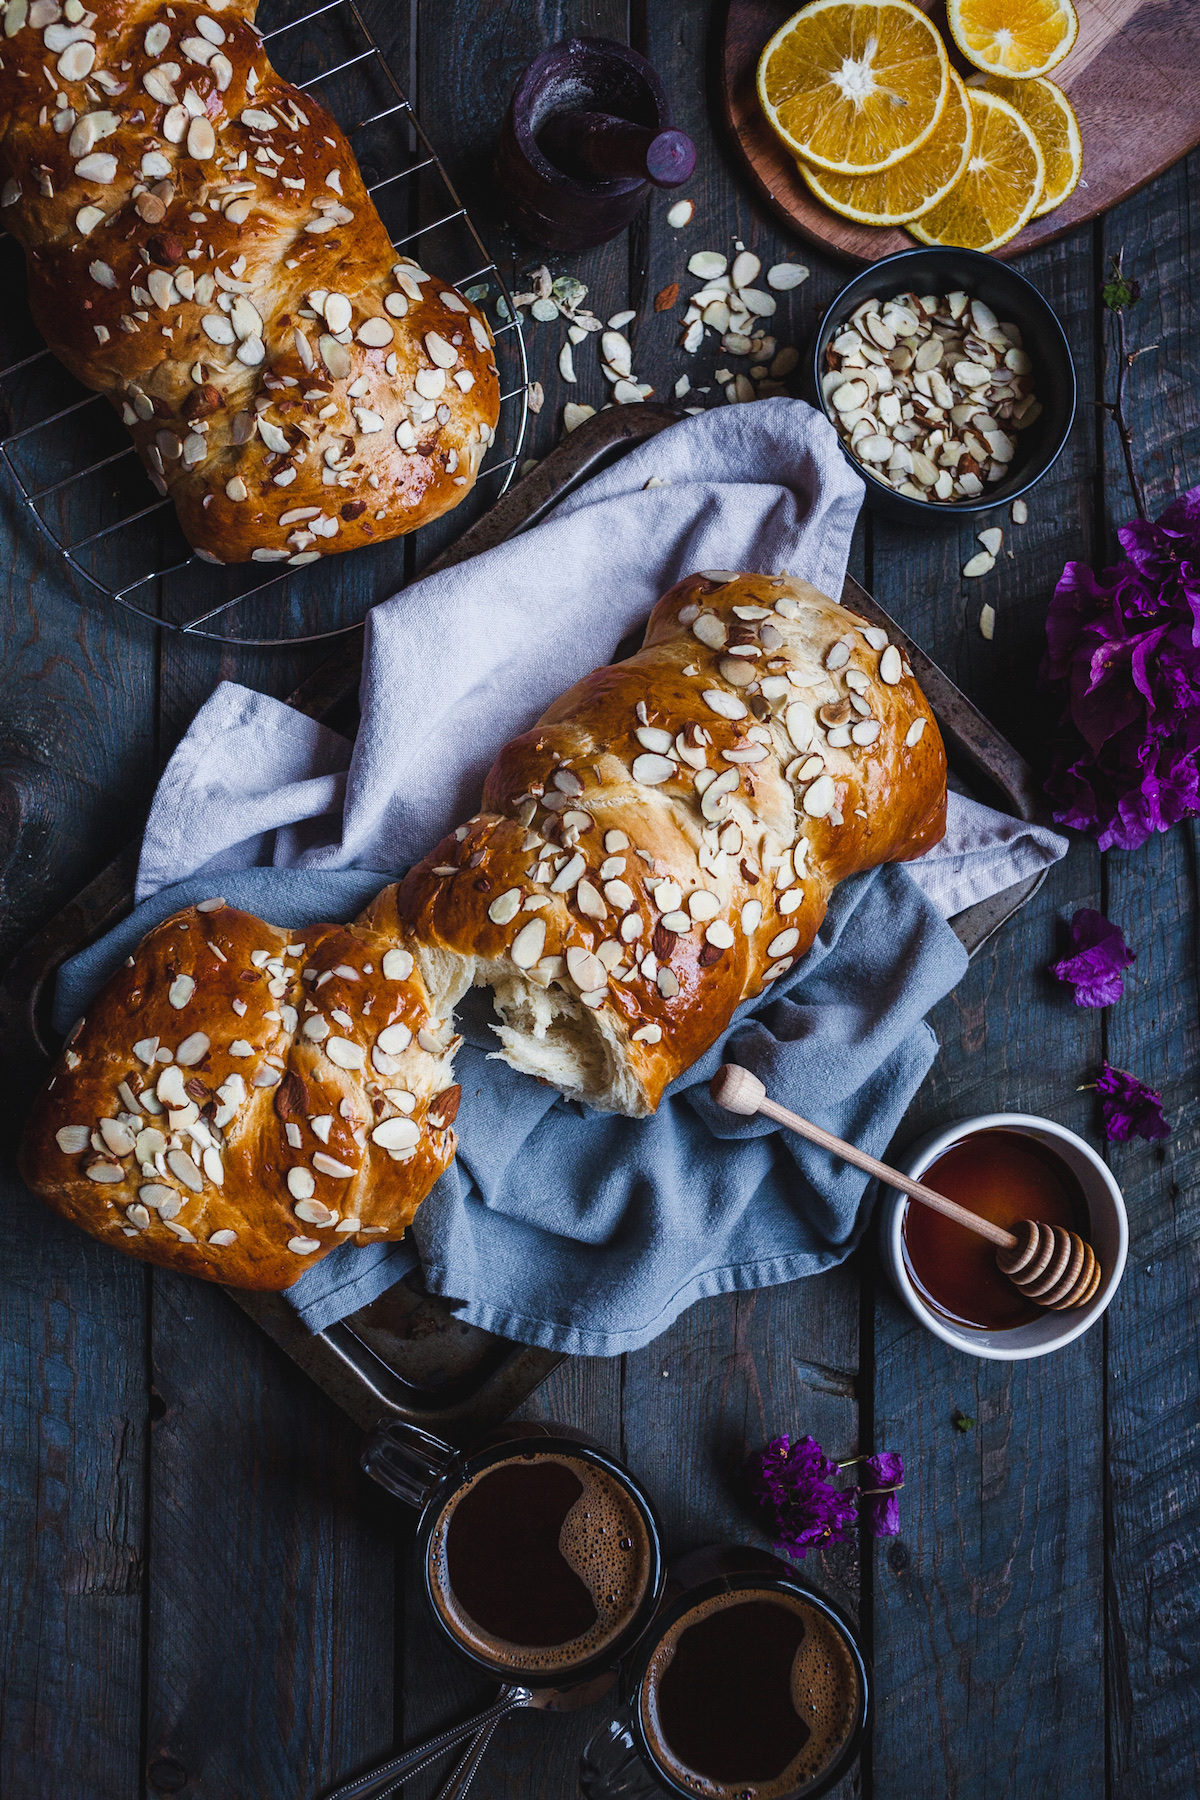
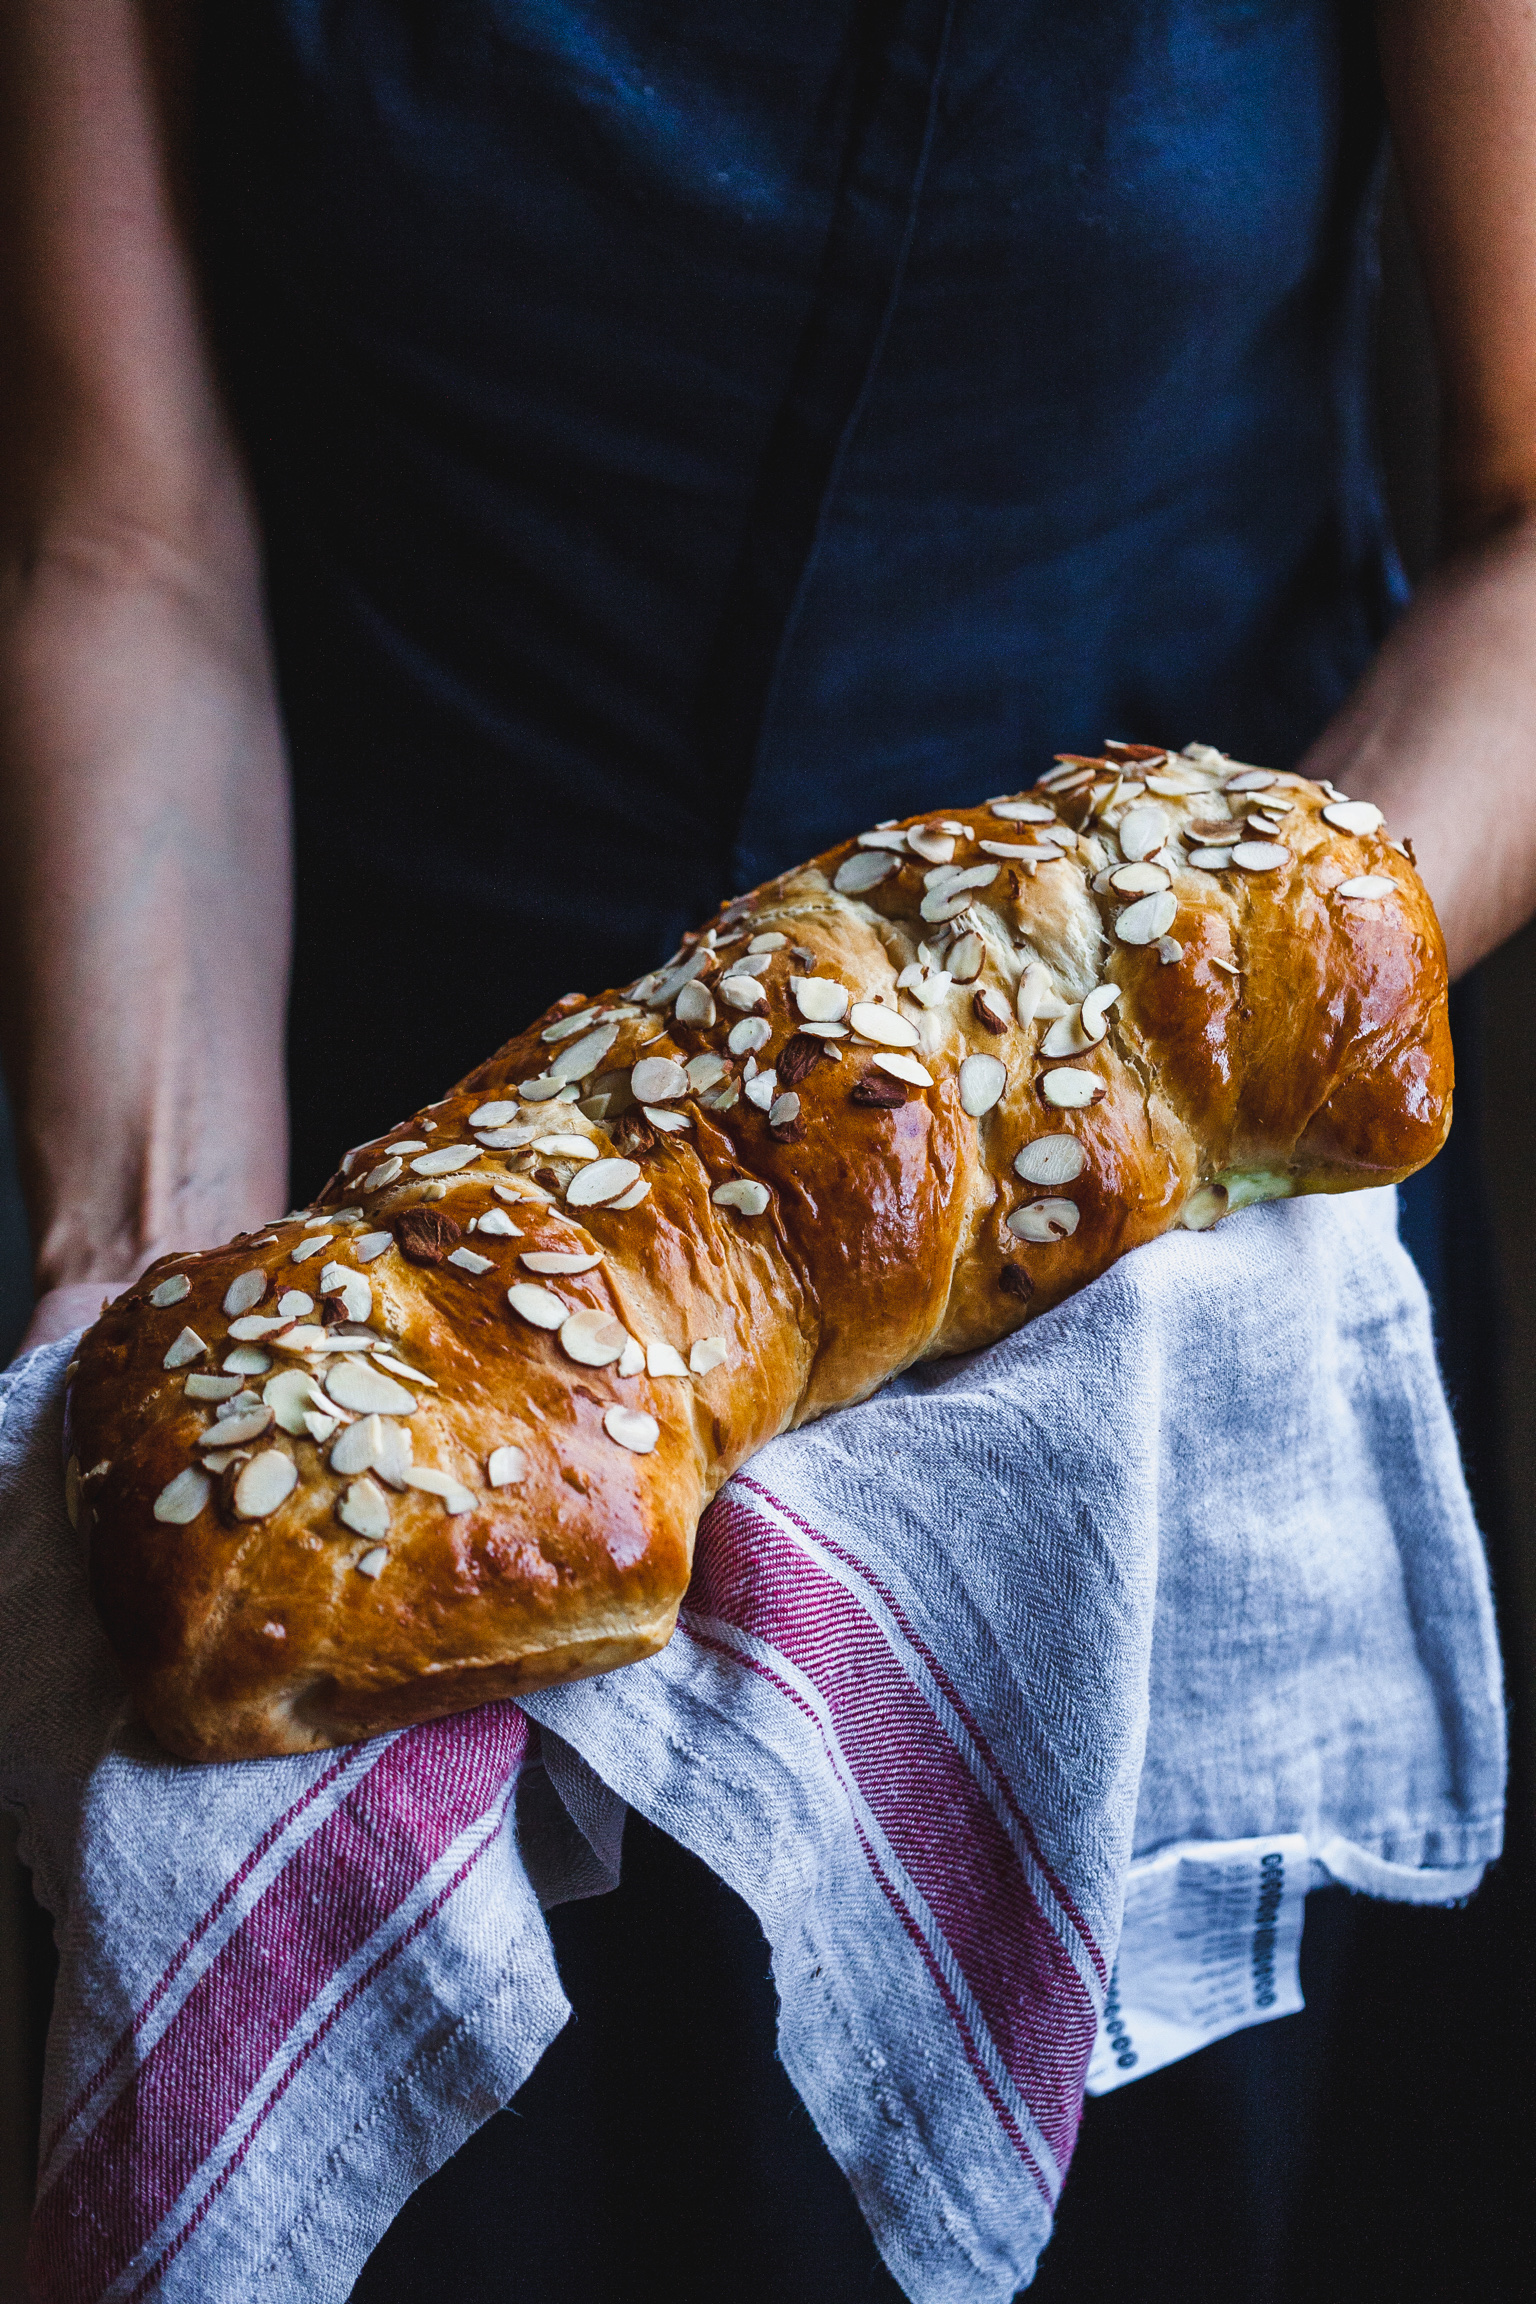
This Tsoureki (Greekstyle Sweet Brioche Bread) Sweet Mahlab Bread is irresistibly soft, gently sweet yeast bread similar to brioche or challah but with it’s own distinctive flavor. It’s wonderful enjoyed on it’s own when fresh (cant resist tearing into it while its still warm) and leftovers make fantastic French toast or even a nice Trifle. My family enjoys this bread all year round so I don’t have memories of this bread associated with any particular holiday. It’s fragrant and delicious and it’s brioche and definitely should not be limited to only annual indulgences.
What does tsoureki taste like?
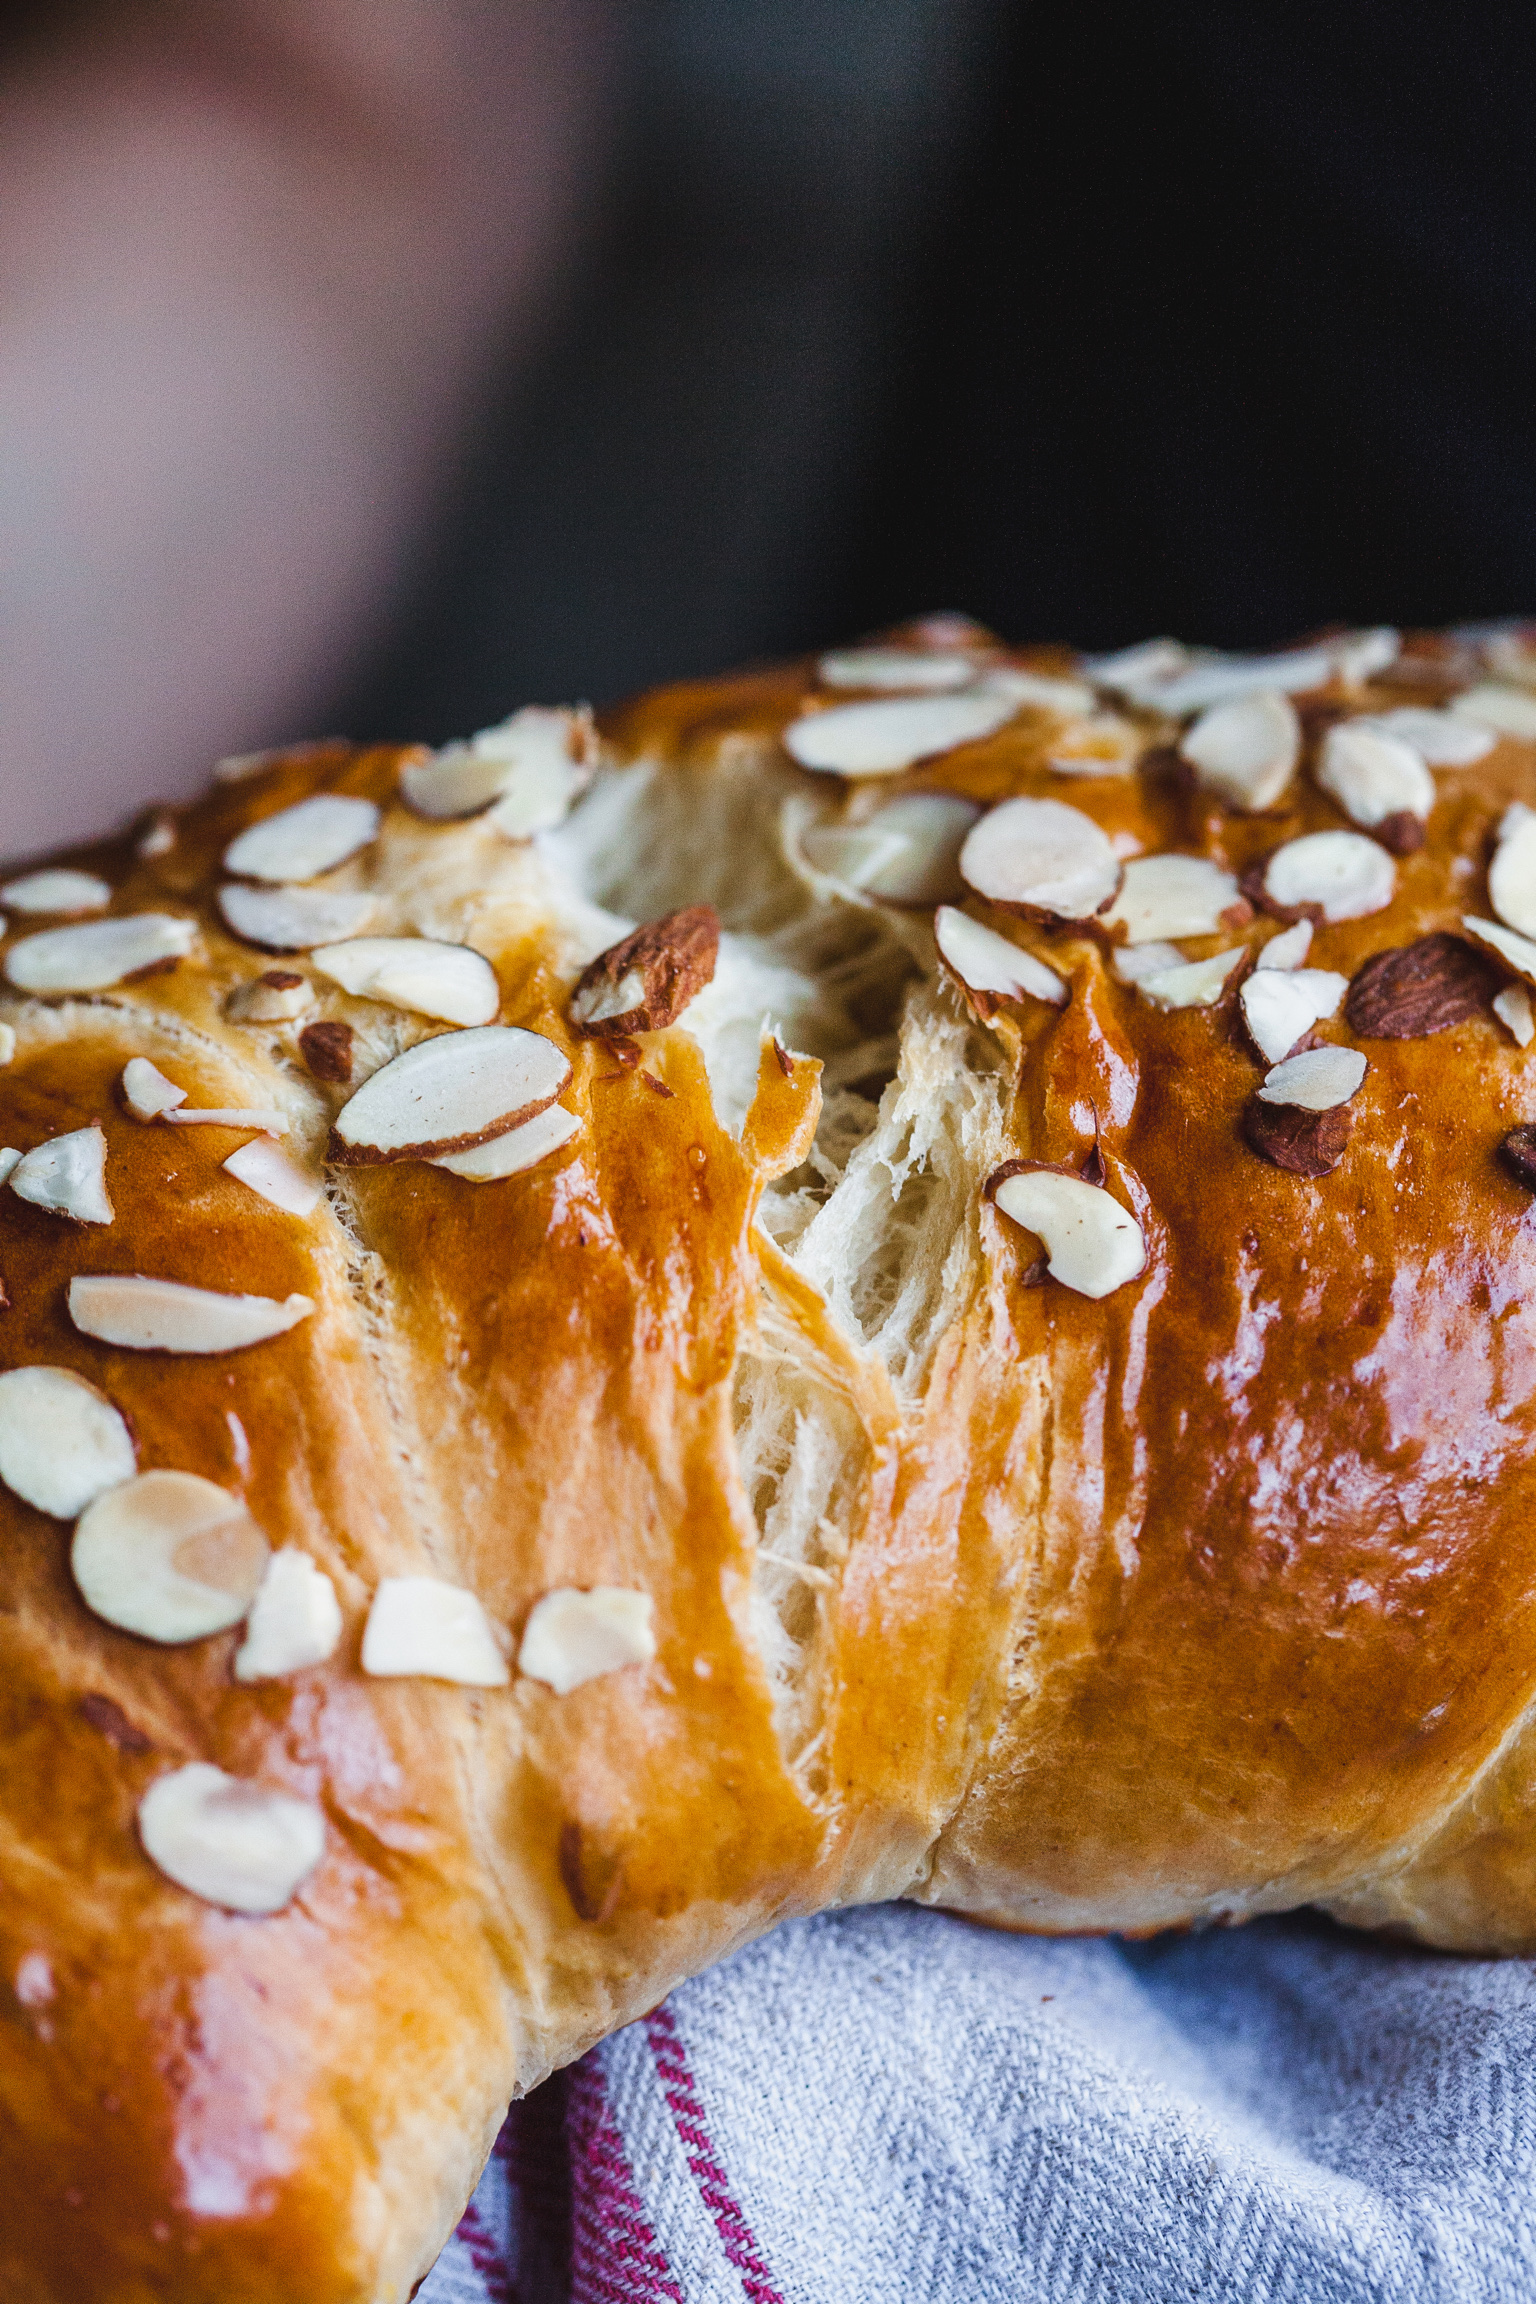
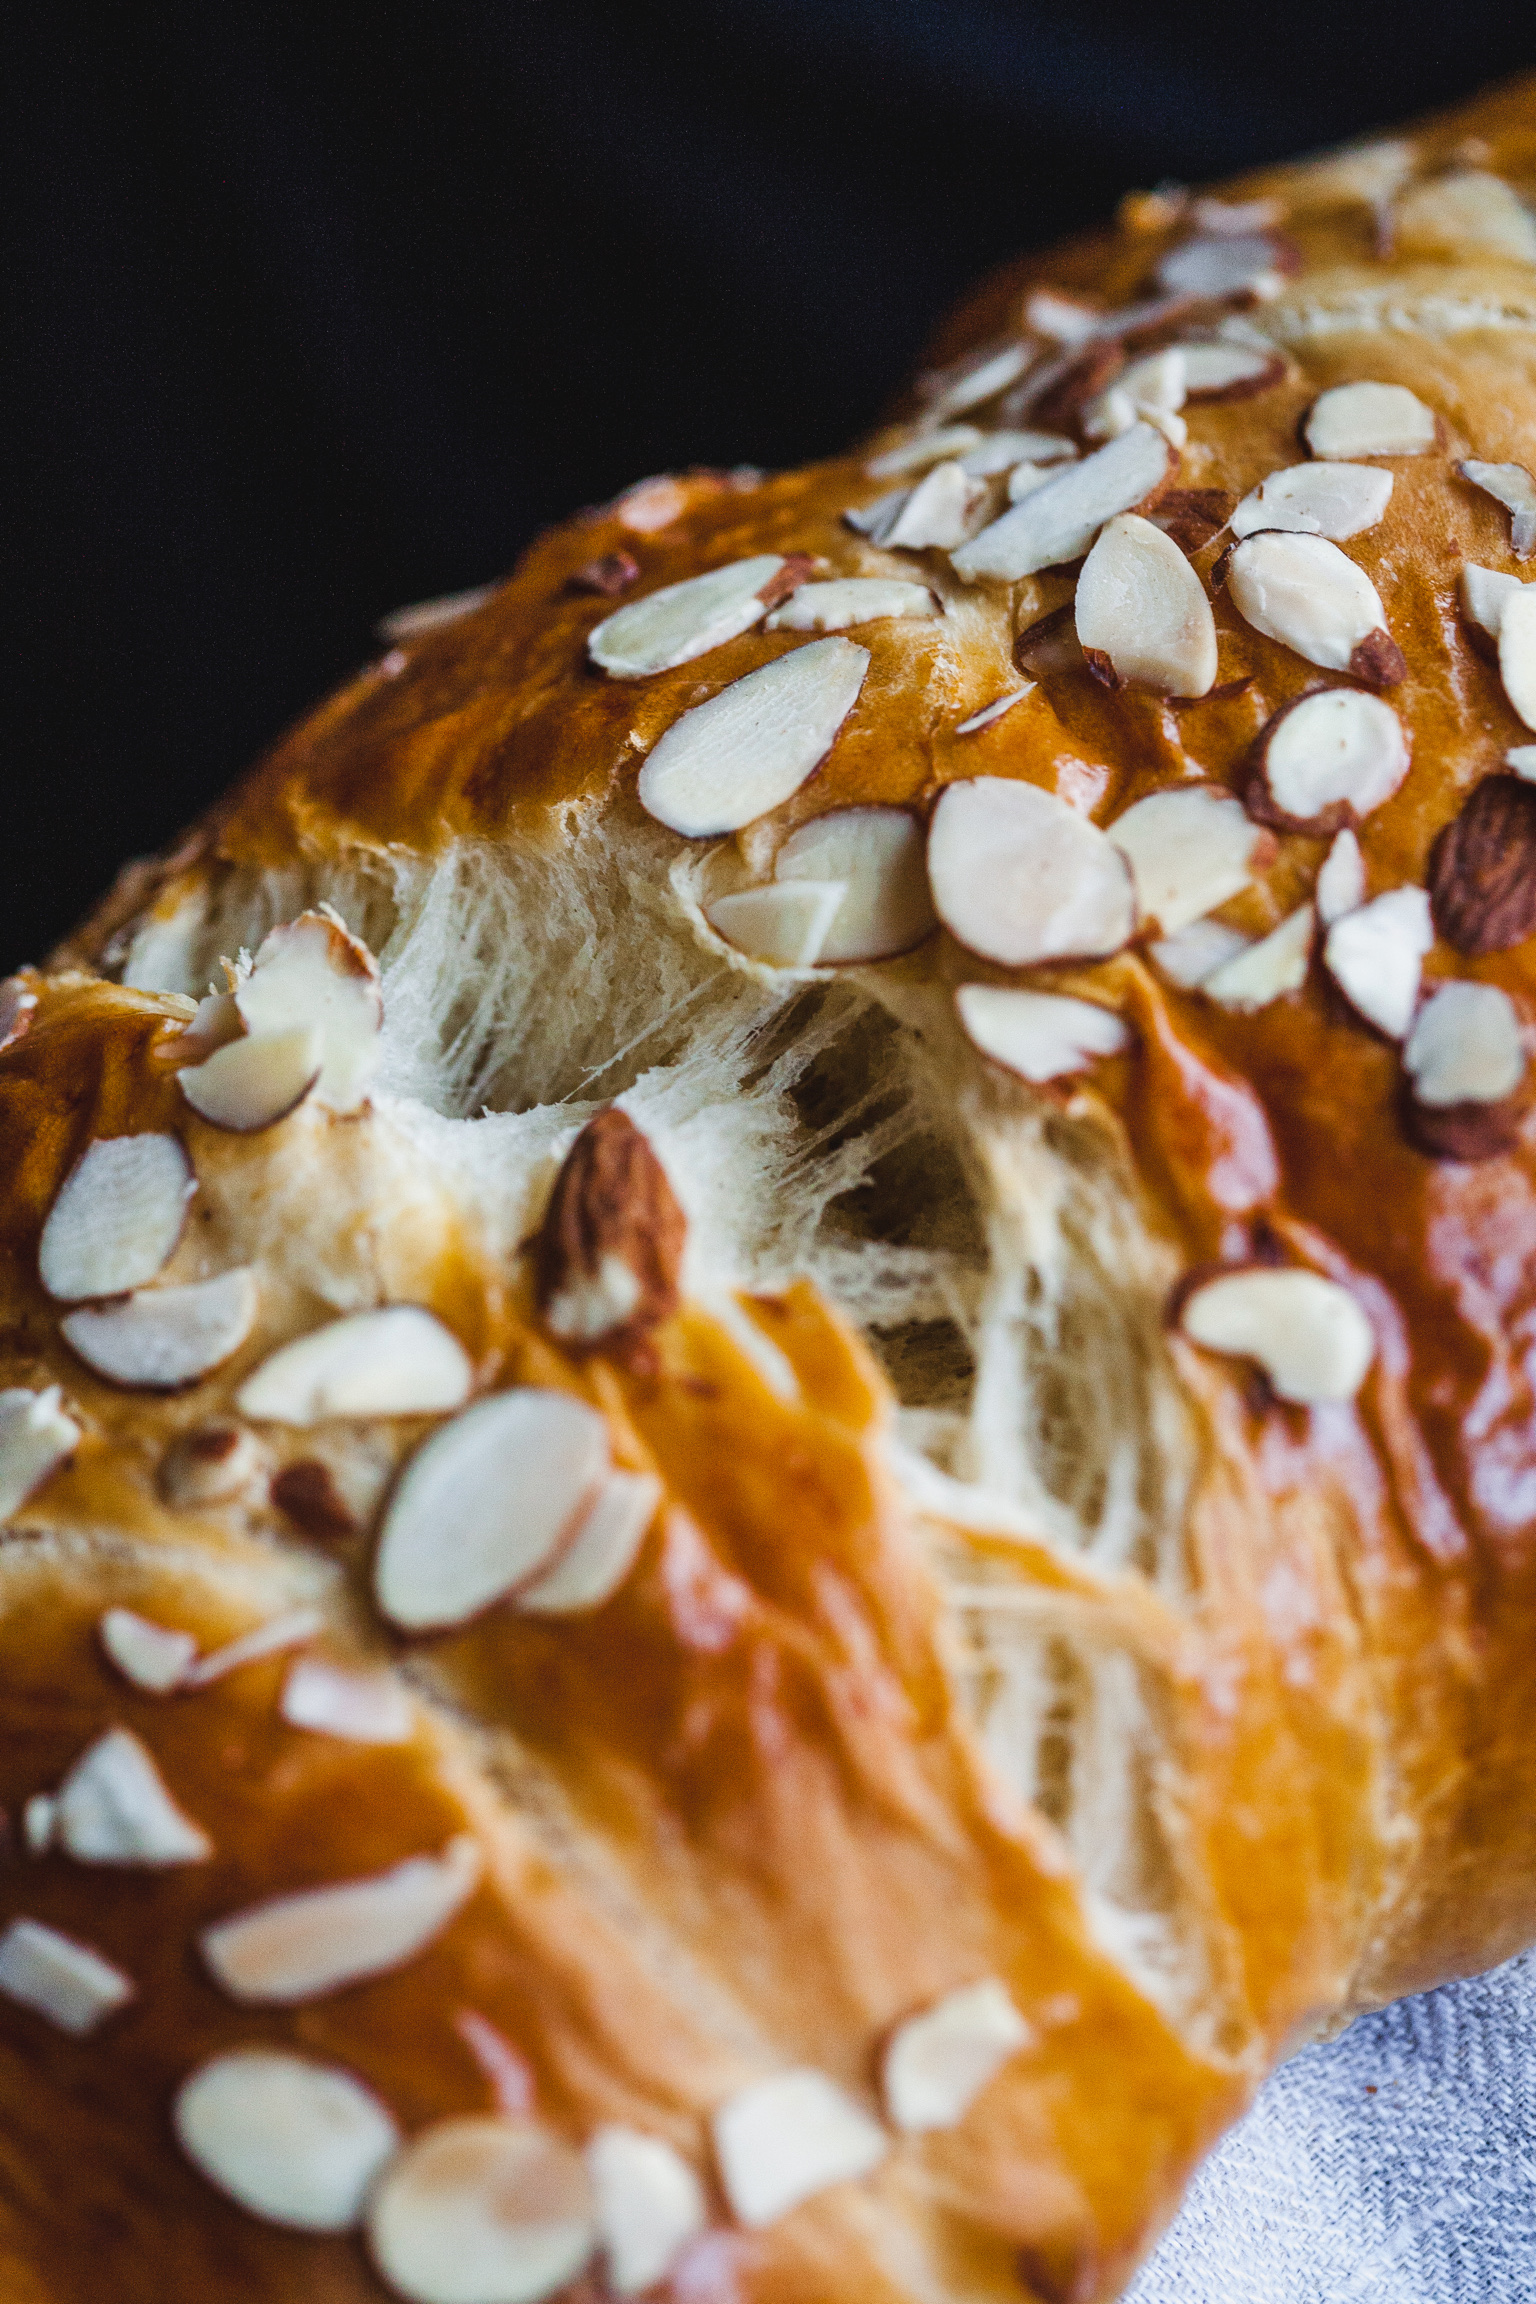
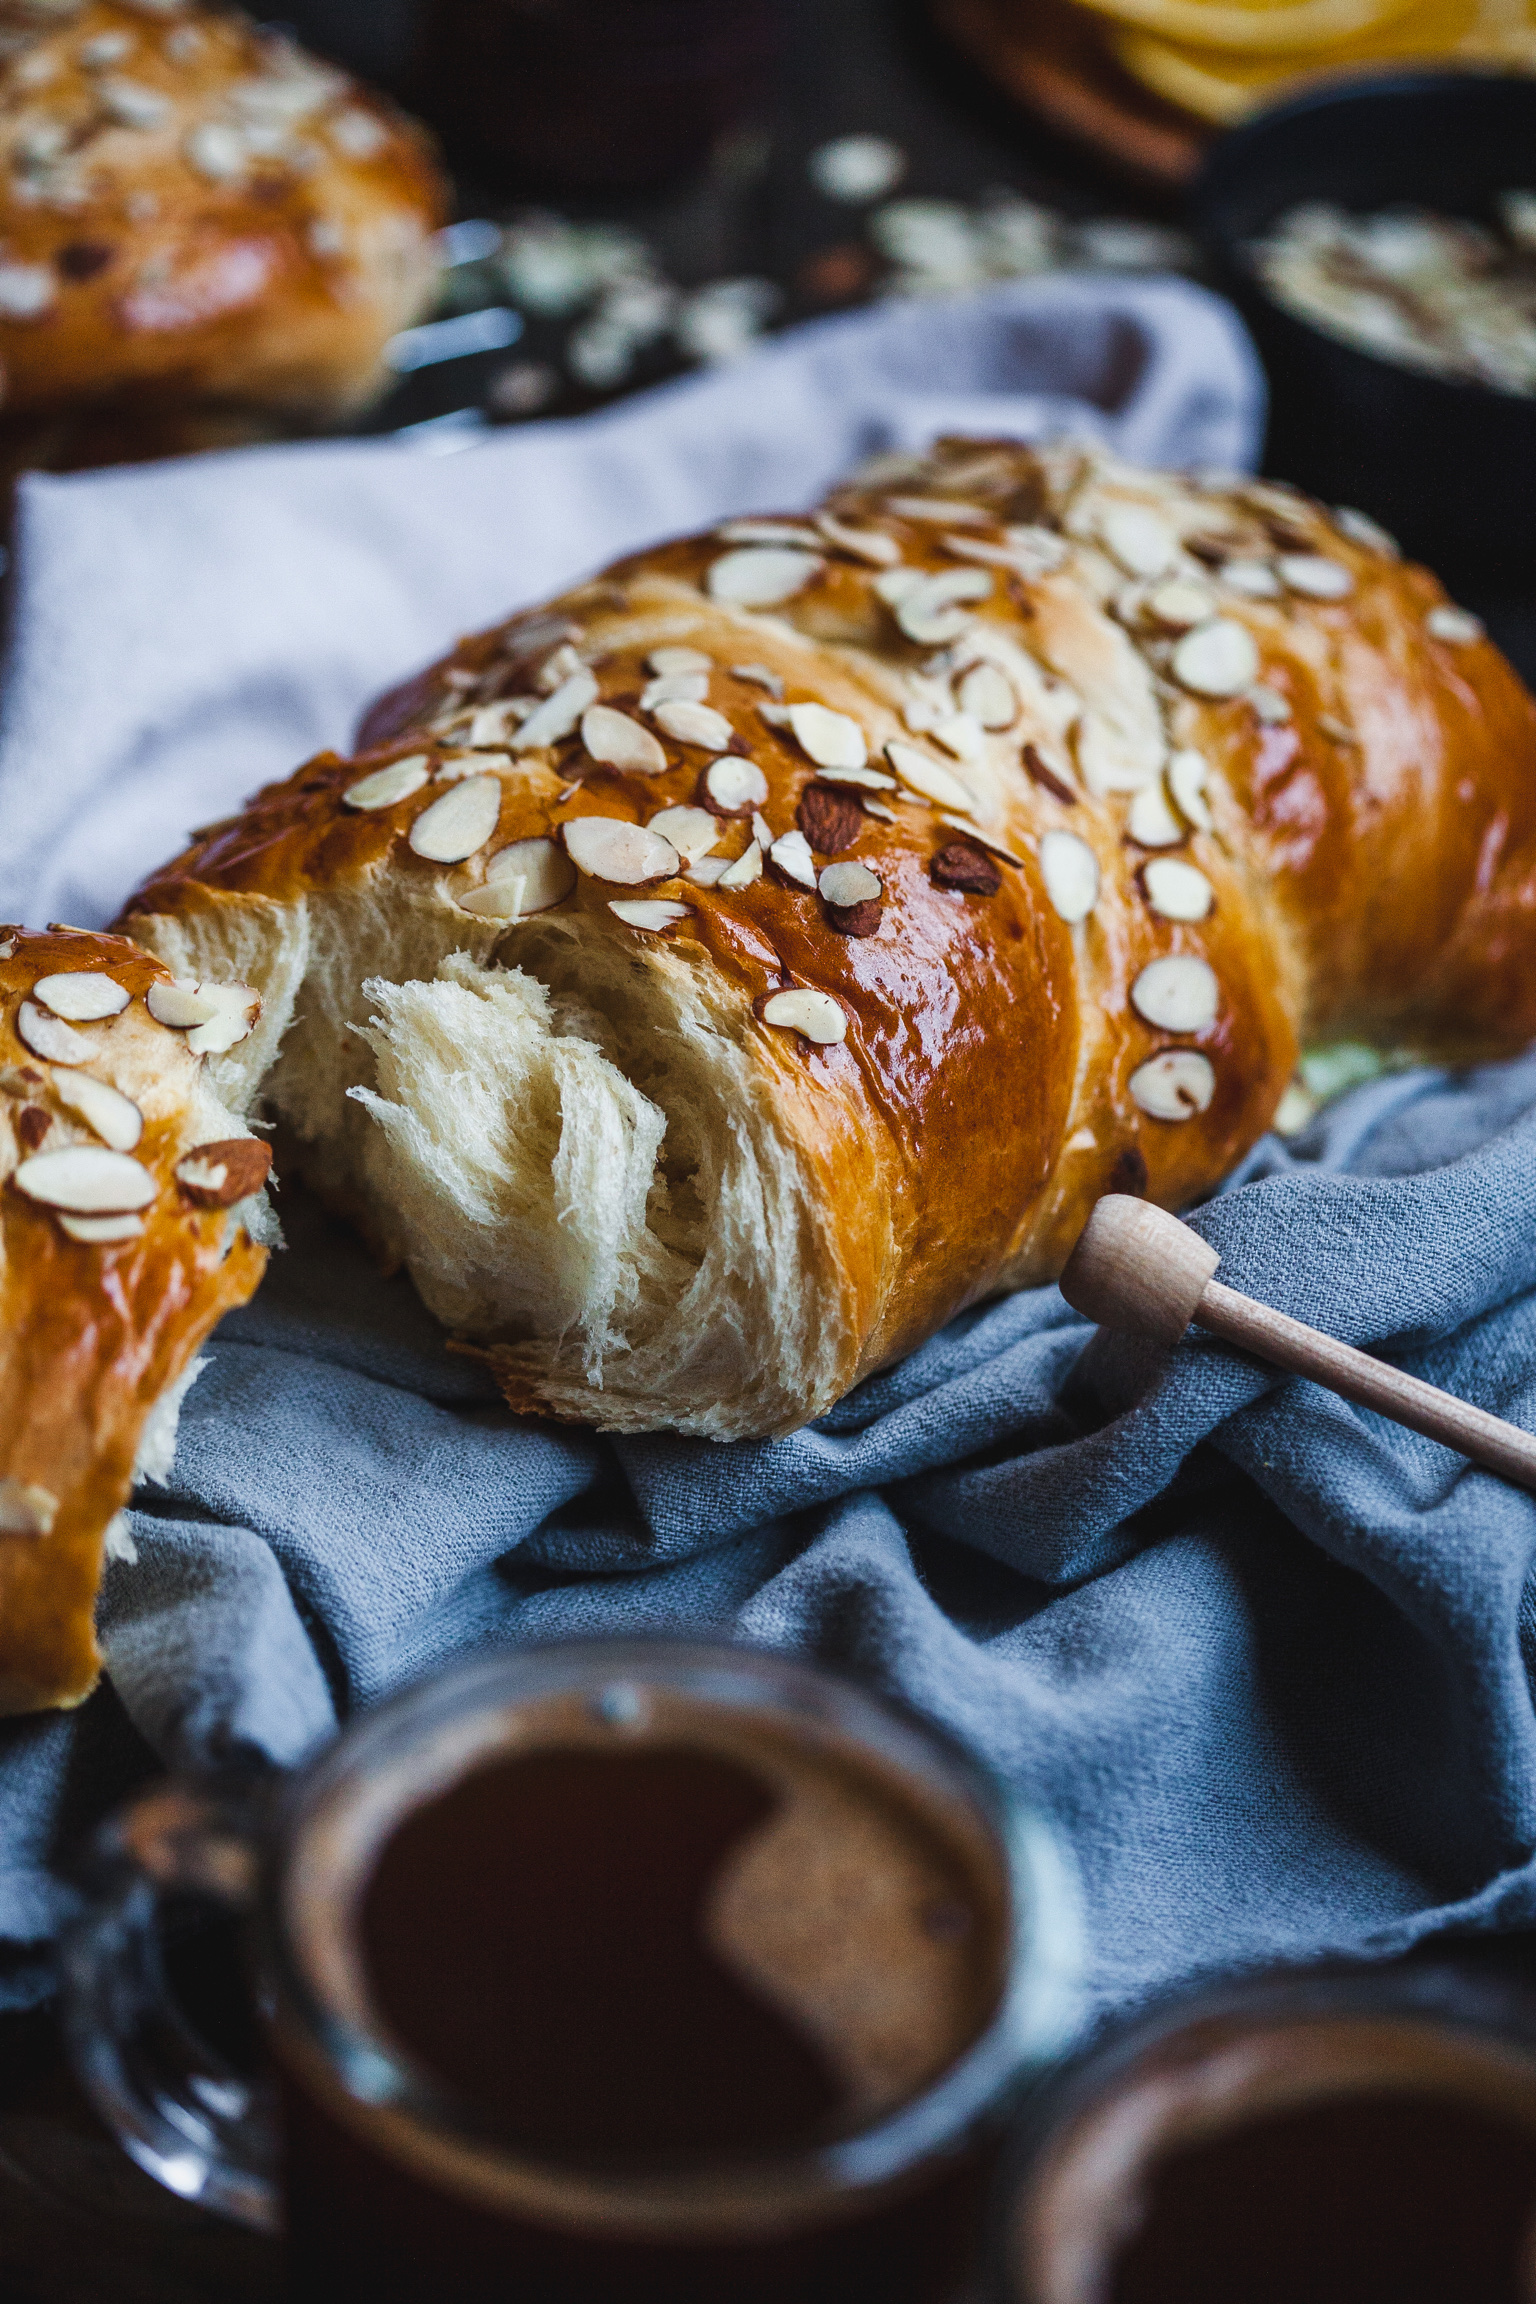
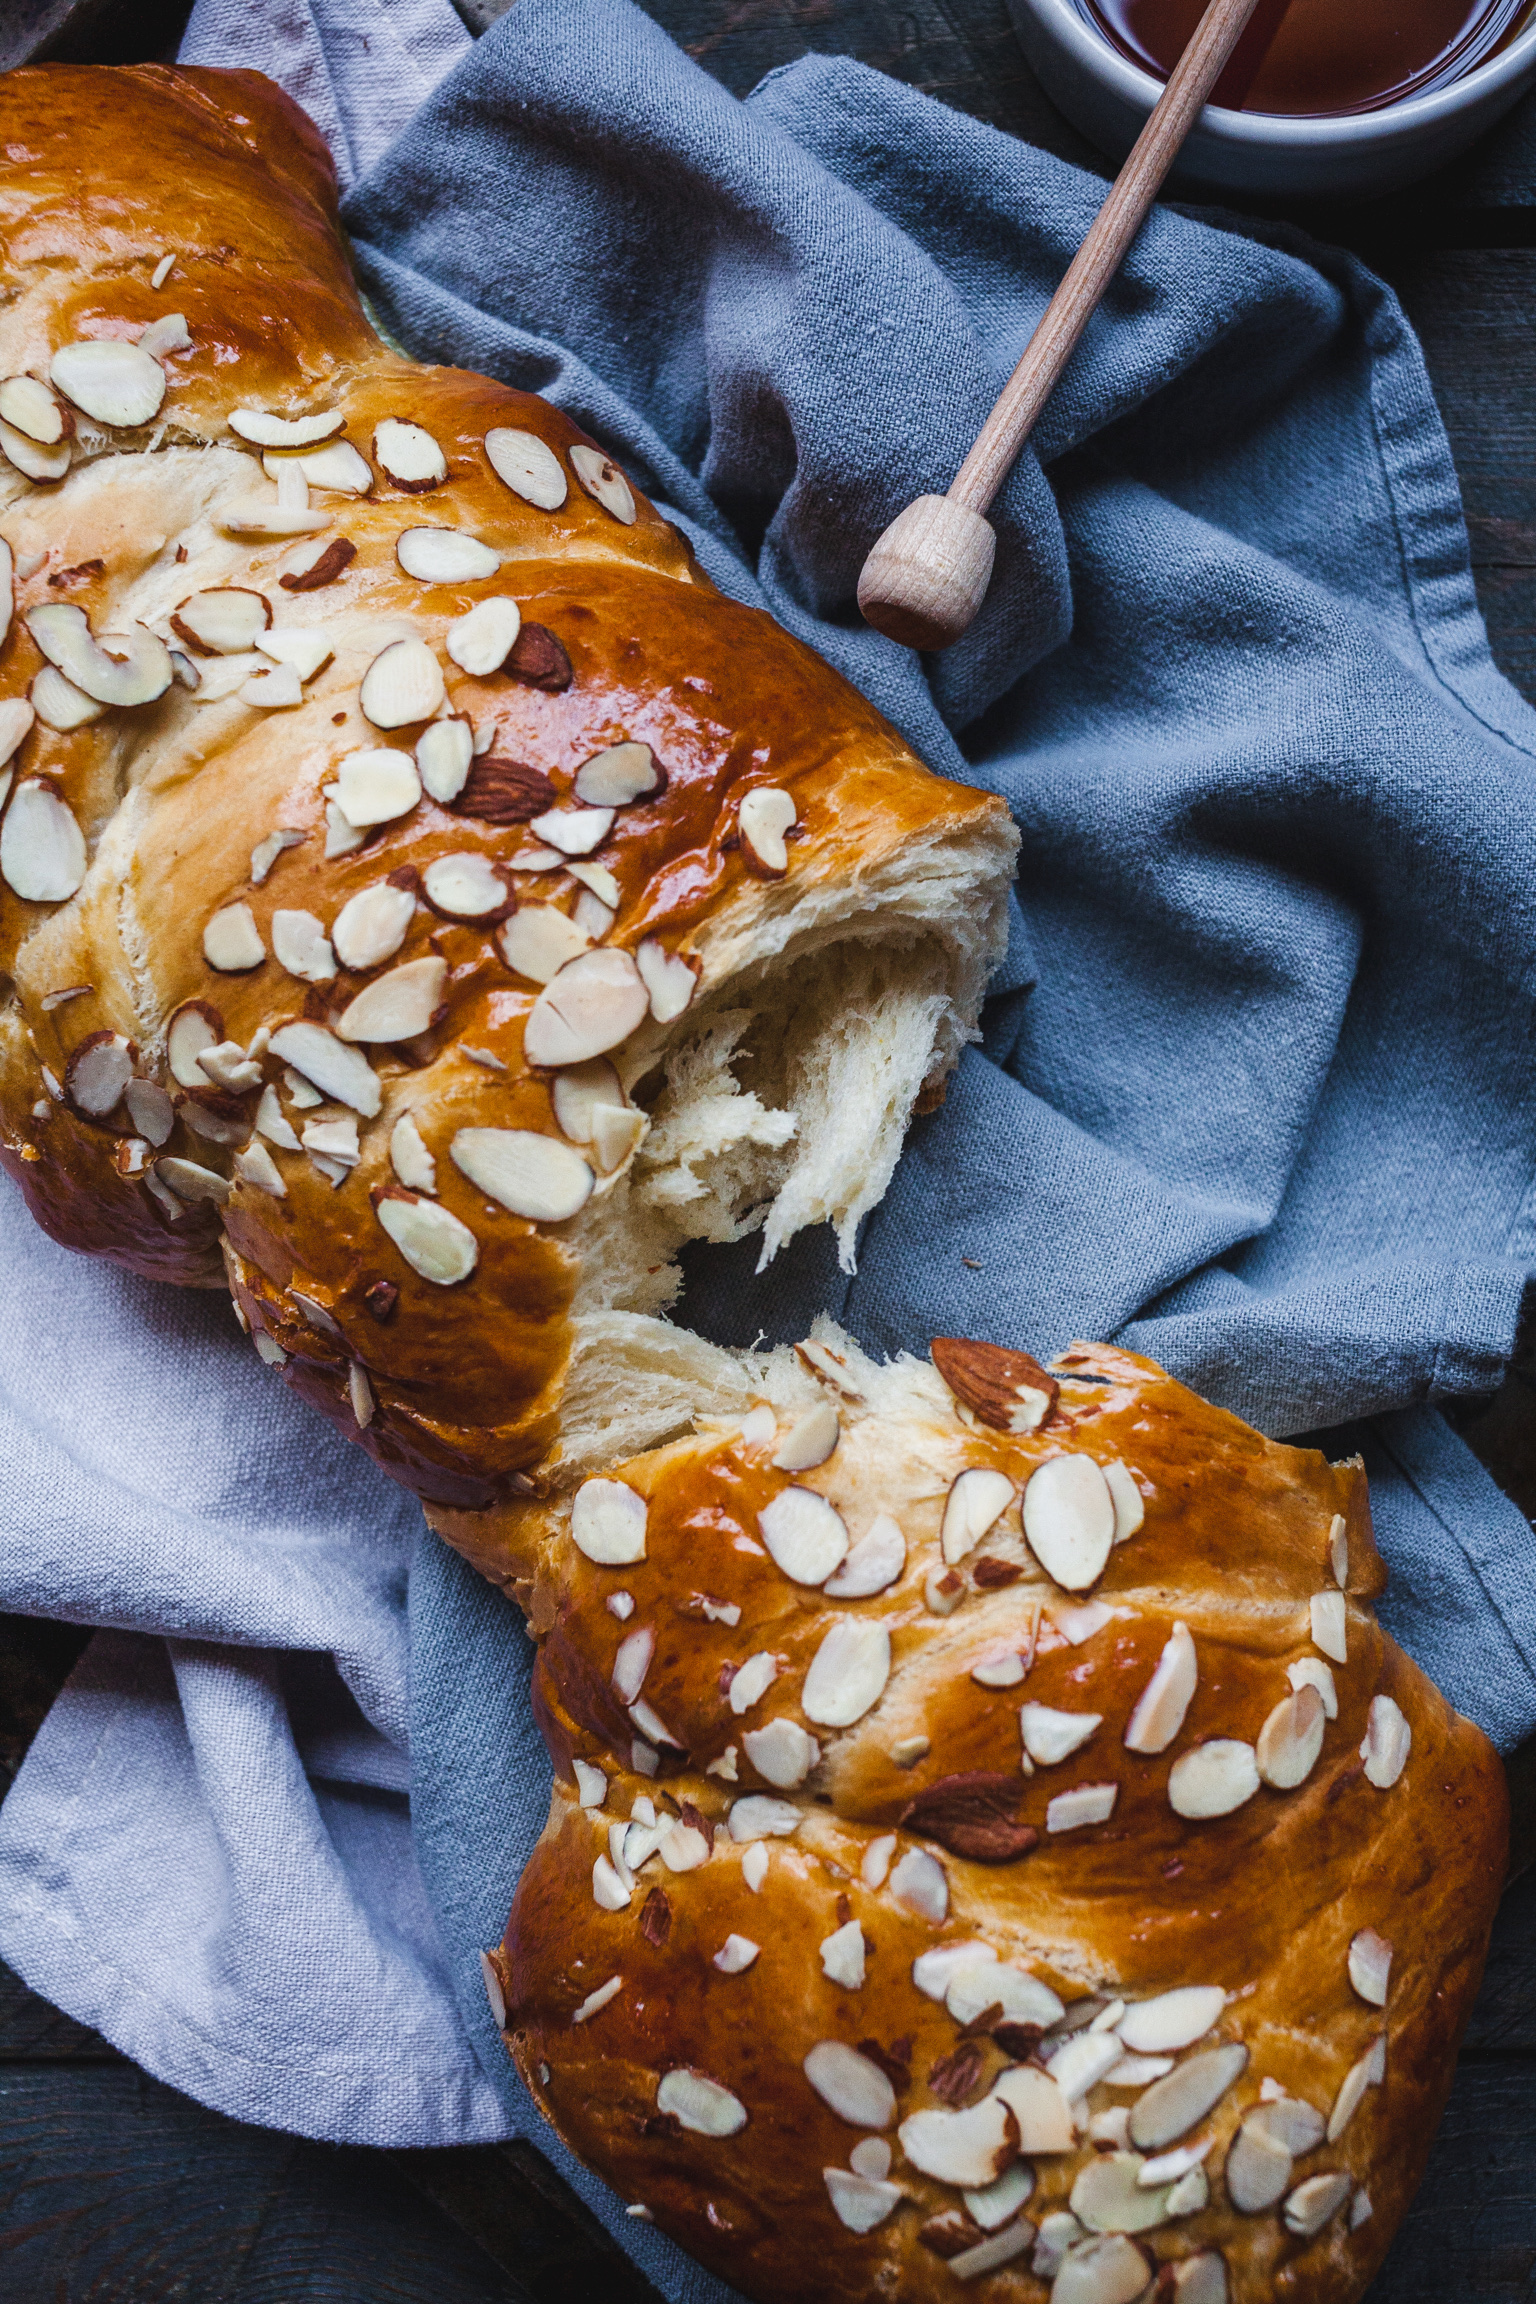
Tsoureki tastes gently sweetened, with a nice soft, fluffy texture especially fresh out of the oven. I cant resist tearing into a loaf out the oven. The ability to peel the tsoureki in layers is probably the best part and my favourite and a true testament to a perfect loaf and texture. It has delicious orange flavour undertones thanks to the orange zest in it along with some distinct warming spices - more on that below. It is irresistible and worth the effort to make it at home.
What is tsoureki bread?
Tsoureki (τσουρέκι in Greek) is pronounced T-Soo-reck-y. It is Greek-style egg and butter enriched sweet bread or brioche. It is quiet similar to Jewish challah bread or French brioche but what sets it apart is its flavour. Tsoureki is flavoured with mastic/mastica/mastiha and mahlab/mahlepi, orange zest and often times cardamom. Those flavours make this bread so fragrant and are classic to the Greek version of this style bread. There are many variations but those are the flavours I have always known to be included. Many make and eat Tsoureki during the holiday season but really and truly it should be made and enjoyed anytime of the year. Tsoureki is delicious eaten plain just as it is, sliced and enjoyed with your morning coffee or tea. Just like brioche though it can also be sliced and served with butter and jam and I love it toasted with nutella when it’s a couple of days old and not at its best anymore.
What is Mahlab/mahlepi/mahleb and Mastic?
Mahlepi is actually ground kernels or seeds of cherry stones and brings the most unique flavour to the bread - almost almond like. The mastic also brings a very unique flavour to the bread too. You only need a little and it goes a long way. Too much could add bitterness to the bread so be mindful. It is an aromatic gum or resin which exudes from the bark of a Mediterranean tree, used in making varnish and chewing gum and as a flavouring. Mastic tastes similar to licorice and is usually sold in small pouches. It looks like clear or white pieces of stone. I usually put mine in the fridge before I grind it in the food processor or in a mortar and pestle. They are not always easy to find but without them you will not get that classic Greek style tsoureki fragrance. (The brioche will still be delicious just not signature) Some replace it with ground anise seed but it truly stands on its own when it comes to flavour - not easily substituted. You can find them both at any Middle Eastern shops and Greek bakeries will usually sell it too or you can find it online as well.
How to make homemade tsoureki?
Follow these simple simple steps to get perfect tsoureki every time:
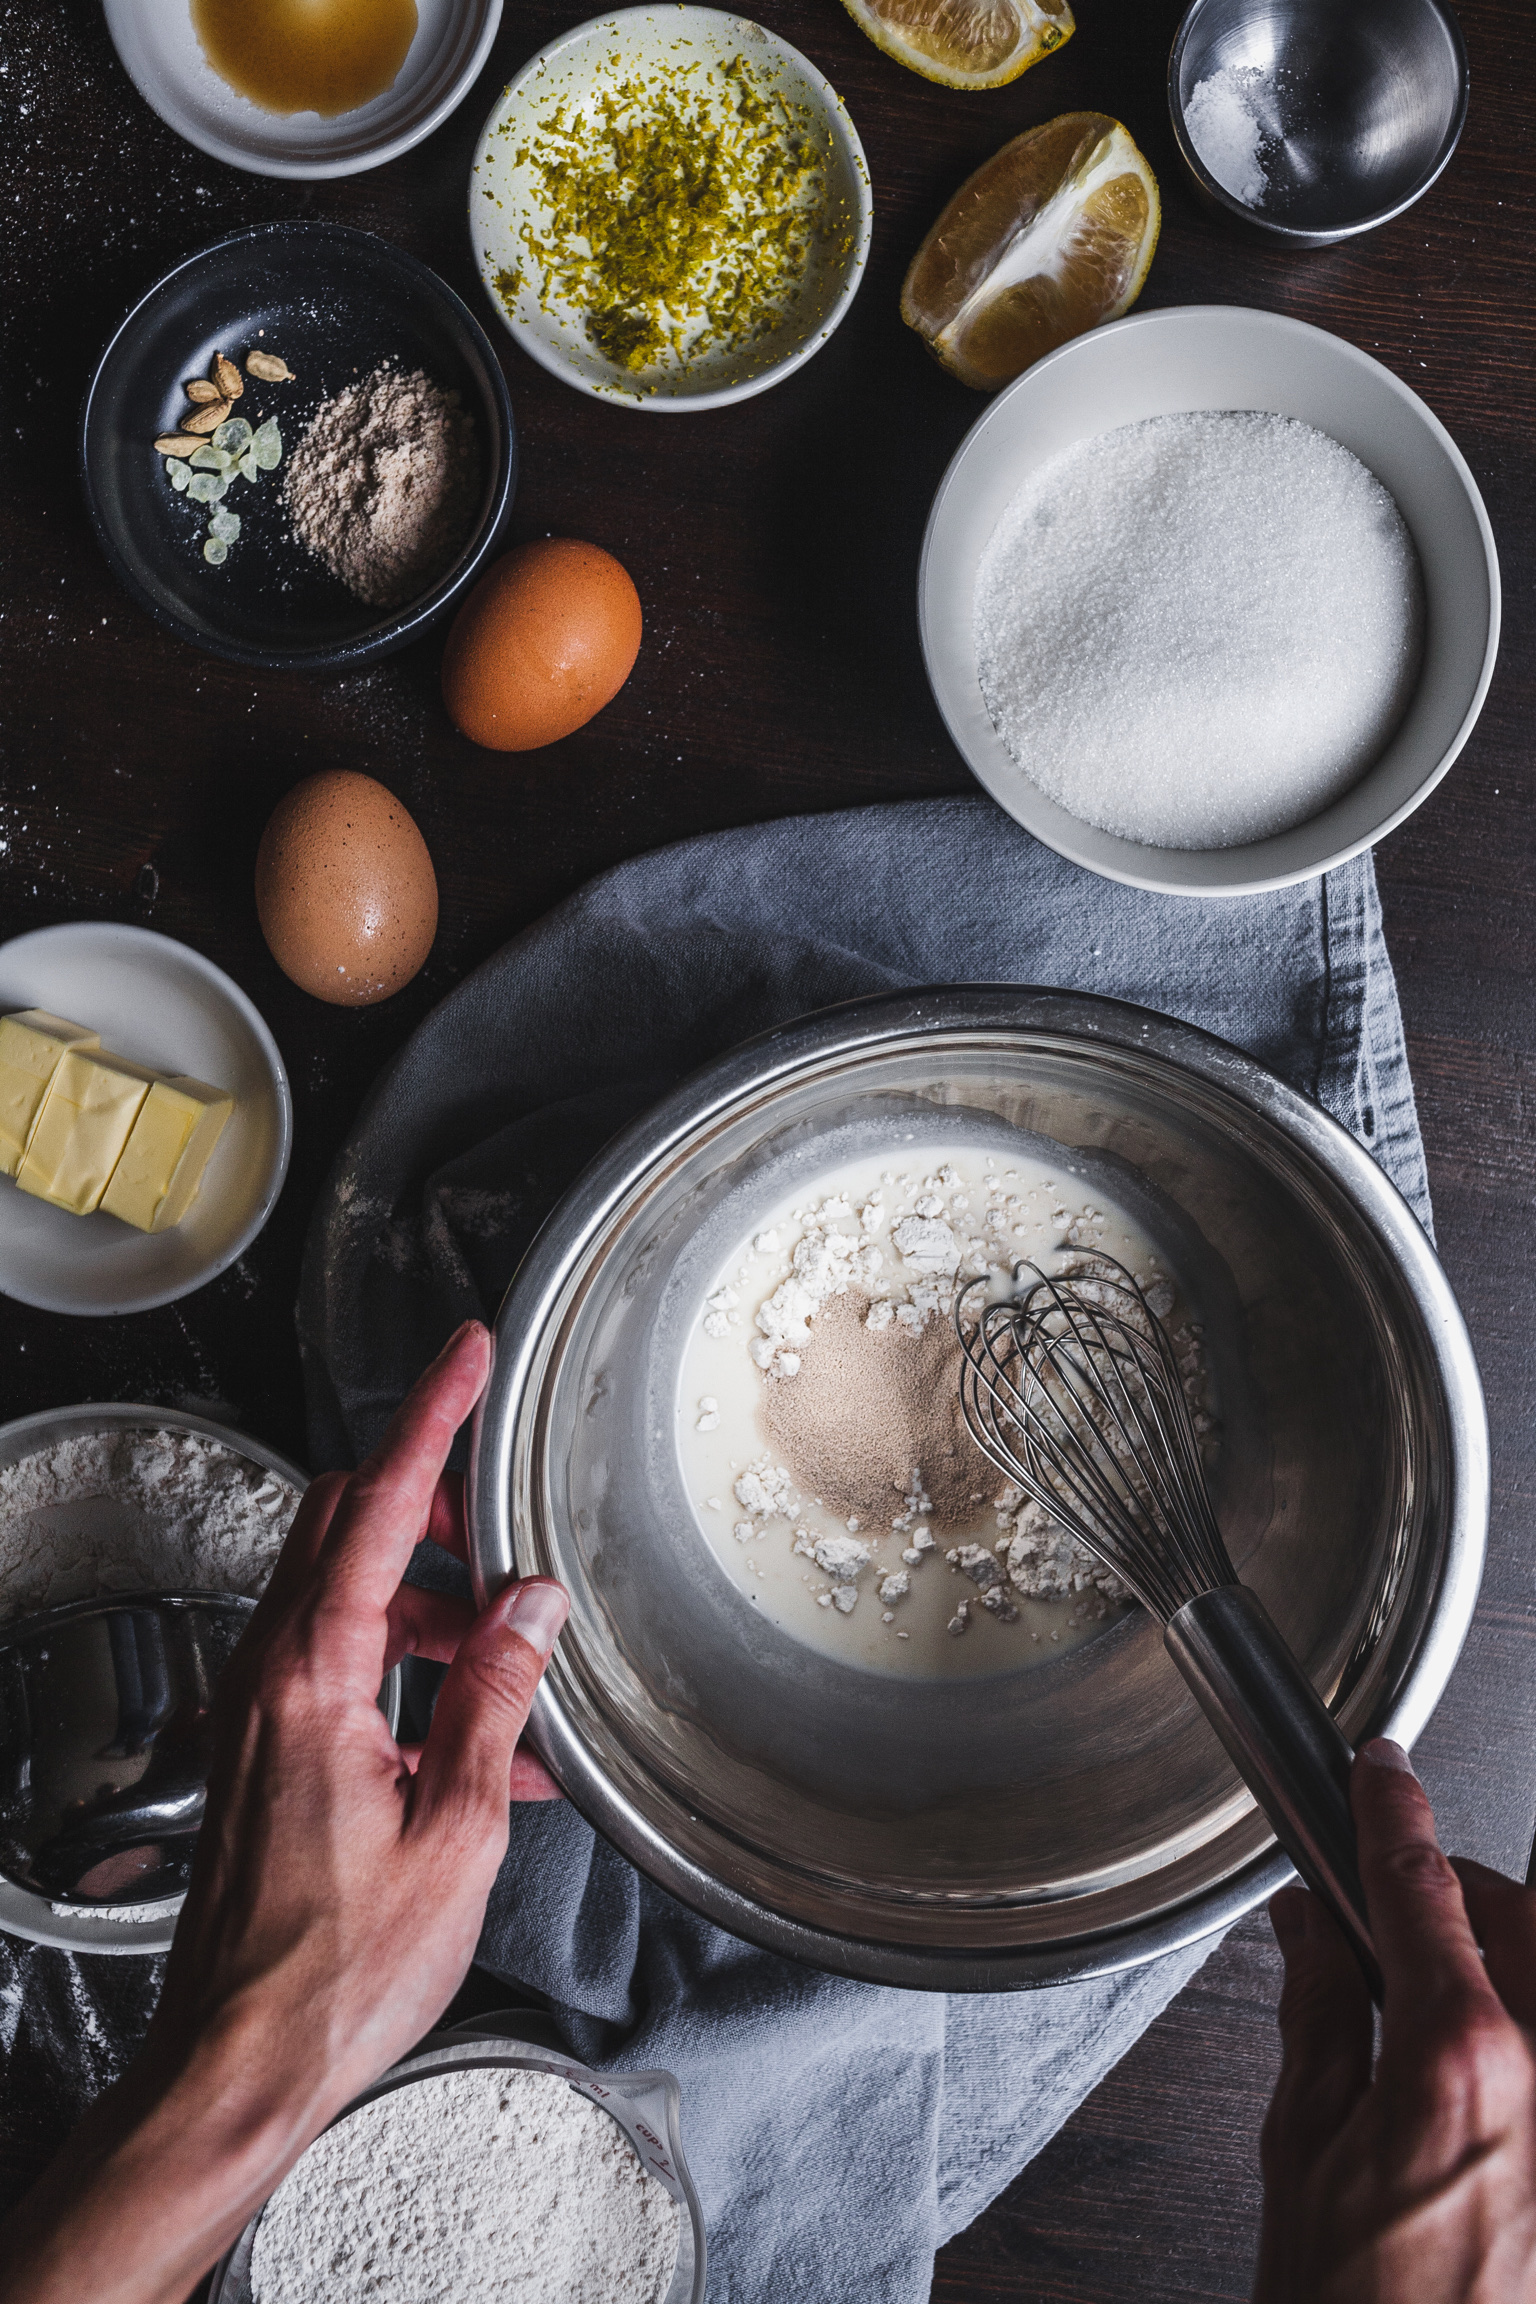
- Activate yeast
- Whisk together the aromatics with the flour
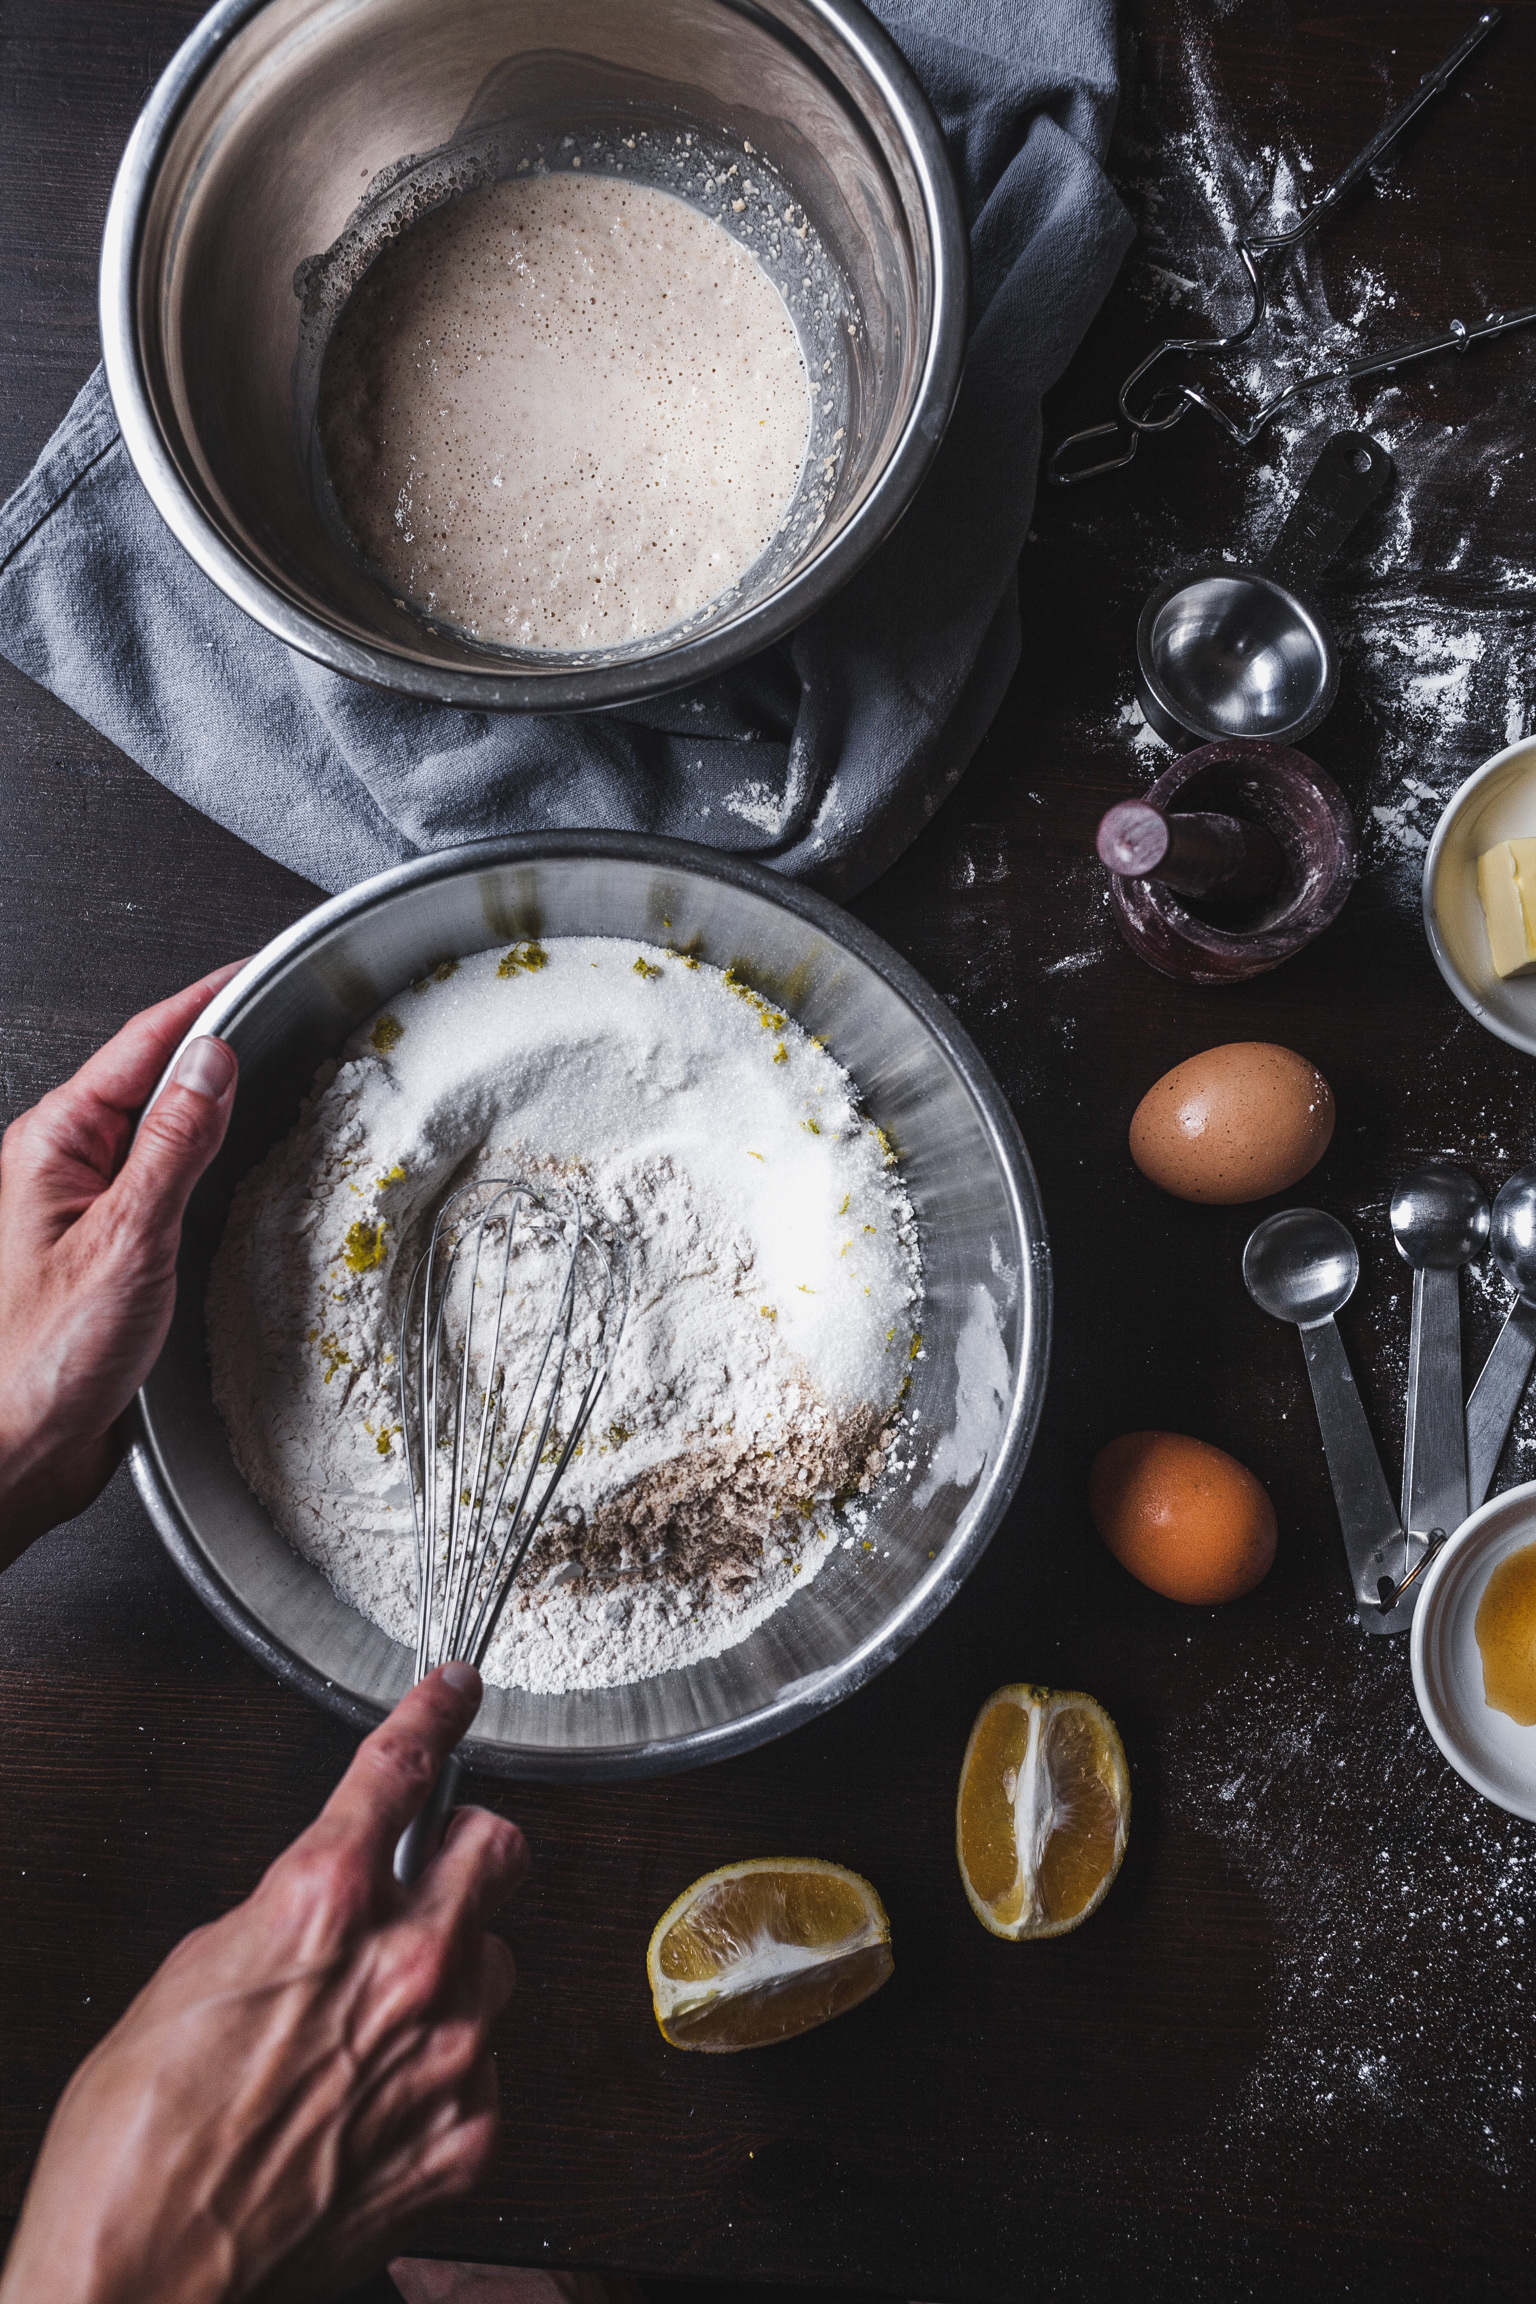
- Mix the flour into the yeast mixture/starter along with the eggs, sugar and vanilla
- Mix/knead with a standing mixer with hook attachment for 8 minutes plus 2 minute with the addition of the butter. (by hand and regular mixer instructions in recipe notes below)
- Shape dough and Braid (make sure to watch the video for a quick how to)
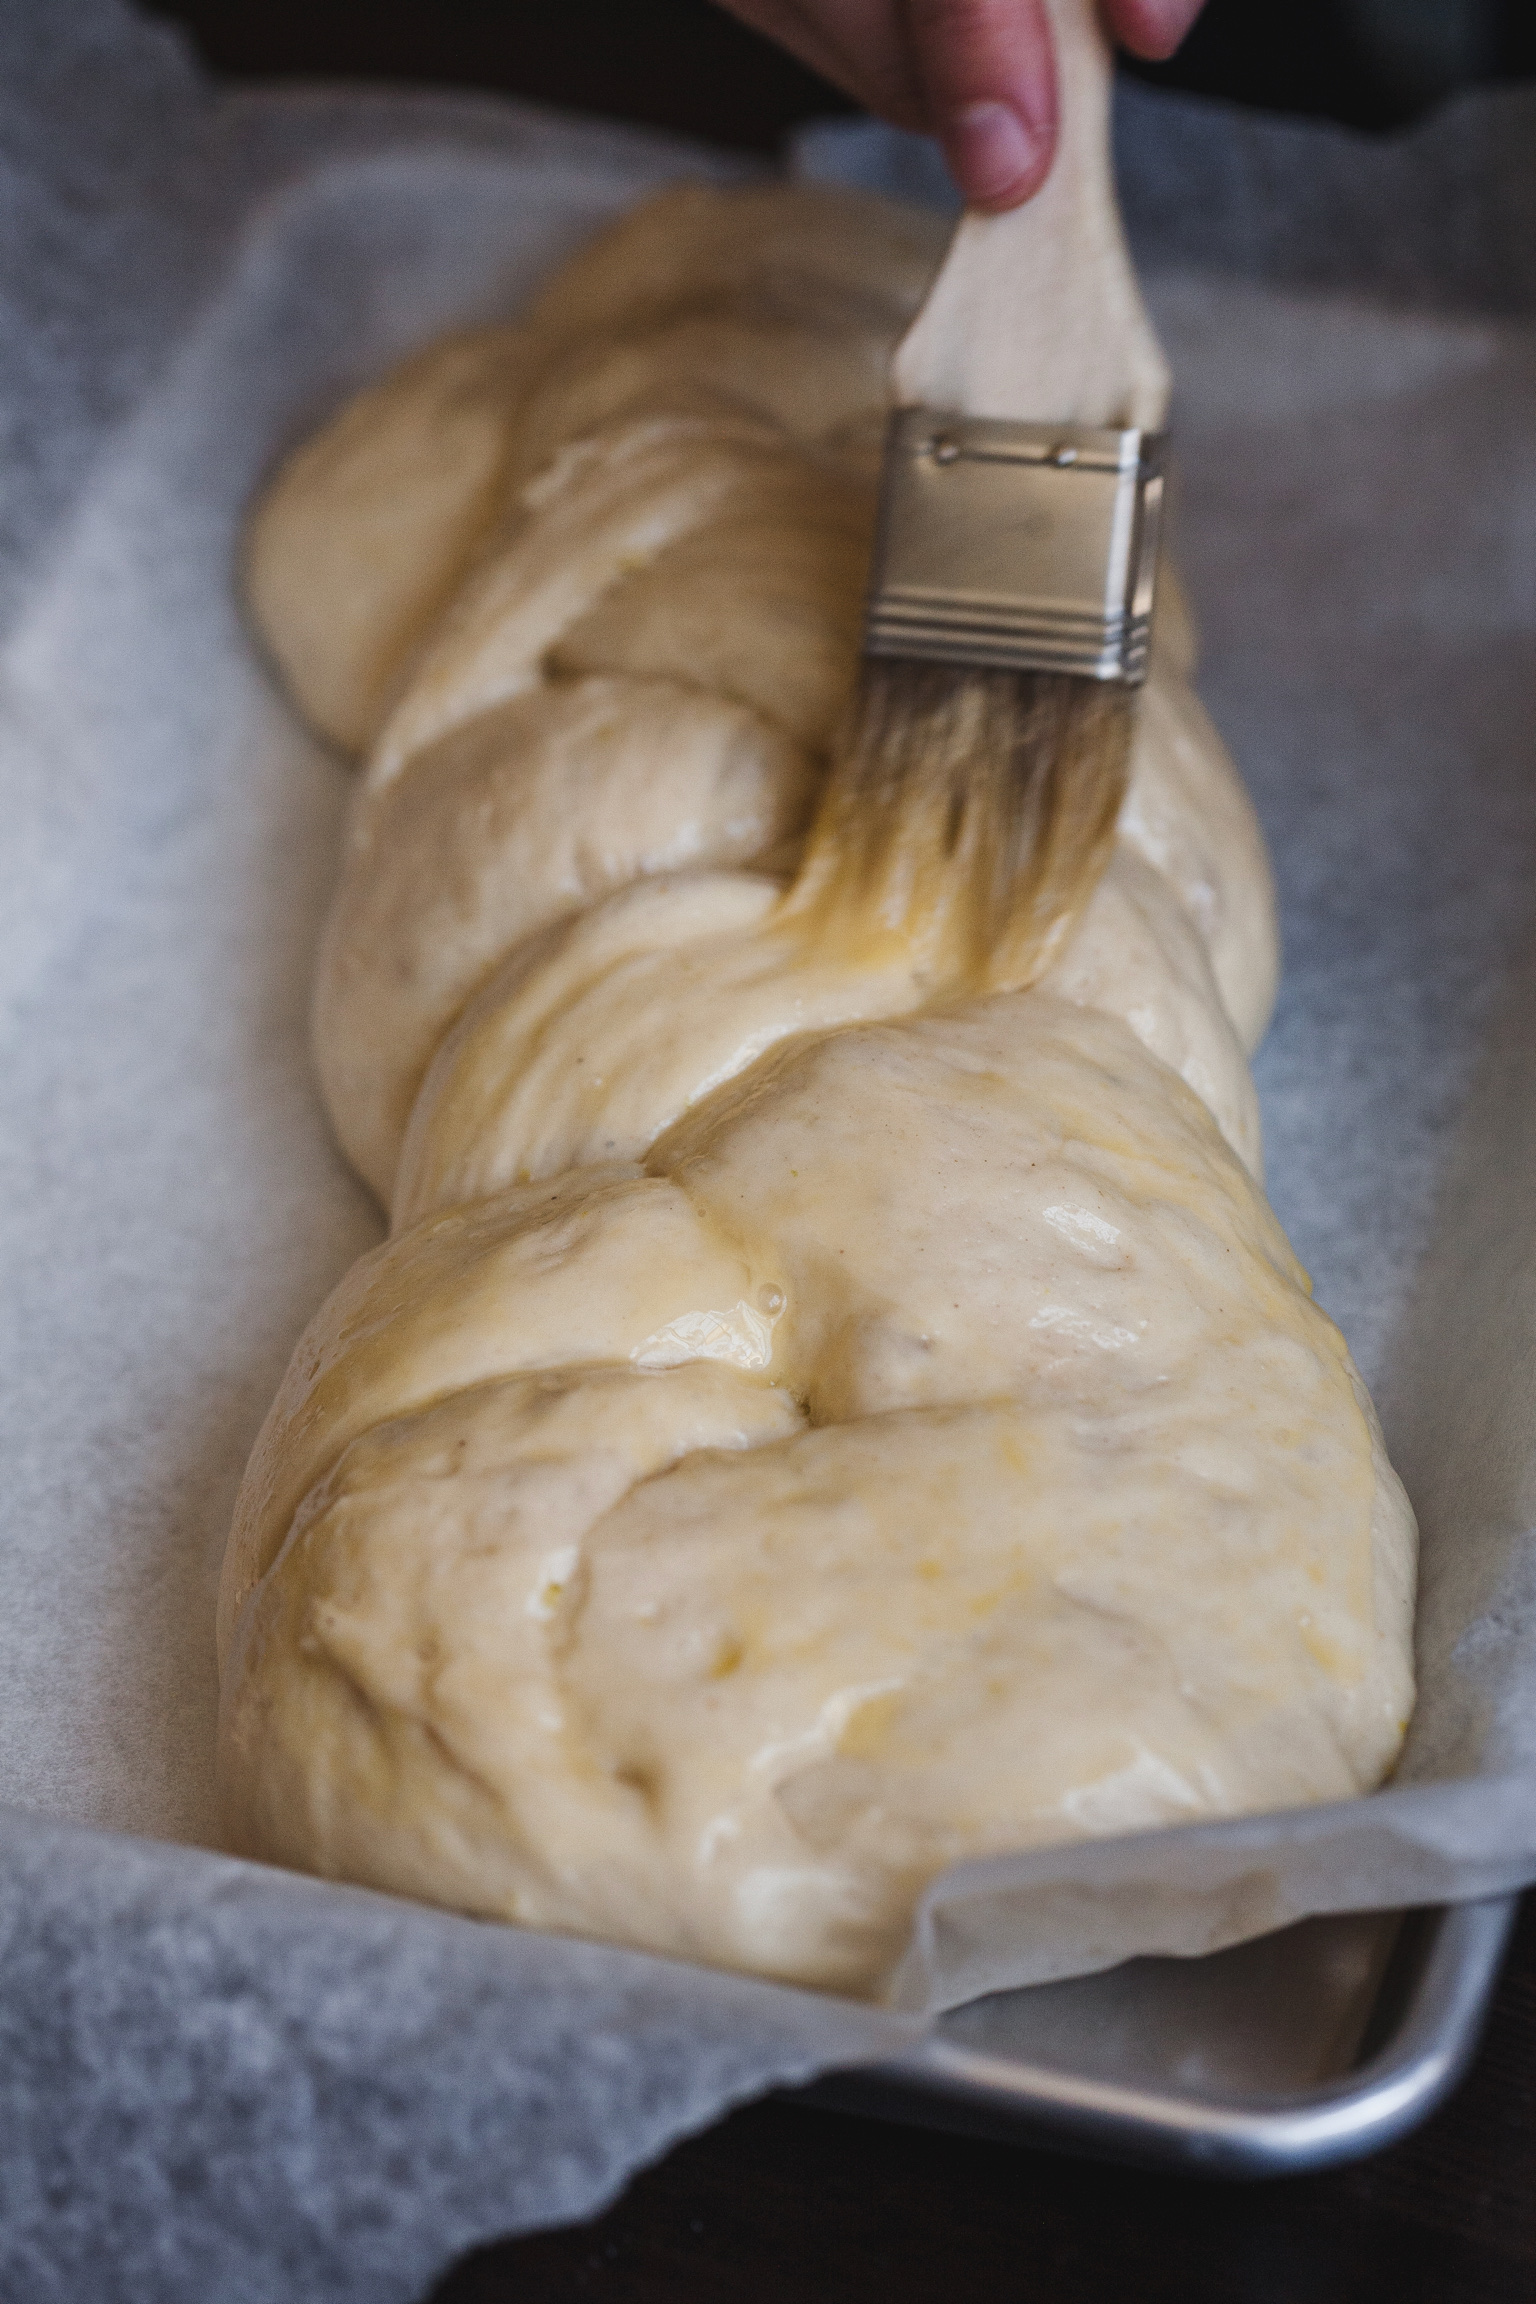
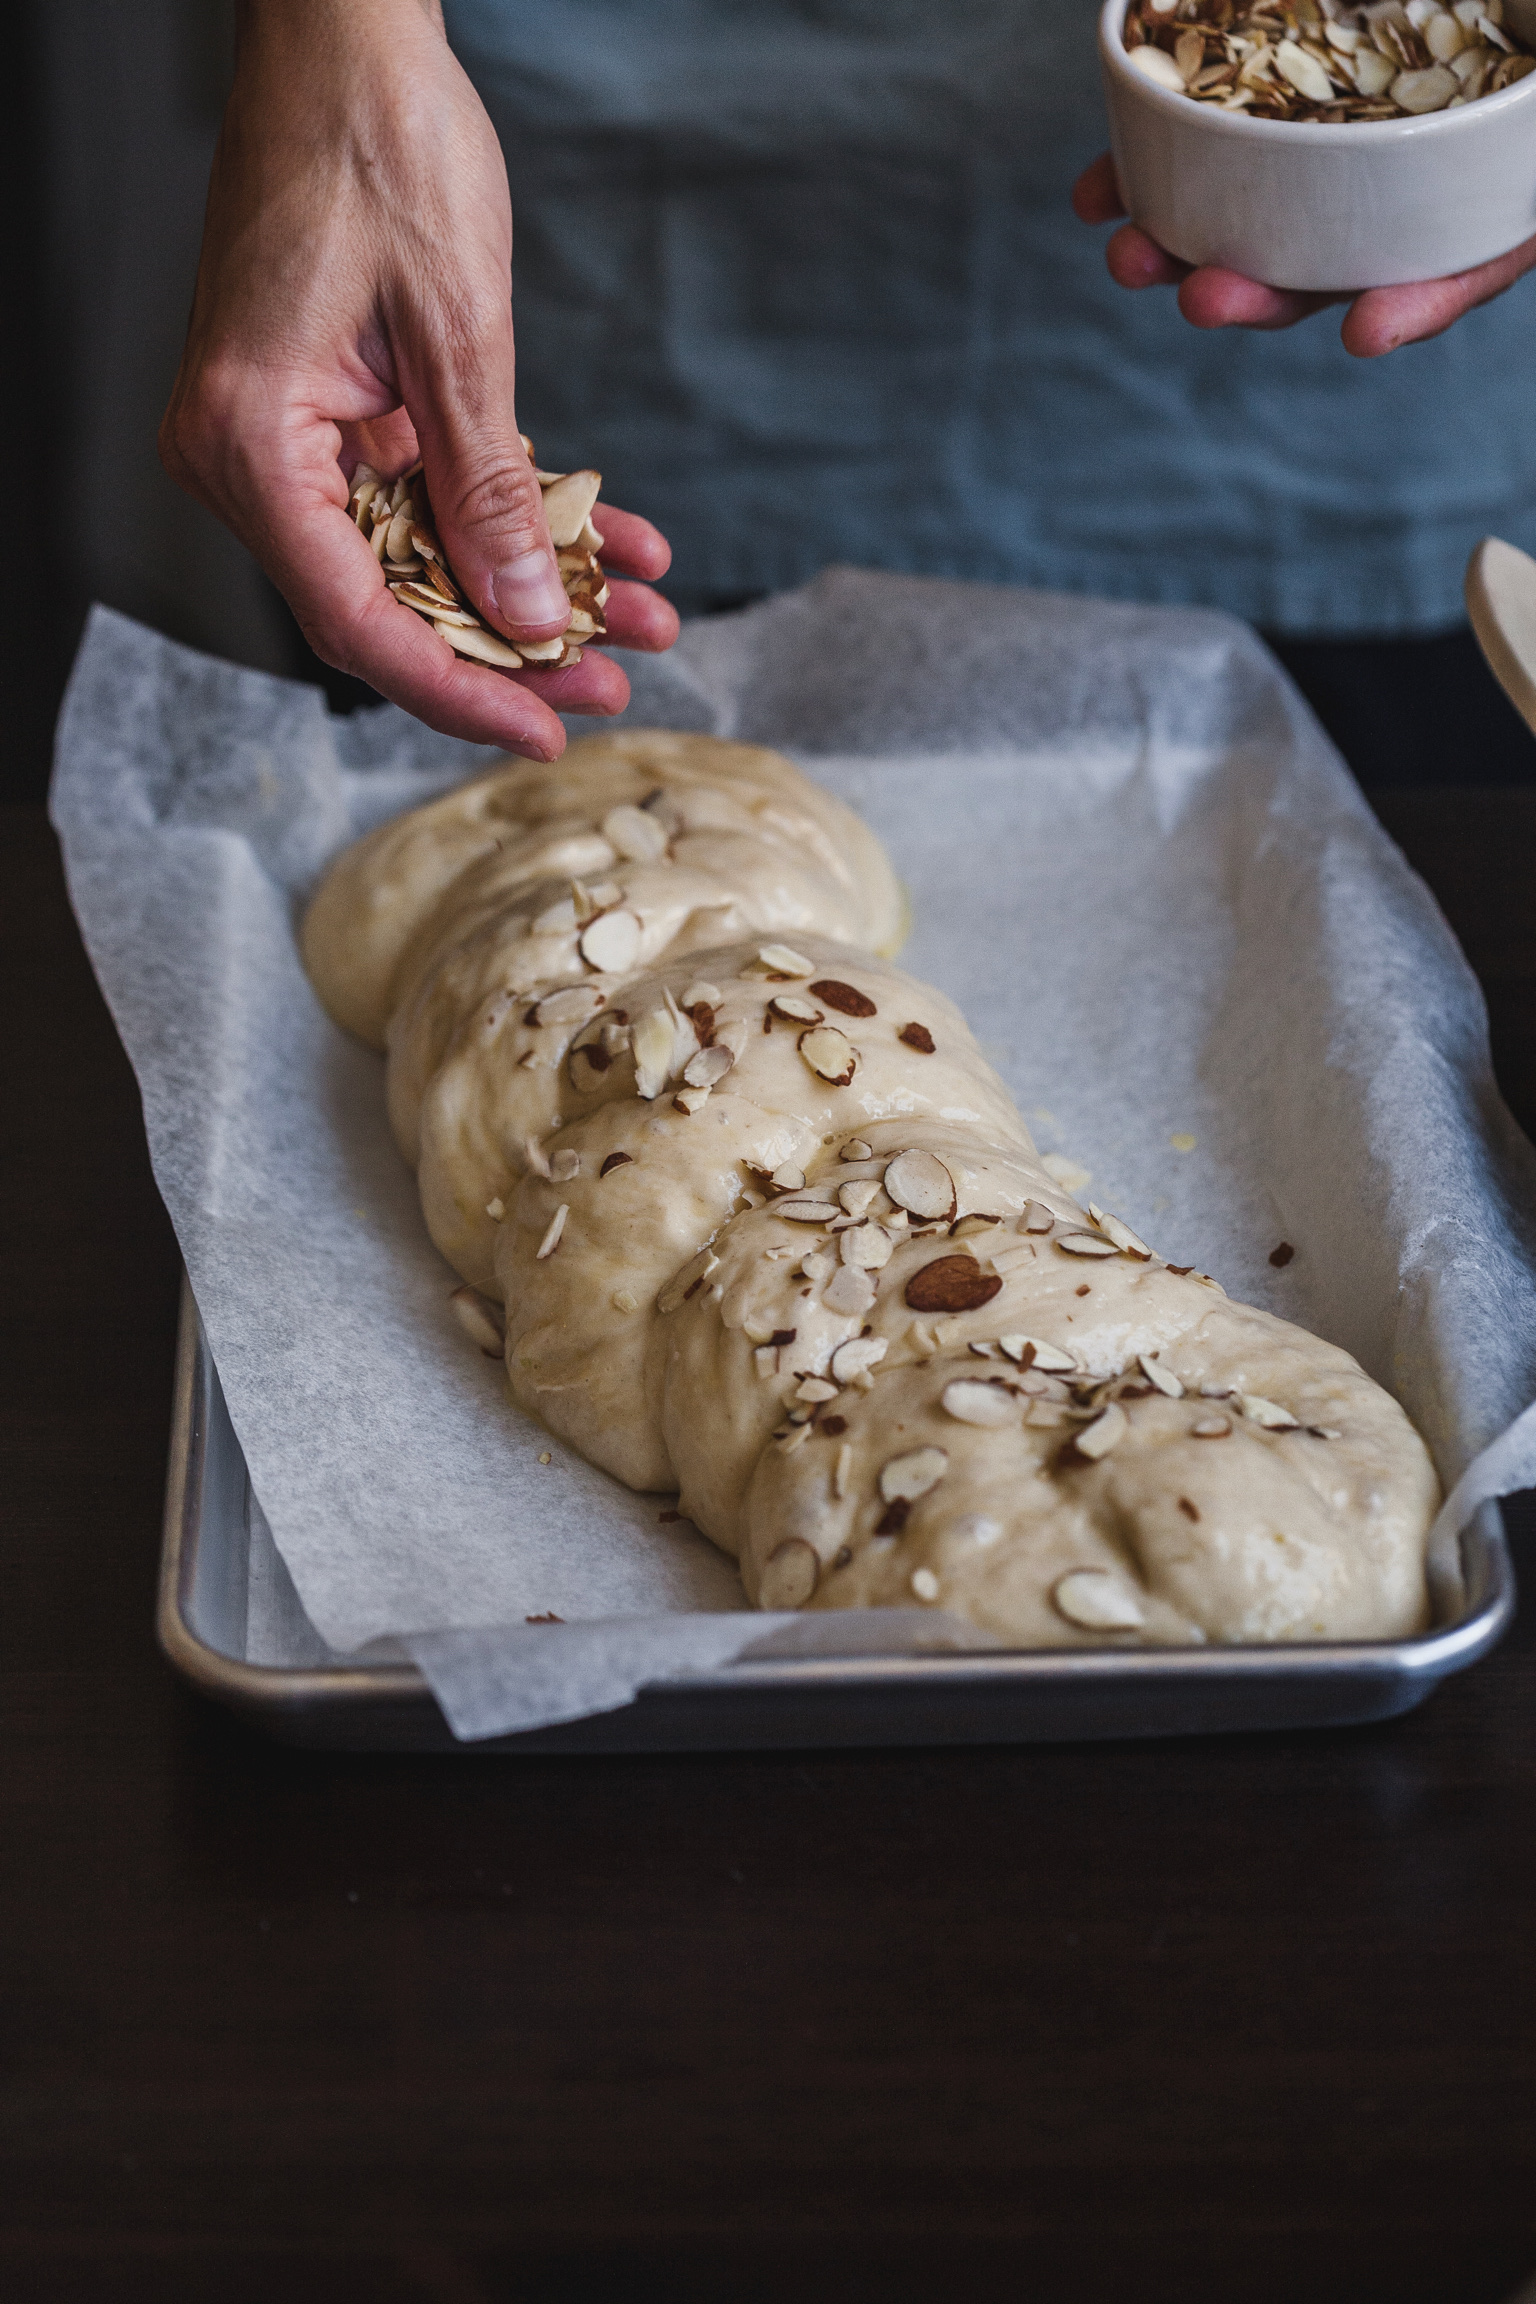
- Brush loaves with egg wash, sprinkle with sliced almonds and bake until golden (you will know when its done - your whole house will smell amazing)
How to make tsoureki with that perfect stringy pull apart texture:
Tsoureki has the most delicious texture that is very similar to brioche. It’s soft, light, and stringy. You can pull it apart like your pulling away layers of mozzarella. It’s so fantastic and the texture really is what matters when you make it. The working or kneading of the dough is what helps this texture actually happen so it’s critical to knead by hand or with a mixer for the time shown below. Basically get ready for an arm work out if you don’t have a standing mixer. A handheld mixer with dough hook attachments helped but I still had to work it cause it’s such a sticky and glutinous dough.
How to get the perfect tsoureki texture
Nailing the perfect texture is not out of reach when it comes to tsoureki. The perfect texture in a tsoureki means that the dough needs to be kneaded until soft, smooth, and elastic, then allowed to rise for 1 hour. Make sure to watch the video linked in this post or the how to make tsoureki video I have up on YouTube to see a few extra tips to help the dough develop that perfect texture while your roll and shape it. Making sure to allow time for initial and secondary rising is also key. Practice makes perfect applies to tsoureki as much as it applies to anything else. Your tsoureki will only get better each time you make it and get a real feel for the texture of the dough.
If you love this tsoureki recipe you will love these ones too:
- Easy Baked Tsoureki (challah/brioche) French Toast
- Quick And Easy Mixed Berry Trifle
- Traditional Homemade Spanakopita (Easy From Scratch Greek Spinach Pie)
Recipe
Ingredients
For the starter
- ½ cup of milk (lukewarm)
- 1 tablespoon active dry yeast (instant)
- 1 teaspoon sugar
- 2 tablespoons All purpose flour
For the dough
- 1 tablespoon mahlepi
- ¼ teaspoon of ground mastic or 1.5 grams of rock mastic ground
- 5 cardamom pods or ½ teaspoon ground (optional)
- ½ teaspoon salt
- 4 cups bread flour or all purpose flour
- 1 cup granulated sugar
- ¾ cup milk (lukewarm)
- 2 large eggs
- 1 teaspoon vanilla extract
- Zest of one medium size orange
- 2 oz or ½ stick of butter cubed and at room temperature
- 1 egg yolk plus 2 tbsps of water whisked for eggwash
- Sliced almonds to sprinkle over loaves (optional)
Directions
Activate yeast & Make dough
- In a large bowl whisk together all the starter ingredients until fully combined, cover with plastic wrap and let sit in a warm spot for approx 10 minutes until the yeast mixture is foamy and yeast is activated.
- Meanwhile in a small food processor/mini chopper process the mahlepi, mastic, cardamom pods and salt until everything is ground to a powder. Alternatively use a mortar and pestle to grind the mastic and salt together and then the cardamom pods separately. Whisk them all together to combine and set aside. (Skip if they came already ground)
- In a large bowl whisk together the flour, mahlepi, ground mastic, ground cardamom, salt, orange zest until well combined.
- Once the yeast is activated, add the flour mixture, eggs, milk, sugar and vanilla to it and if you are using stand mixer mix using your dough hook attachment on low for 8 minutes. Continue mixing and then add the softened butter and then increase speed to medium and knead for another 2 minutes. Dough will be very sticky and elastic and will start to pull away from the sides of the mixing bowl.
- Brush a bowl with olive oil or melted butter and transfer the dough into it and cover with plastic wrap. Set in a warm spot and let it sit and double in volume - approx 1½-2 hours.
Roll & Shape dough
- Once ready remove plastic wrap then punch down dough and transfer to a clean working surface (not floured). If the dough is very sticky lightly grease your hands with oil to be able to handle dough better.
- Roll out the dough into the shape of a baguette and then fold over and roll out in to shape of a baguette again repeating this 5-8 times which helps create chewy threads and texture in the bread.
- Cut the dough in half with a large knife or bench scraper, then cut each half into 3 equal pieces. Cover 3 pieces with plastic wrap or damp towel while you work with the remaining 3.
- Gently shape each piece into a rough log with your hands, then roll it out into long ropes (I use my baking pan to measure the length), working slowly so your dough rolls out evenly. If you notice your ropes shrinking or pulling back too much when you remove pressure or feel them pull against you, leave them sit for a few minutes and come back to them. Wrap with plastic wrap if letting them sit and rest for a few minutes so they don’t dry out.
- Place the ropes next to each other, pinching the ends on one side to seal. Tuck ends under for a smooth finish, and spread out the ropes as wide as possible on your counter. Loosely braid your ropes together, laying one strand on top of the other, not pulling or stretching them. You want a braid free from gaps, but you don’t want to strangle it too tightly either. Adjust your ropes throughout so they stay wide on your work surface, which will make for a more even finished product. When you reach the end, pinch the ends together and tuck them under as you did the other side. (See video for more details)
- Transfer the braid carefully onto a greased or lined sheet pan.Cover each loaf with a kitchen towel or greased plastic wrap and place back in your warm spot to let rise until doubled in size, about 1-1½ hours.
Bake
- Preheat oven to 350˚F
- Brush loaves with eggwash and sprinkle generously with sliced almonds and transfer to oven and bake for 25-30 minutes until golden brown (brown on the puffy parts and still light in the creases). Bake one at a time or both at the same time depending on how large your baking trays are.
- Remove from oven when done and immediately release them from their trays and lay them to cool on a wire rack for 30 minutes and then slice and enjoy!
Recipe Notes
- Storage & How To Use Leftovers: To store your tsoureki bread after it’s been baked and cooled, just keep it in an airtight container or zip-top bag. How long does tsoureki last? It will keep at room temperature for a few days (the flavours really develop nicely in it after the first day) or in the fridge for around a week. Can you freeze tsoureki? Yes. Once the bread is completely cool place loaves in heavy duty plastic sealable freezer bags. Tsoueki can be frozen for up to 2 months. To defrost, remove from the freezer about five hours before they will be served and let them come to room temperature. It will get stale over time and that is the perfect time to make my * Easy Baked Tsoureki (challah/brioche) French Toast or * My Quick And Easy Mixed Berry Trifle with it.
- How to shape tsoureki? You can braid your tsoureki with three stands or more if you are creative like that. It can be made in a straight loaf or it can be shaped into a round loaf once braided as well. If three stranded braiding is not your thing, there is nothing wrong with doing a double stranded twisted loaf or ring.
- Can I make tsoureki ahead of time? Overnight or Slow Rise: Your tsoureki can be made and kneaded ahead of time. Place dough in a large bowl after its kneaded then cover with plastic wrap, and leave in the fridge for at least half a day or overnight (it can be kept in the fridge for up to 2 days). This will make shaping it even easier and the flavours and the texture will also develop a little more as well. Once braided allow to rise a second time and then bake as mentioned above
- Can I make tsoureki whithout a standing mixer? Yes of course. If using hand mixer with the spiral hooks like I did initially mix for 10 minutes and on medium high speed and then added the butter and continue to mix for another 2-3 minutes. If you are kneading by hand, knead in a bowl or on counter top for at least 15 minutes to achieve a elastic texture and to ensure the gluten has formed well.
- Tsoureki Trouble Shooting: The key with any sweet bread, challah or any yeast bread is patience. The temperature and humidity in a room can directly determine how long the rise time will be. The recipe calls for 1-2 hours of rising time but if it’s rising in a cold dry spot it could take all day. Keeping that in mind choose the warmest spot in the house to let the dough rise - and wrap with a damp towel over the bowl if your house or area is particularly dry. I like to keep mine over or in a slightly warm oven - repeat slightly warm not even remotely hot. And wrapped in a damp towel if I’m finding it difficult to get a warm spot in my kitchen and not getting a rise out of the dough.
- You can also create a warm spot in your oven to proof bread in the oven, place a glass baking dish on the bottom rack of the oven and fill it with boiling water. Stash your dough on the middle or top rack and shut the door. The steam and heat from the boiling water will create a warm and steamy environment for the dough—exactly what you want for a good rise.