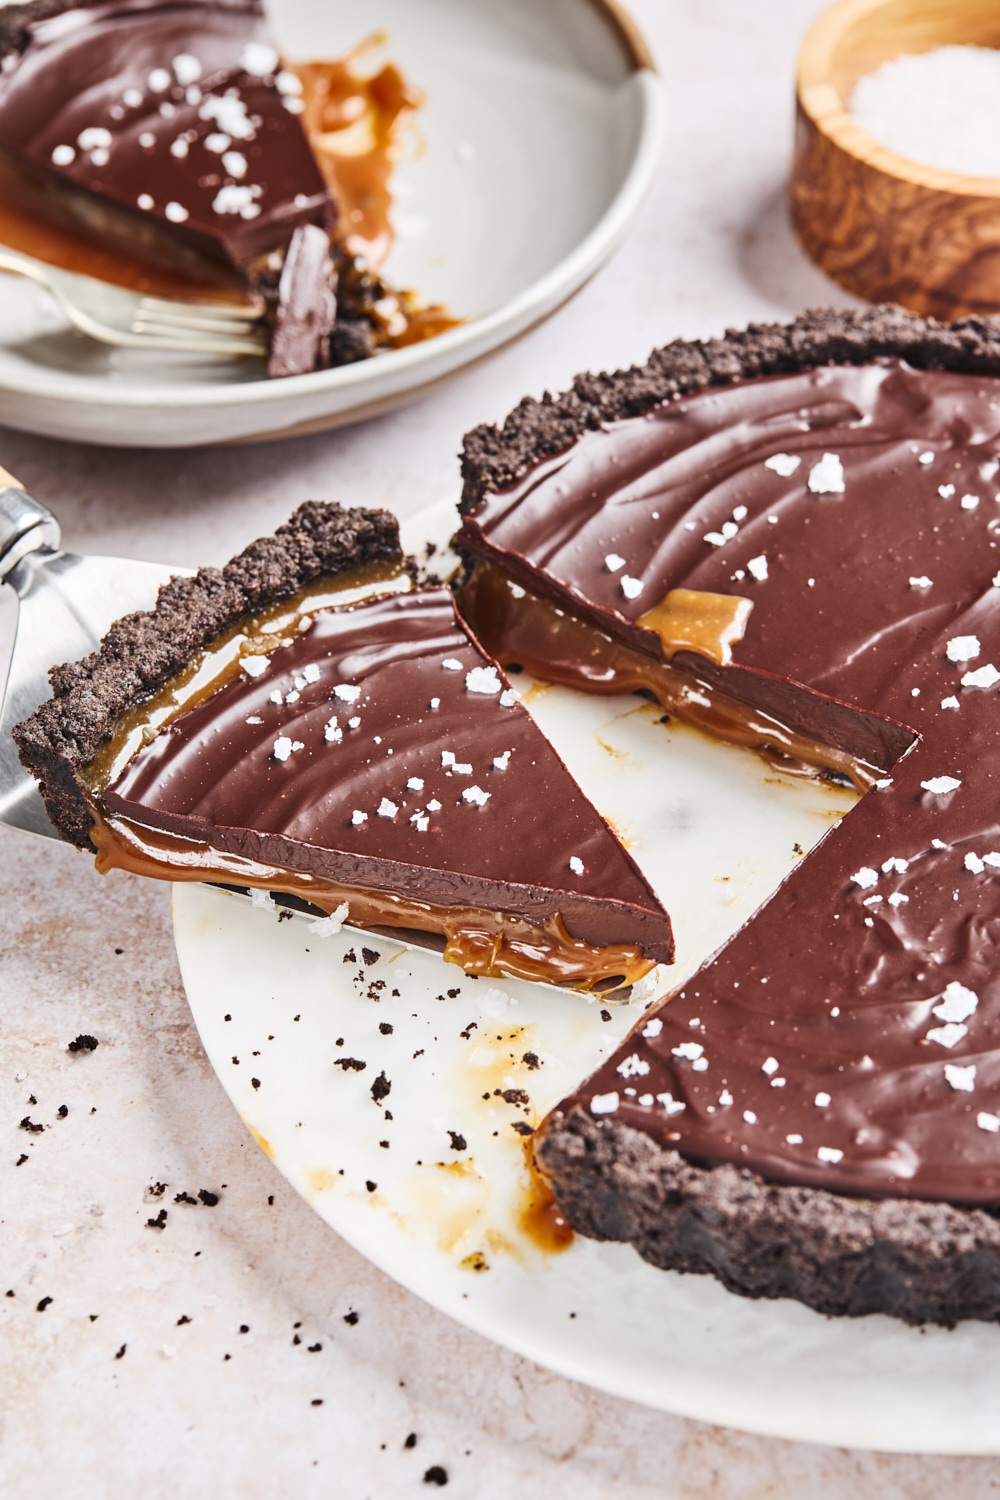
Chocolate Caramel Tart
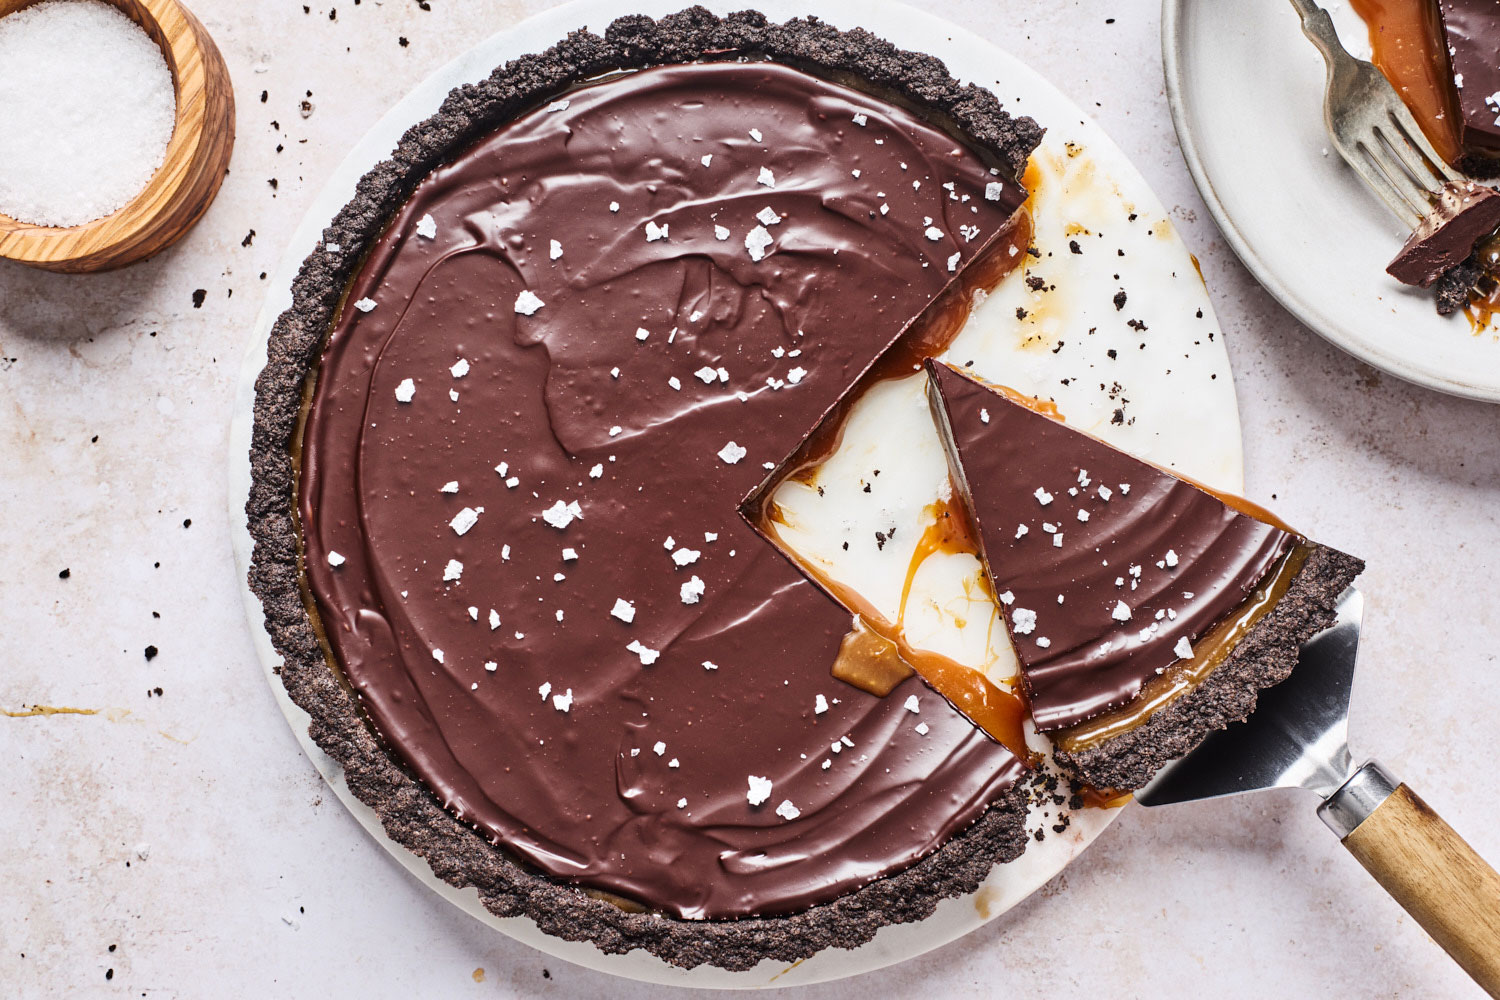
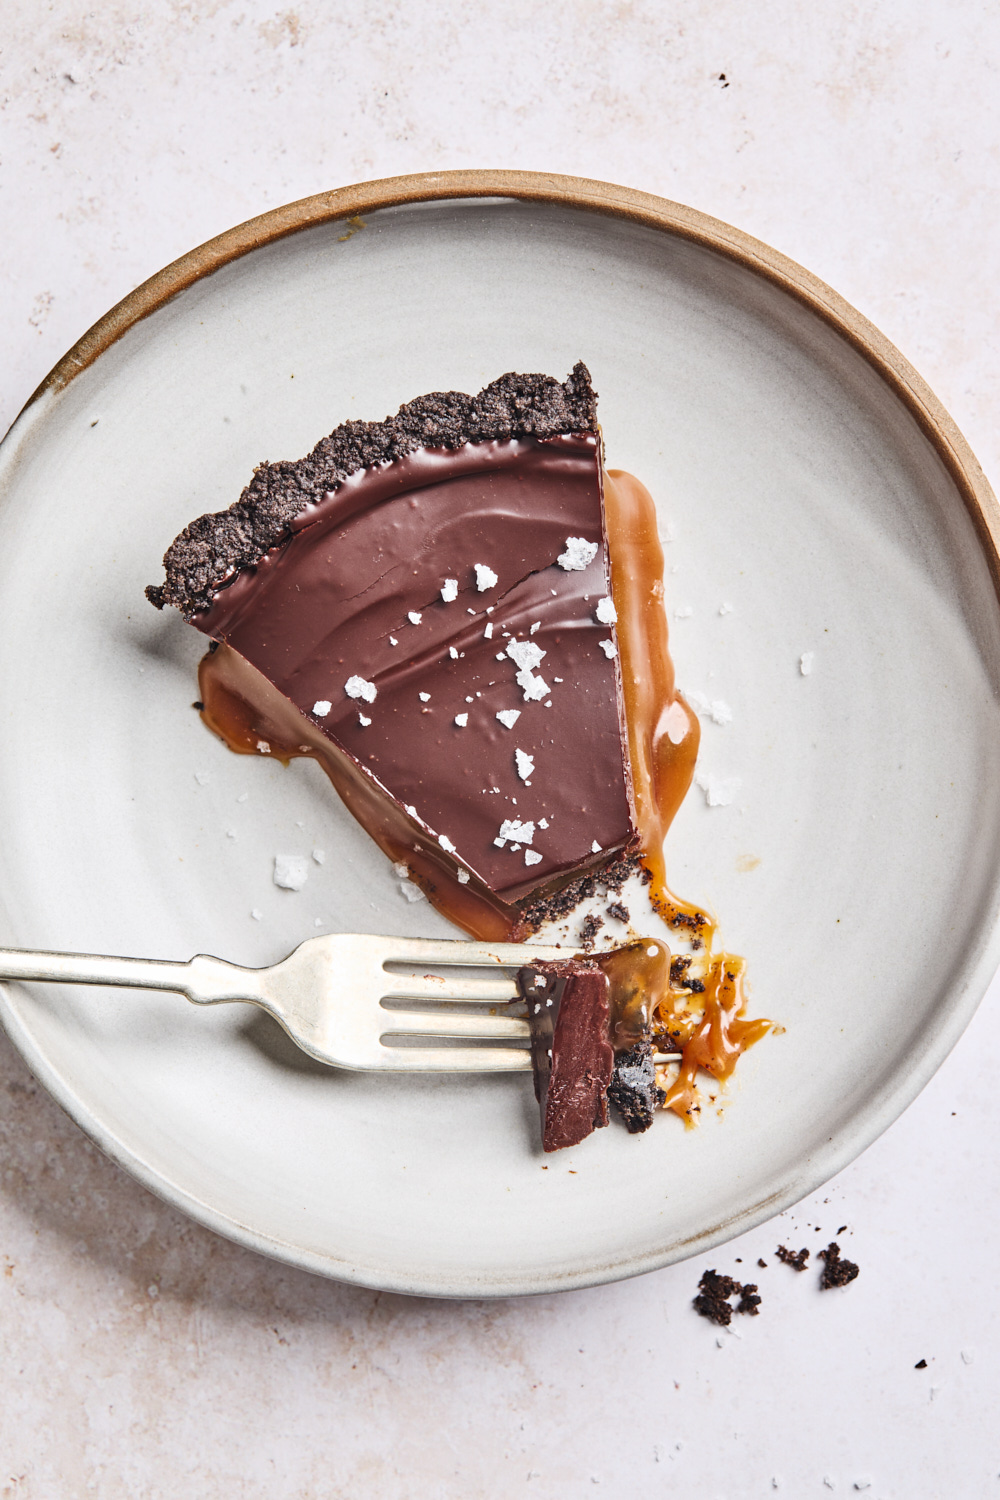
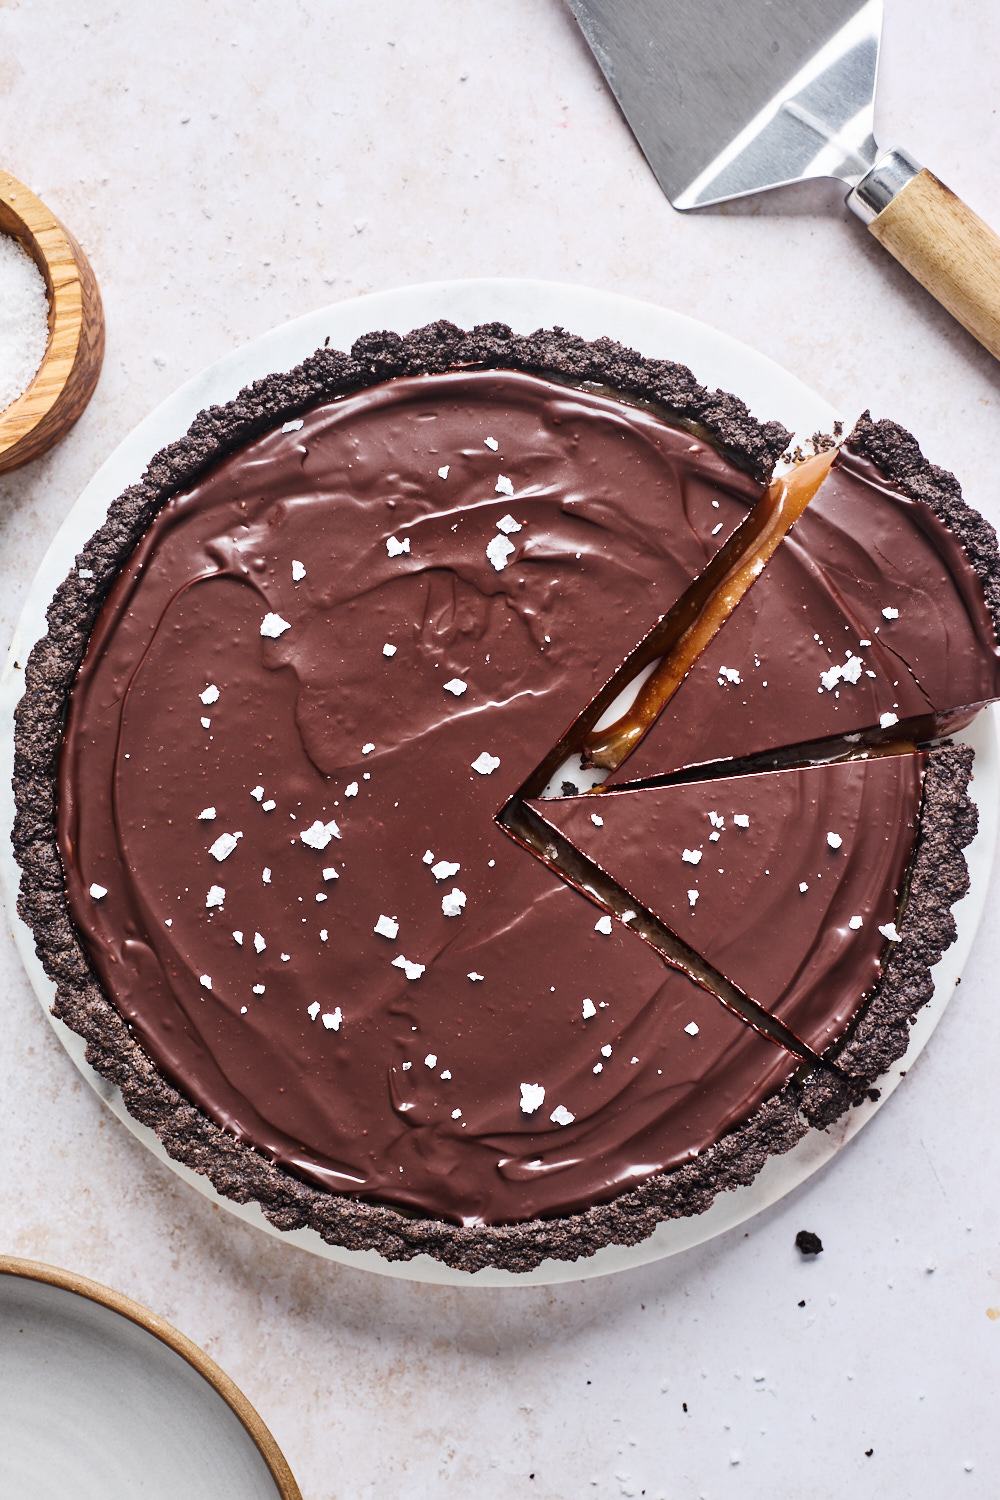
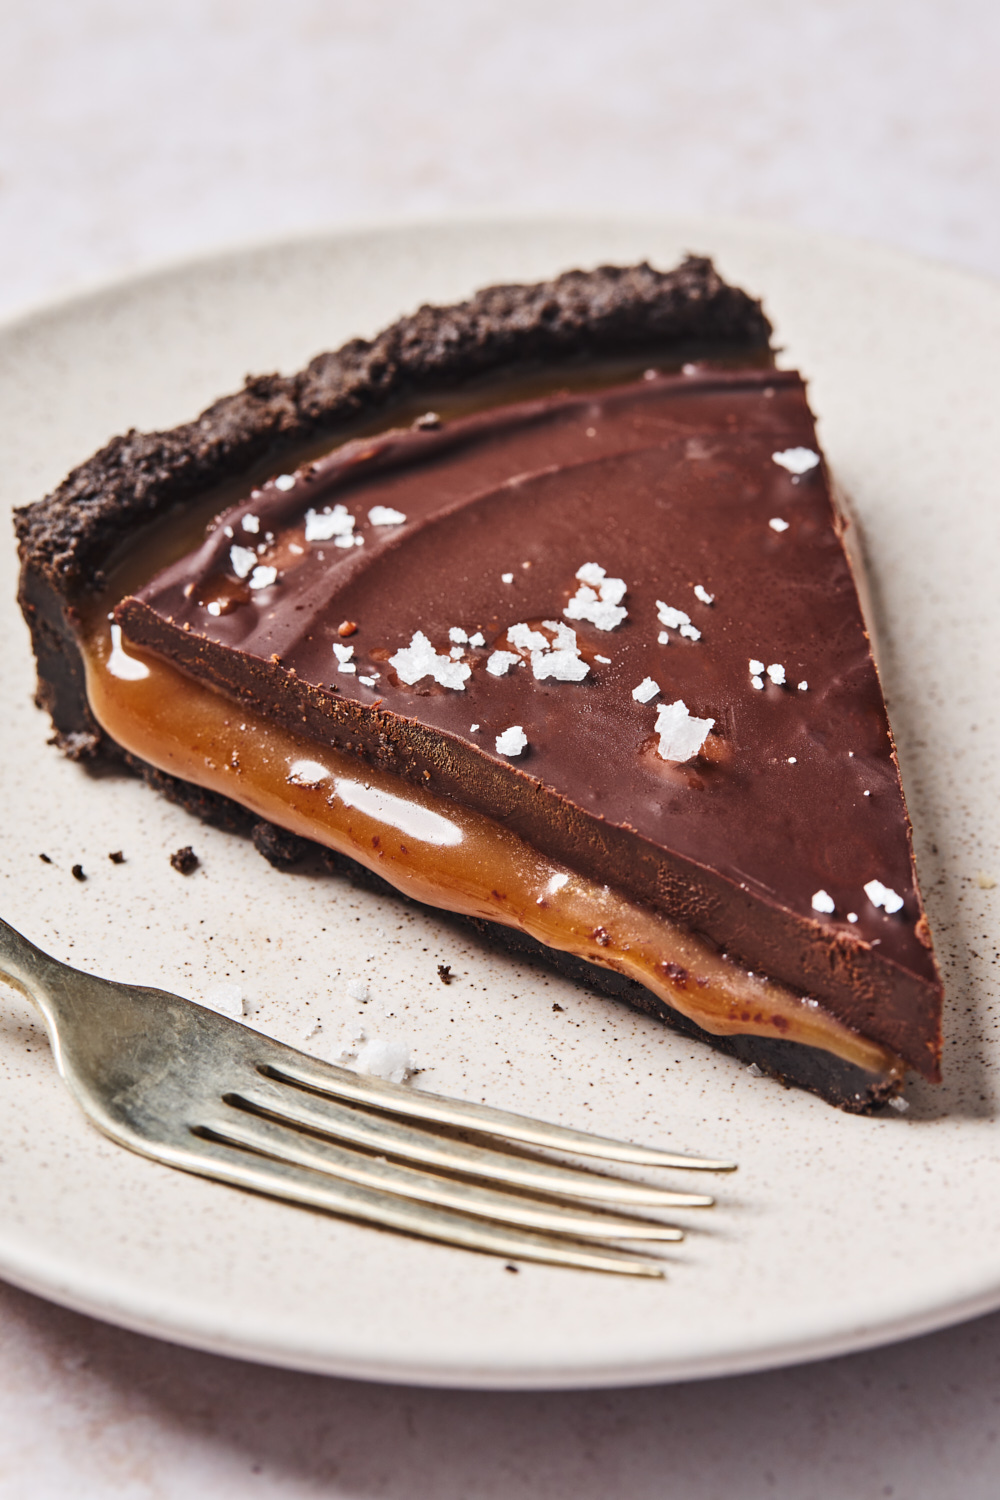
This easy Chocolate Caramel Tart with its Oreo cookie crust, soft creamy caramel filling, and rich chocolate ganache topped with flaky sea salt is a no bake rich and satisfying chocolate dessert that looks fancy, but is easy to make. No need to fuss with pastry dough, pie weights or a mixer for this easy tart recipe. This is a very rich dessert and can serve up to 12 with small slices. The rich flavor of the chocolate (dark chocolate) ganache plays well with the sweetness of the caramel. Don’t be intimidated by the homemade recipe for the caramel, it takes a little patience but it’s quite easy to make. This is a great make ahead deserts as it chills until you are ready to serve it. Serve it chilled or room temperature allowing the caramel to ooze out a bit in its gooey glory!
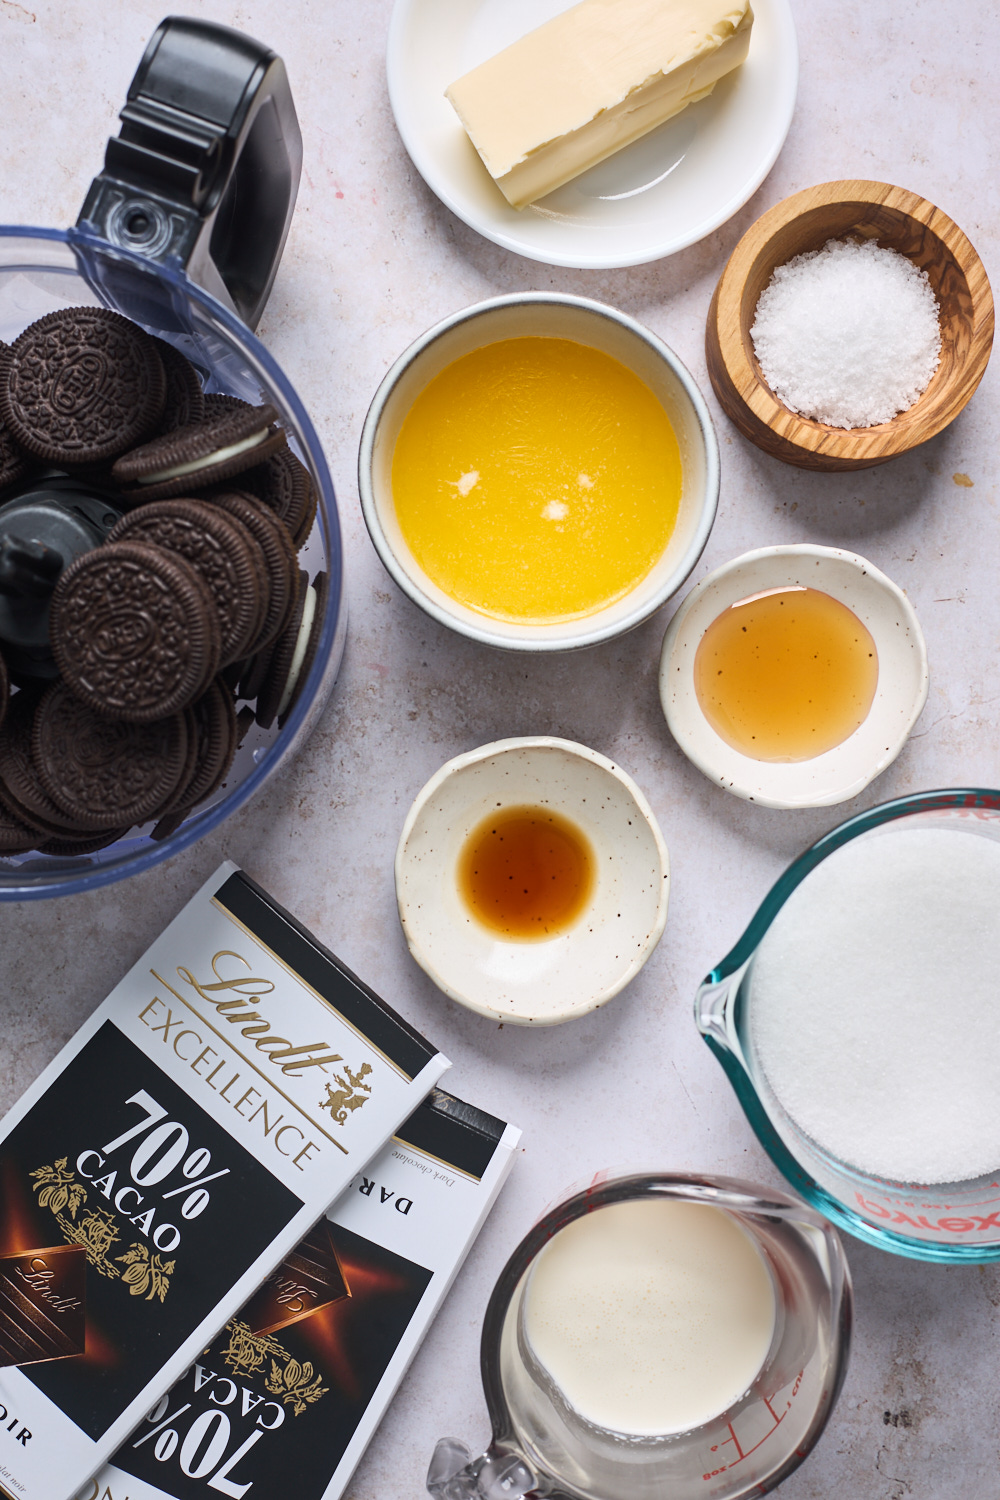
Chocolate Caramel Tart Ingredients
- Oreo Cookies - these make the base of the tart. I use the whole cookie and crush them using a food processor or you can use a rolling pin over them in a zip lock bag to crush them. If you want an alternative feel free use a graham cracker crust instead using 2½ cups of graham cracker crumbs and ½ cup of melted butter for a less sweet base.
- Butter - unsalted is what I always use so its easier to control the salt in the dessert. You will need some for the crust and for the caramel
- Sugar - I used granulated sugar here
- Corn syrup - Corn syrup helps to stabilize the sugars, making things a little more fool-proof when making caramel and gives the ganache an extra glossy finish. It is optional to add so feel free to leave it out if you prefer
- Heavy whipping cream - full fat heavy whipping cream works best here for both the caramel and ganache
- Vanilla extract - pure vanilla extract is what I recommend
- Dark Chocolate - the dark chocolate plays well with the sweetness of the caramel. I find using semi sweet chocolate or milk chocolate is too sweet for this recipe
How to make this Chocolate caramel tart
- Prepare the crust- by crumbling the Oreos in a food processor, tossing those crumbles in melted butter until saturated, and pressing the Oreo mixture into the bottom and sides of a tart pan or pie pan. Set the crust in the freezer to set while preparing the next step.
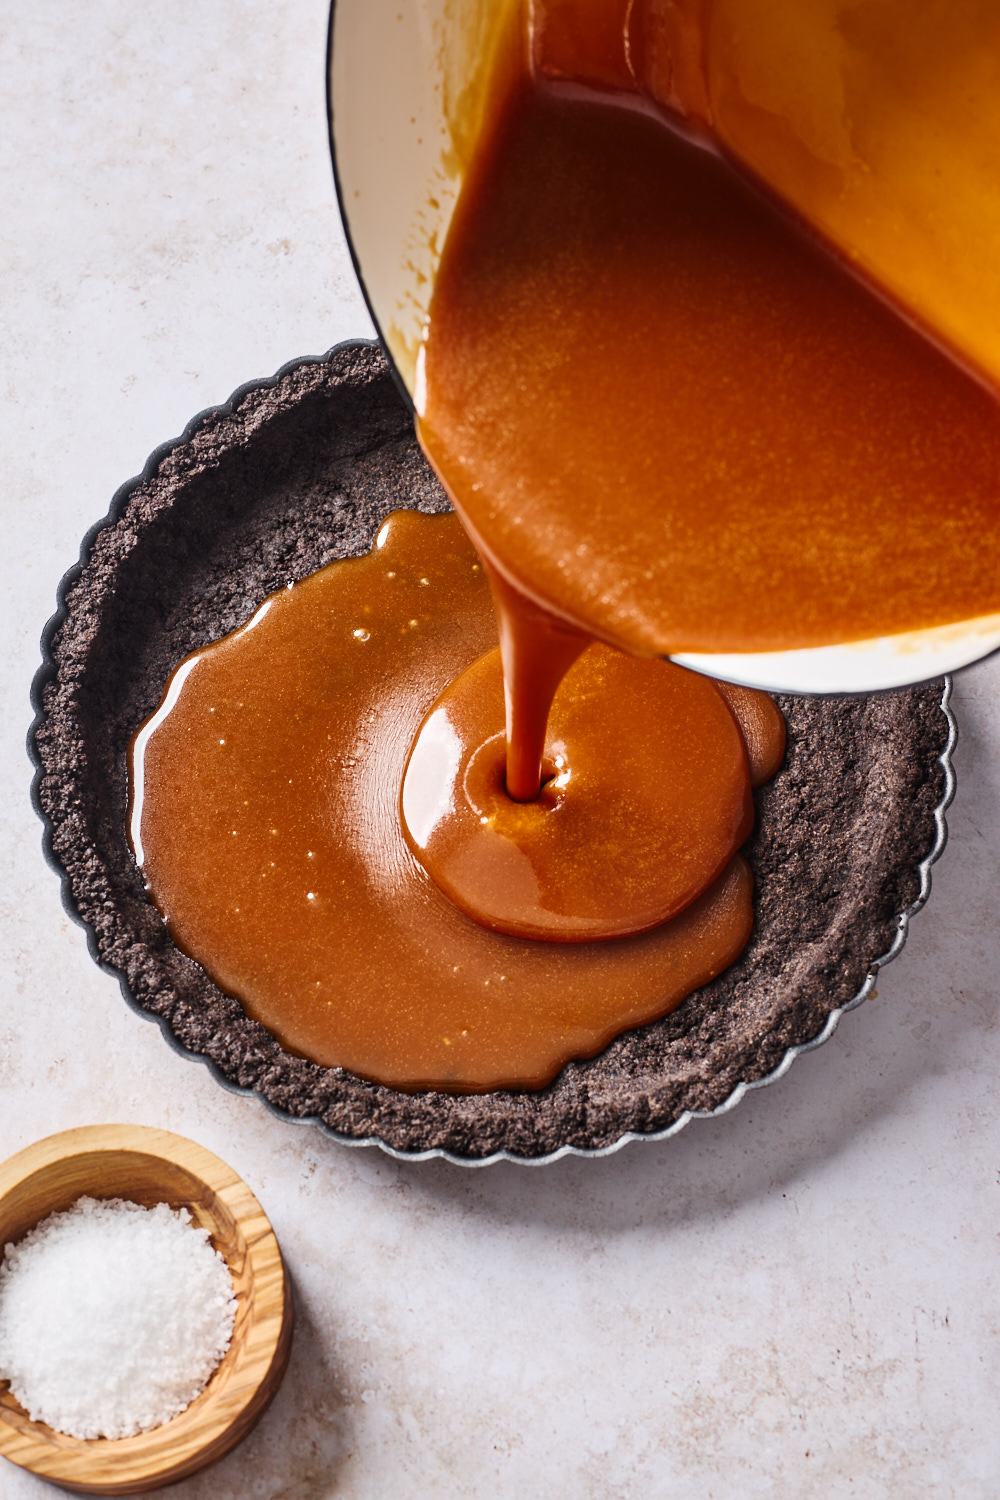
- Make the Caramel- In a medium or large saucepan cook the sugar, corn syrup and water together until it’s bubbly and turns a golden amber / light copper color. If you are using a candy thermometer this will occur right around 350 degrees. Gradually whisk in the heavy whipping cream, then the butter and salt. Pour it into the pan with the prepared Oreo crust. Place the pan back in the freezer/fridge and let the caramel layer set.
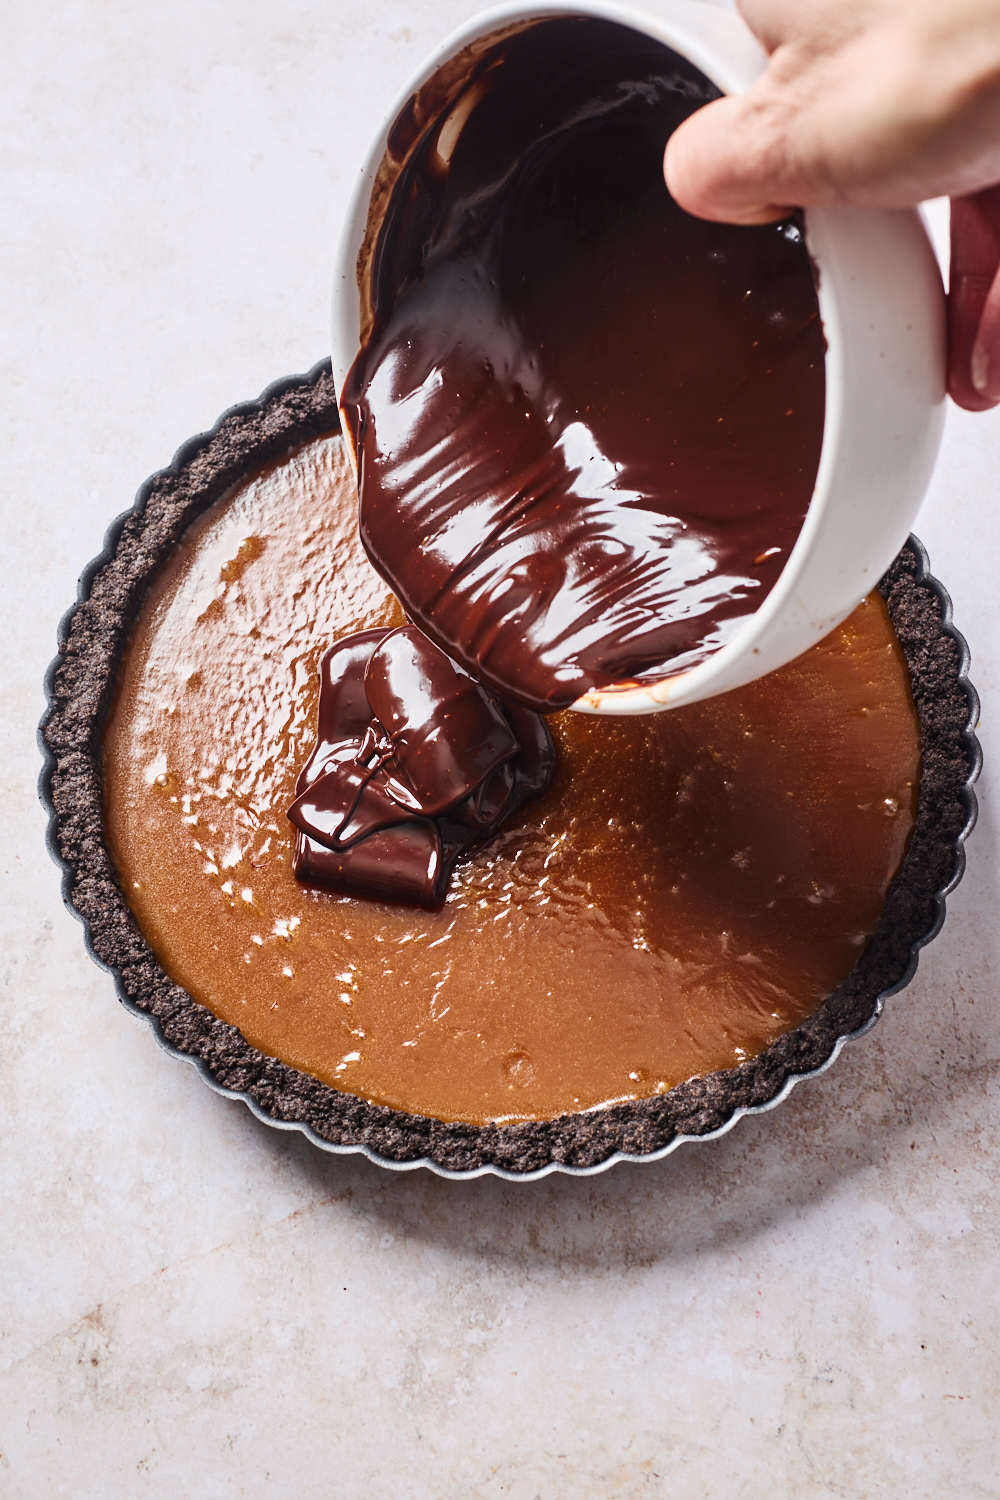
- Make the Ganache - place the chopped chocolate and corn syrup in a bowl. Place heavy whipping cream in a small saucepan, then warm the cream up over medium heat or heat in microwave. Once the cream starts to simmer around the edges, quickly remove it from heat and pour it over the chocolate. Allow it to sit for a minute, then whisk until a smooth ganache forms. Pour over caramel layer and spread evenly. Place the pie pan back in the fridge or freezer until the ganache layer is hard and set.
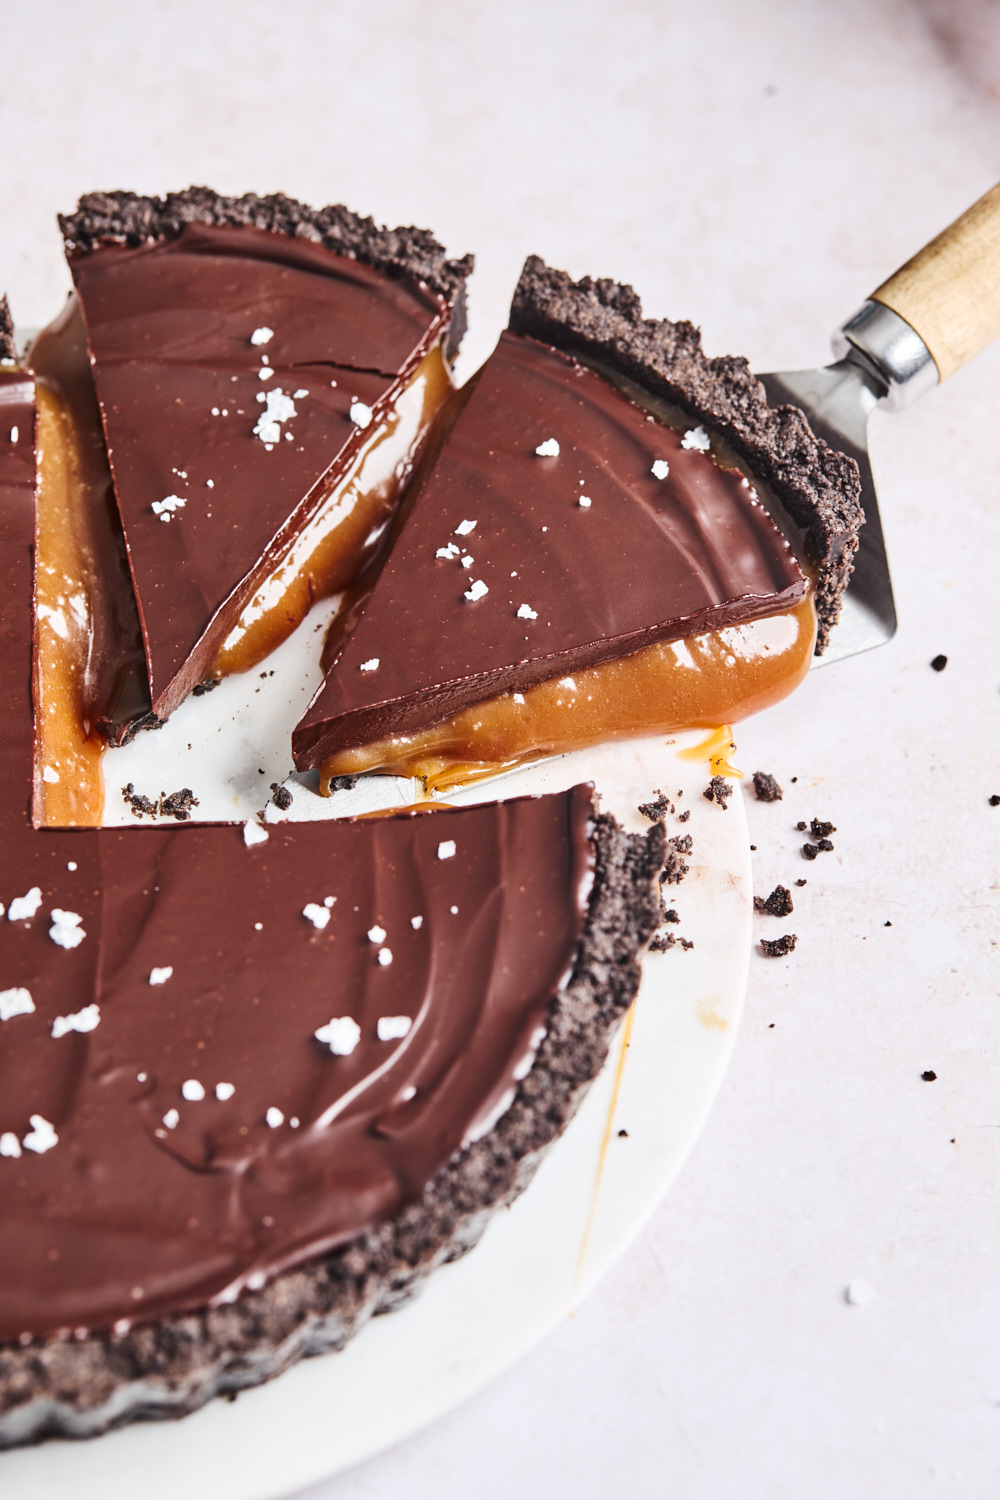
- Serve and enjoy!- I recommend slicing the tart while its chilled. Allow slices to come to room temperature for a couple of minutes before serving or serve right away and enjoy. The longer the tart stays at room temperature the gooier the caramel will get.
How to store the salted caramel chocolate tart
- To store: Chocolate caramel tart should always be stored in the refrigerator, covered, for up to 2 weeks.
- To freeze: Place slices of the tart in a sealable container or wrapped well in plastic wrap and store in the freezer for up to 6 months. Thaw the tart overnight in the refrigerator
Tips and Notes for making the best chocolate caramel tart:
For the CRUST
- Feel free to use any cookie base you like. If you are using graham cracker crumbs or other biscuits the ratio should be 2 ½ cups cookie crumbs to ½ cup of melted butter.
- Can I bake the crust? YES you definitely can bake the crust. Although this is a no bake recipe for a more crisp cookie crust its always recommended to bake the crust for 8-10 min at 350 degrees F then allow to cool. This of course is not necessary but it will give you a more crisp crust.
For the CARAMEL
Patience is KEY with the caramel filling. Please don’t be intimidated to make caramel. Just be patient and don’t be tempted to turn up the heat too high to speed it up! You must be patient as trying to speed it up will quickly give you burned caramel sauce.
- I like to use a saucepan with a light-colored interior, such as an enameled pan, so that I can easily see the caramel change colors. A dark pan will make it much harder to note the color. And make sure it is larger than you think you will need, since the caramel will bubble up when you add the cream.
- A candy thermometer is not necessity to make caramel but it is handy to have. That being said they aren’t always accurate. Many times it’s best to rely on the color of the caramel as opposed to the temperature. You want to look for a dark dark amber/light copper color. However, dark amber goes to burnt in a matter of seconds. If using a thermometer, start paying close attention at about 340 degrees. Once the color deepens, pull the mixture from the heat.
- I like to set each layer of this crust in the freezer because it takes way less time between layers for them to set but if you prefer to chill the tart layers in the fridge please do so. I would allow 1 hour each of chilling for the caramel sauce and the ganache in the fridge.
- Slice tart while its chilled so its easier to slice into even pieces. Once the caramel layer starts to soften it gets a bit messy which is totally normal (just think giant caramilk bar). Cut with a hot, dry knife just before serving. You can serve slices chilled or allow them to come to room temp for a few minutes before serving.
- A cool storage tip I got from Smitten Kitchen is to spray two small strips of foil with nonstick spray and press them against the cut/open sides of the tart and wrap them tight; this will keep it from spilling out in the fridge.
More tasty desserts you will love
Recipe
Ingredients
For the Oreo Crust
- 25 Oreo cookies (one 270 gram pack)
- 6 tablespoons (¾ stick/85 g) unsalted butter, melted
For the Caramel Filling
- 1½ cups sugar
- 1 tablespoon corn syrup (optional)
- ½ cup water
- 6 tablespoons unsalted butter
- ½ cup heavy whipping cream
- 1 teaspoon vanilla extract
- ¼ teaspoon sea salt
For the Chocolate ganache Topping
- ½ cup heavy cream
- 5 ounces dark chocolate chopped
- 1 teaspoon corn syrup (optional)
Directions
For the crust
- Pulse Oreo cookies, with filling, in a food processor until finely ground. Transfer crumbs to a medium bowl, add melted butter, and stir until combined and moistened. Press the mixture onto the bottom and up the sides of pan - a 9-inch (23cm) tart pan.
- Chill in fridge or freezer for 30 minutes to firm up while you make the caramel and before adding the filling. (If possible, I recommend to bake the crust in a 350F/180C preheated oven for 8 minutes, then let it cool completely on a wire rack before adding the filling. This will make the crust more crisp and less soft.)
For the Caramel Filling
- Heat sugar, corn syrup and water in saucepan over medium heat.
- Heat, stirring constantly, until the sugar dissolves and the sugar syrup is bubbling. Stop stirring completely and allow it to boil undisturbed until it turns a deep amber. This will occur right around 350 degrees. this takes approx 10 minutes.
- Immediately remove it from the heat and slowly and carefully pour the hot cream into the caramel. It will bubble up furiously. Then whisk in butter, vanilla and sea salt until smooth. Pour into shell and chill in freezer for 30 minutes until set but not frozen or in the fridge for about 1-3 hours.
For the chocolate ganache
- Place chopped chocolate in a glass bowl along with the corn syrup. Bring heavy cream to a simmer in a saucepan or for 30-60 seconds in the microwave. Pour hot cream over the chocolate, let sit for 1 minute it will start to melt, then whisk until completely smooth.
- Pour ganache over chilled caramel, and smooth or swirl with an offset spatula. Allow chocolate to set at room temperature or freeze for 15-30 minutes. Sprinkle with flaky sea salt before serving. Cut into thin slices while well chilled. Lightly cover tart with plastic wrap and store chilled.
Tips and Notes for making the best chocolate caramel tart:
For the CRUST:
- Feel free to use any cookie base you like. If you are using graham cracker crumbs or other biscuits the ratio should be 2 ½ cups cookie crumbs to ½ cup of melted butter.
- Can I bake the crust? YES you definitely can bake the crust. Although this is a no bake recipe for a more crisp cookie crust its always recommended to bake the crust for 8-10 min at 350 degrees F then allow to cool. This of course is not necessary but it will give you a more crisp crust.
For the CARAMEL
Patience is KEY with the caramel filling. Please don’t be intimidated to make caramel. Just be patient and don’t be tempted to turn up the heat too high to speed it up! You must be patient as trying to speed it up will quickly give you burned caramel sauce.
- I like to use a saucepan with a light-colored interior, such as an enameled pan, so that I can easily see the caramel change colors. A dark pan will make it much harder to note the color. And make sure it is larger than you think you will need, since the caramel will bubble up when you add the cream.
- A Candy thermometer is not necessity to make caramel but it is handy to have. That being said they aren’t always accurate. Many times it’s best to rely on the color of the caramel as opposed to the temperature. You want to look for a dark dark amber/light copper color. However, dark amber goes to burnt in a matter of seconds. If using a thermometer, start paying close attention at about 340 degrees. Once the color deepens, pull the mixture from the heat.
- I like to set each layer of this crust in the freezer because it takes way less time between layers for them to set but if you prefer to chill the tart layers in the fridge please do so. I would allow 1 hour each of chilling for the caramel sauce and the ganache in the fridge.
- Slice tart while its chilled so its easier to slice into even pieces. Once the caramel layer starts to soften it gets a bit messy which is totally normal (just think giant caramilk bar). Cut with a hot, dry knife just before serving. You can serve slices chilled or allow them to come to room temp for a few minutes before serving.
- A cool storage tip I got from Smitten Kitchen is to spray two small strips of foil with nonstick spray and press them against the cut/open sides of the tart and wrap them tight; this will keep it from spilling out in the fridge.
Recipe Notes
- If you would prefer to use store-bought caramel sauce you can, just make sure to use real caramel spread not caramel sauce otherwise it won’t set. Make sure it’s room temperature when you pour it into the tart base and allow enough time for it to set in the fridge or freezer