Homemade Thin Mints
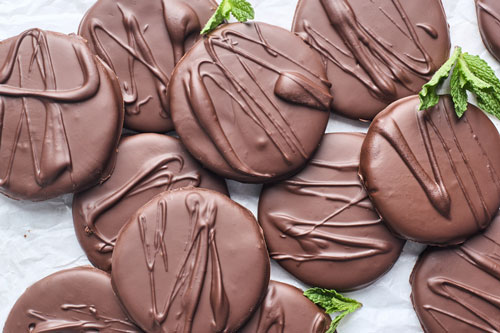
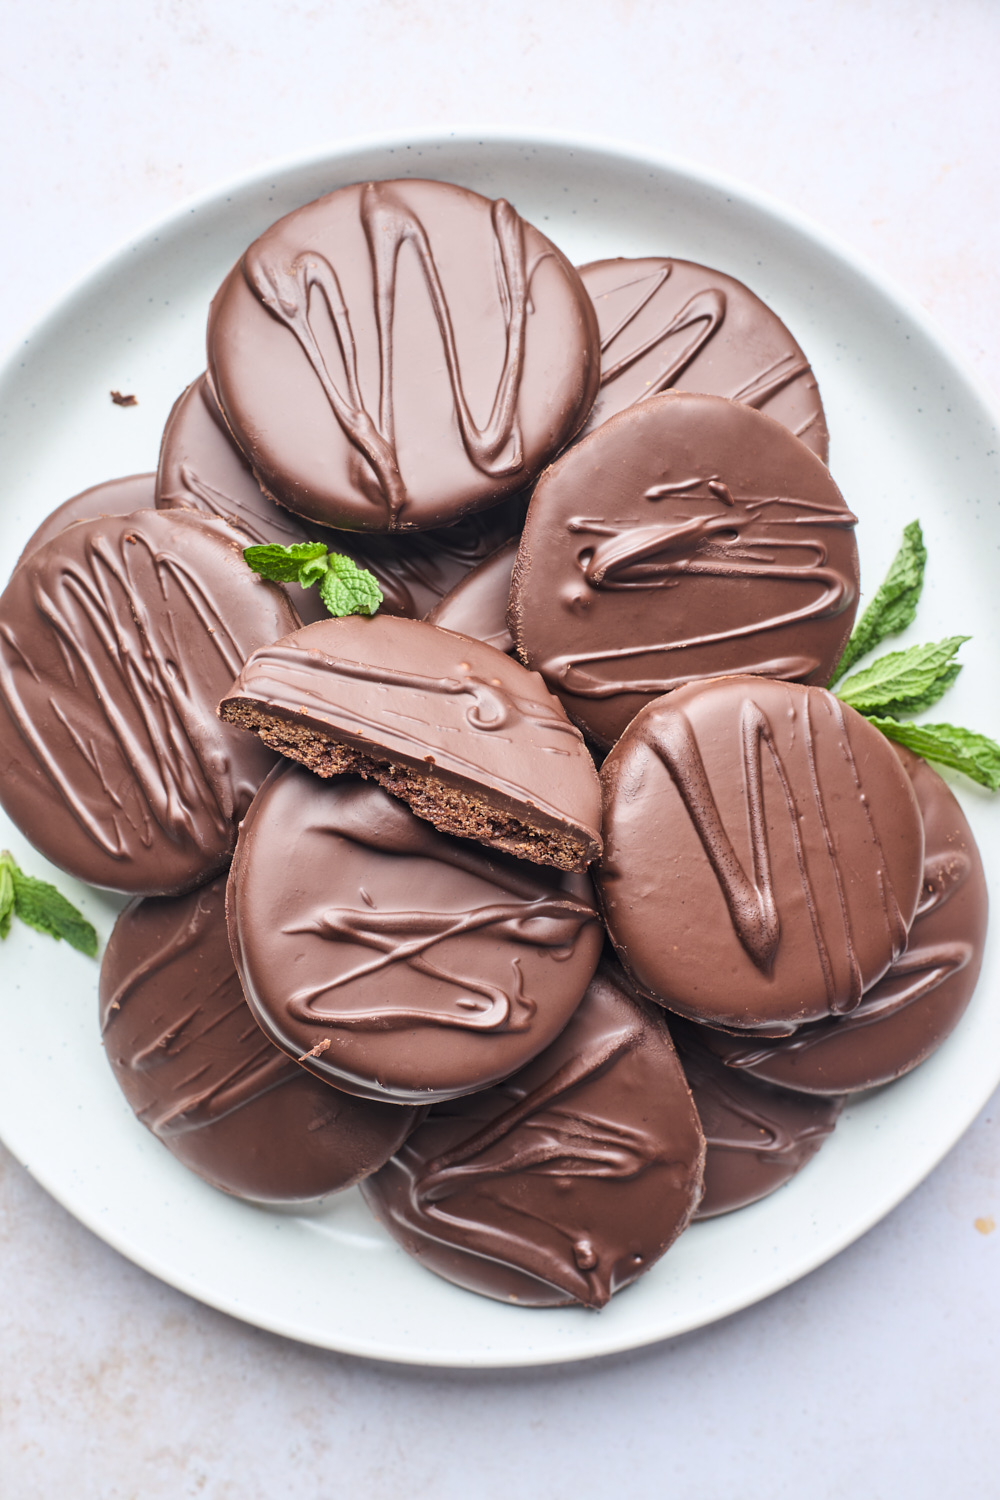
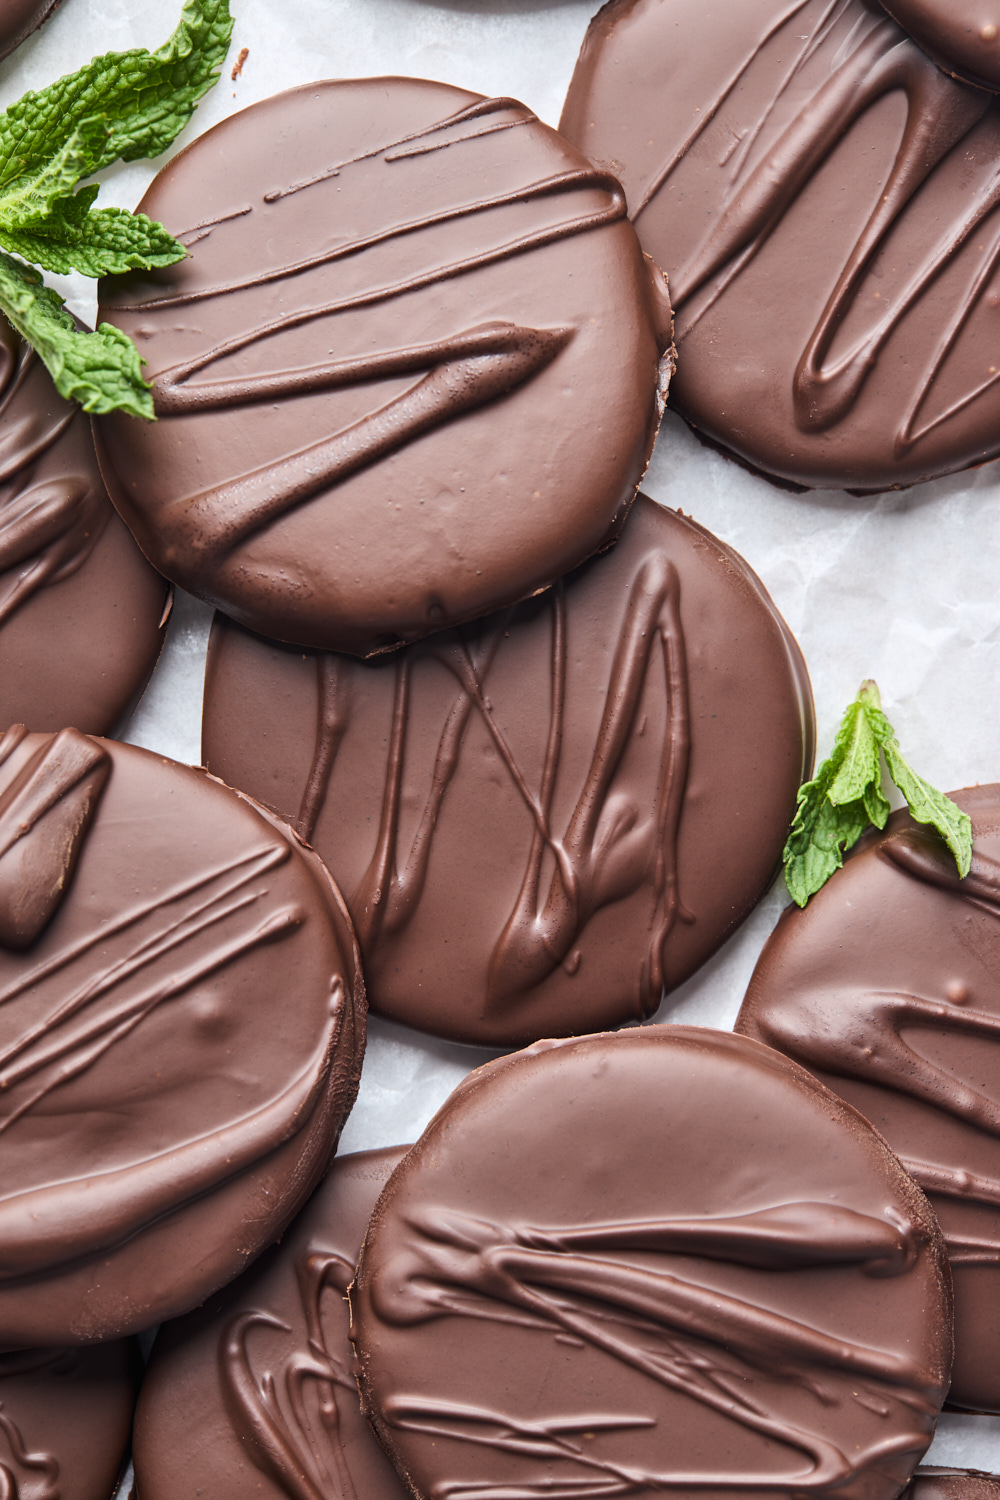
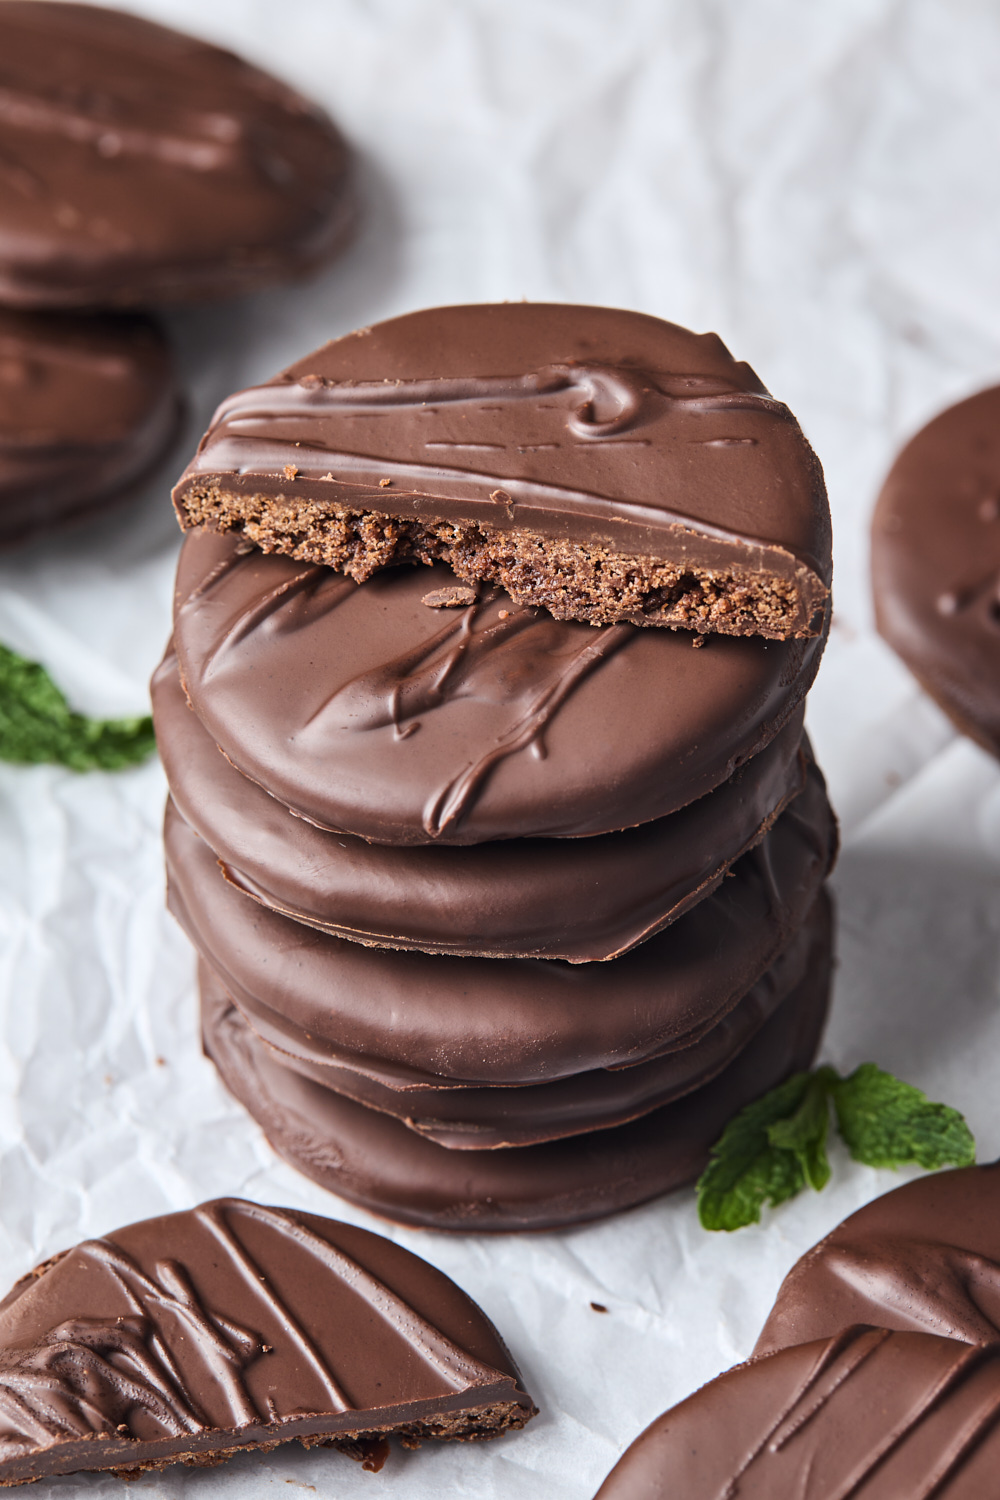
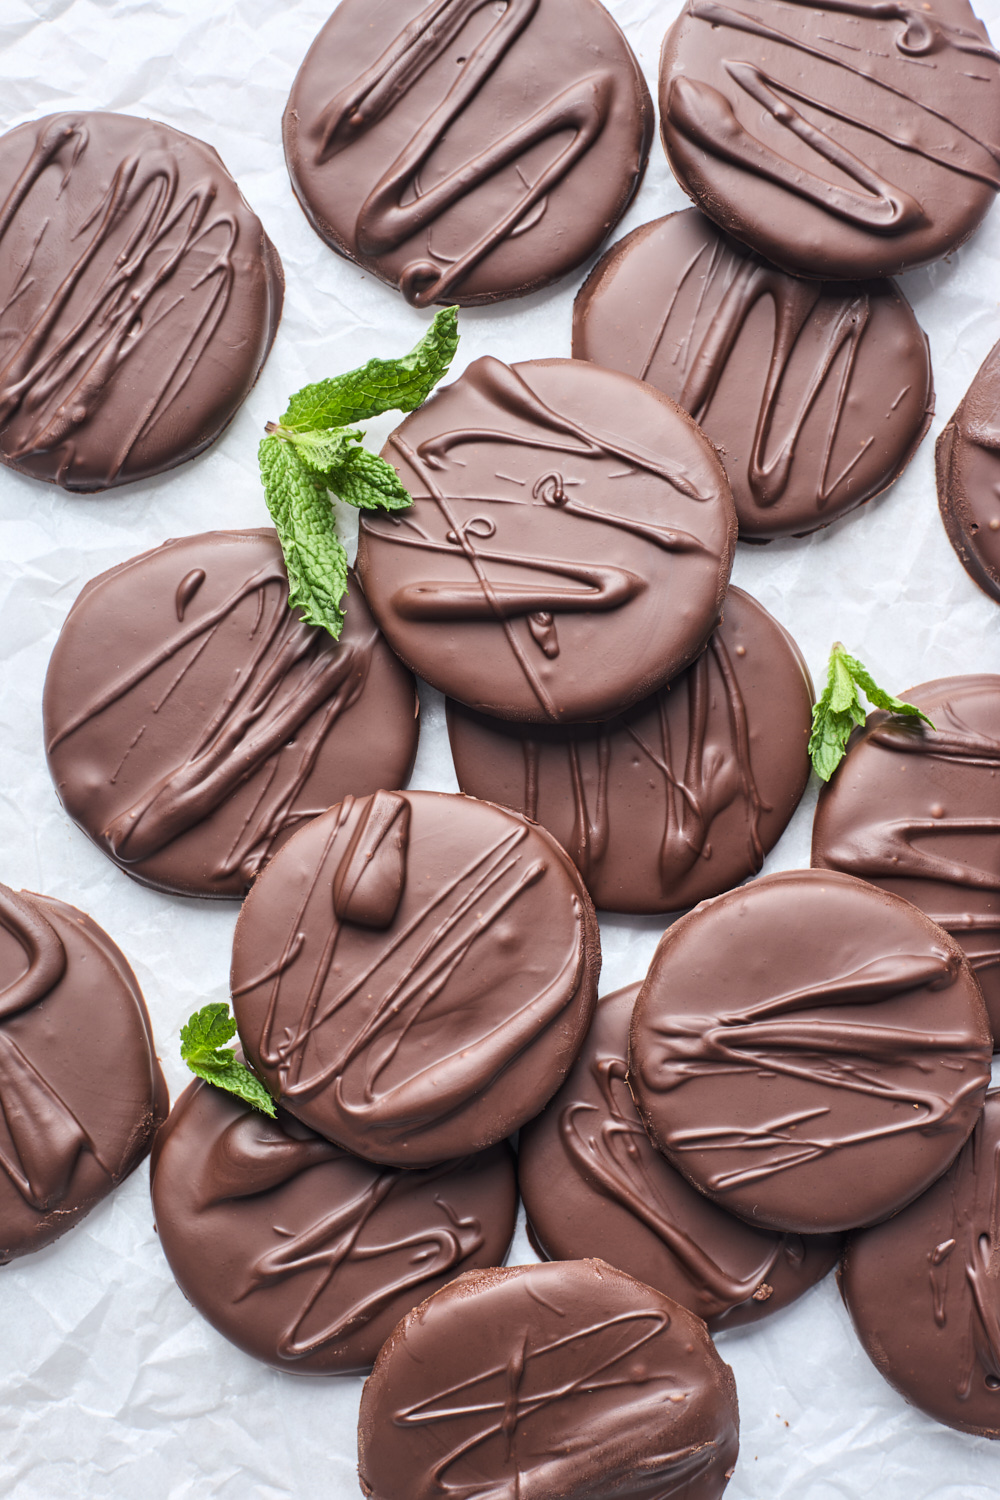
These homemade Thin mint cookies are crisp mint chocolate cookies coated in chocolate. They are irresistible and easy to make and everyone will rave about them. The perfect balance between mint and chocolate will have you going back to the cookie jar over and over again. The dough can be made ahead and frozen or the fully baked cookies can be frozen for a quick snack. All you need for this thin mint recipe is some high-quality cocoa powder, peppermint extract, and pantry staples! The result is a crispy cookie with the perfect balance of mint and chocolate. This recipe can be whipped up pretty easily and are perfect to cozy up with a warm cup of hot cocoa or milk. I love them chilled - I cannot resist that cool minty flavour and crispy crunch of these tasty biscuits!
What are thin mints?
Thin Mints are the quintessential Girl Scout cookies, largely unchanged since 1951 in the USA. Thin mints are a crunchy crisp mint and chocolate-flavored cookie coated in minty chocolate. They are flavored with peppermint oil to achieve that delightful minty cool flavor. I never grew up eating them and never was a guide but I’m a fan of all things chocolate and have developed a true love for minty treats especially when they are combined with rich dark chocolate.
Thin mint cookie ingredients
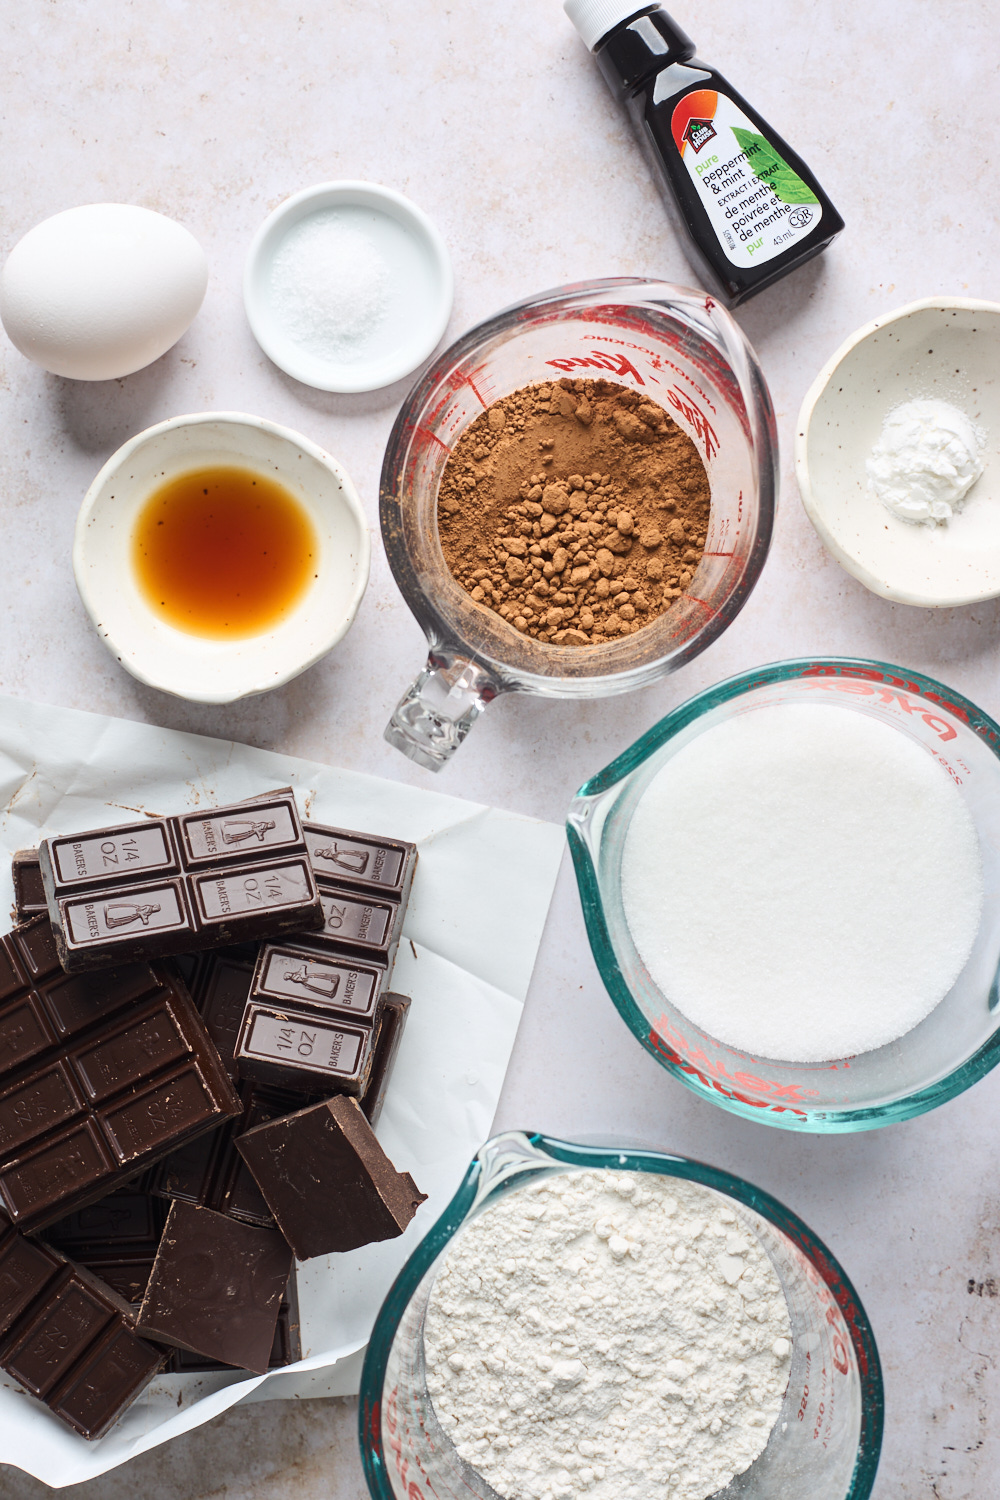
- All-purpose flour: simple all purpose flour is all you need for this recipe
- Cocoa powder: Dutch process unsweetened cocoa powder is what this recipe calls for. A good quality one will give you a richer flavour in your cookies.
- Baking powder: the baking powder aids in the rise of the cookie to make it slightly airy.
- Salt: a touch of salt balances out the sweetness from the chocolate and sugar.
- Unsalted butter: must be softened to room temperature
- Granulated sugar: sweetens the cocoa powder and cookie.
- Large egg: acts as the binding agent that holds all the ingredients together.
- Vanilla extract: adds a touch of vanilla flavour to the cookie.
- Peppermint extract: avoid using just mint extract which has more of a spearmint taste. Peppermint extract has a lovely cool mint taste that blends beautifully with the chocolate.
- Dark or semisweet chocolate, chopped: Use high quality melting chocolates. I like using bitter sweet or semi sweet because it’s less sweet and balances the sugars of the cookie. But if you prefer to use white chocolate or milk go for it
- Vegetable oil: thins out the chocolate to make it thinner and more manageable to dip.
Helpful hints and Tips for making this homemade thin mints recipe:
- I found that if you are using a double boiler to melt chocolate, leaving the bowl of chocolate over the double boiler while dipping kept cookies will keep it at the optimal consistency. Just give the chocolate a stir after every second cookie or so. If you are microwaving you may need to microwave a couple times in between for a few seconds to keep the chocolate toppings nice and fluid.
- Use a fork to help dunk each cookie. When lifting the cookie out of the bowl of melted chocolate, let any excess chocolate drip off through the fork’s prongs. If the cookie gets stuck on the fork, a toothpick is helpful to slide the cookie off.
- Slice and Bake Option: Roll the cookie dough into two 2-3 inch diameter logs, then chill for at least 1 hour as directed above. Slice each into 16-18 cookies, then bake as directed in recipe.
Make Ahead & Freezing Instructions:
- Baked and coated thin mint cookies can freeze well up to 2-3 months.
- Cookie dough can be wrapped and chilled for up to 2 days
- Cookie dough can be frozen for up to 3 months. Then allow to thaw overnight in the refrigerator. Then allow to come to room temperature for about 1 hour. Then roll and continue with the recipe as directed.
More sweet treats you will love:
Recipe
Ingredients
For the biscuits
- ½ cup (1 stick) butter, room temperature
- 1 cup white sugar
- 1 egg, room temperature
- 1 teaspoon pure vanilla extract
- ¼ teaspoon peppermint extract
- 1 cup of all purpose flour
- ½ cup unsweetened cocoa powder
- ½ teaspoon salt
- 1 teaspoon baking powder
For the topping
- 14 ounces quality semi-sweet chocolate, coarsely chopped
- ½ teaspoon canola or vegetable oil
- ¼ teaspoon peppermint extract
Directions
For the cookies
- Whisk together flour, cocoa powder, and salt.
- Beat together butter and sugar until light and fluffy. Mix in egg, peppermint extract and vanilla extract
- Mix flour mixture/ dry ingredients into wet ingredients in two additions until well combined. Roll dough then flatten into disk.
- Wrap dough in plastic wrap, and refrigerate for 15-30 min or until dough is firm enough to roll. (You can chill up to 2 days. If you refrigerate overnight,allow the dough to thaw for 10 minutes.)
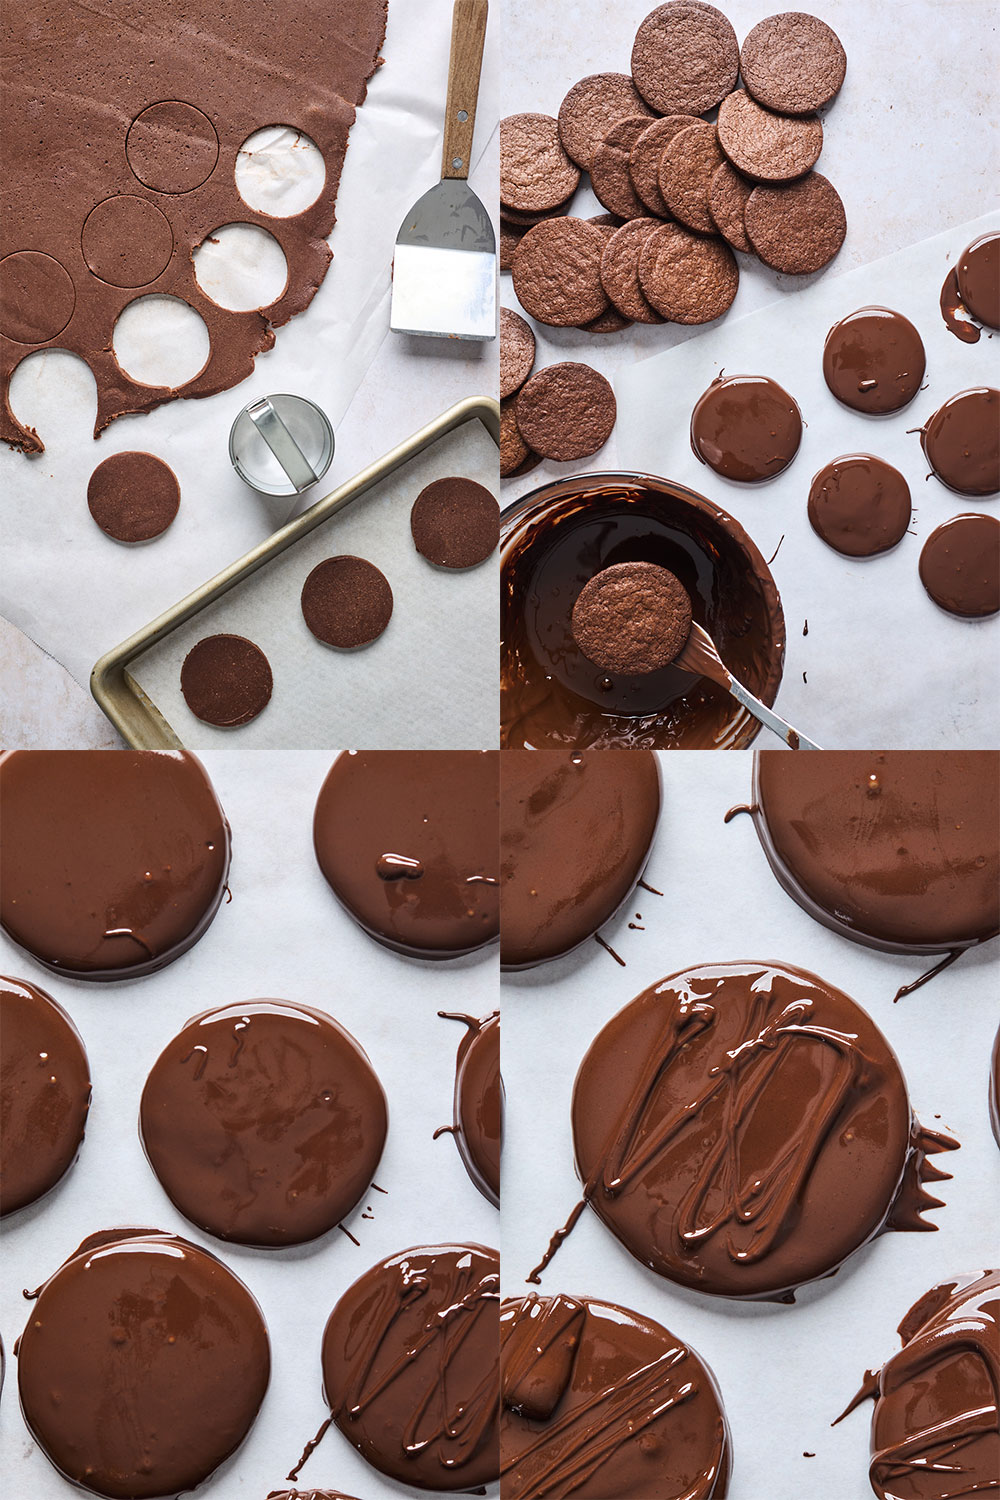
- Roll out dough on floured work surface or between two pieces of wax or parchment paper to 1/8” inch thick. Cut with desired cookie cutters (I used a 1.5” circle cookie cutter) and place on prepared baking sheets with Silplat or lined with parchment paper 1 and ½ inches apart. Gather the scraps of dough, reroll and chill to continue cutting and baking.
- Optional: Refrigerate cookies 15 minutes prior to baking to help them retain their shape.
- Preheat oven to 350°F while cookies are chilling. Bake for 10-12 minutes at 350°F or until tops of cookies look matte. Allow to cool 5 min in pan before transferring them to wire rack to cool completely.
For the chocolate coating
- Chop chocolate into very small pieces. Place in a glass bowl along with the oil and microwave in short 15-20 second bursts. Stir in the peppermint extract. Feel free to add more peppermint as you see fit. (Alternatively you can use a double boiler to melt the chocolate)
- Gently drop the cookies, one at a time, into the coating. Turn to coat entirely, then lift the cookie out of the chocolate with the fork and bang the fork on the side of the pan until the extra coating drips off. Place on a piece of parchment paper or wax paper, and repeat for the rest of the cookies. Place the cookies in the refrigerator or freezer to set for 10 min.
- Cover and store leftover cookies at room temperature for up to 2-3 days or in the refrigerator for up to 1 week. I always chill mine in the fridge or freezer.
Recipe Notes
- The thicker the cookies are the longer they will need to bake. That is why I have a range for the baking time so please be mindful of that.
- The amount of chocolate in the recipe is for a thin coating for the cookies - if you would like a thicker coating on them make sure to double the amount of chocolate, oil and peppermint extract.
- Slice and Bake Option: Roll the cookie dough into two 2-3 inch diameter logs, then chill for at least 1 hour as directed above. Slice each into 16-18 cookies, then bake as directed in recipe.