Butter Tart Bars
 bars
bars
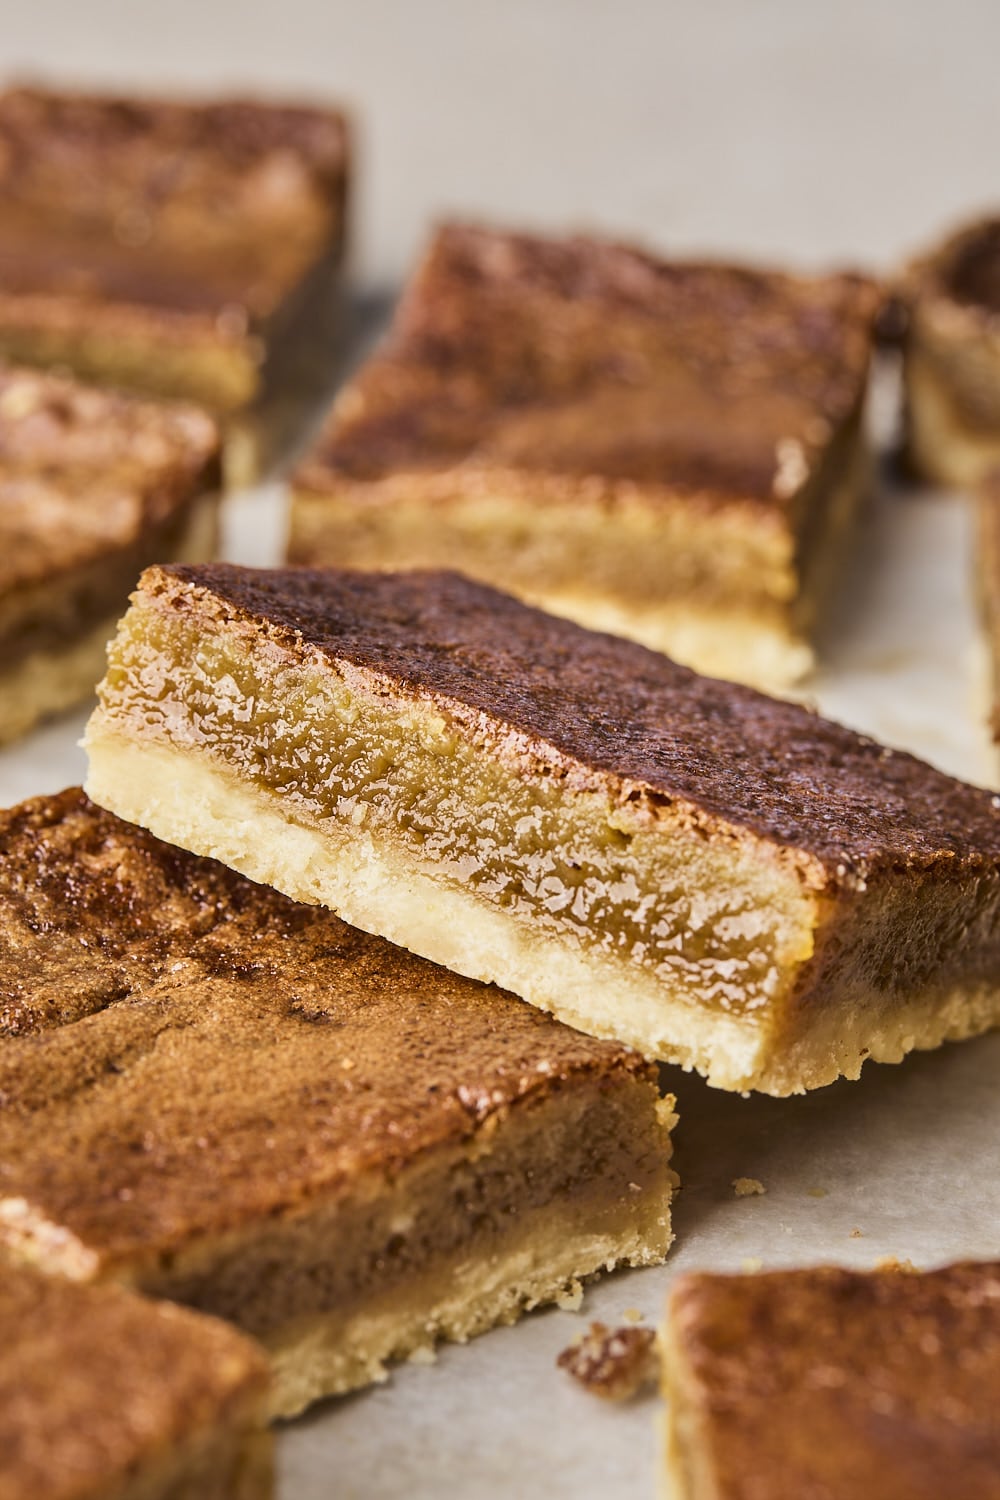
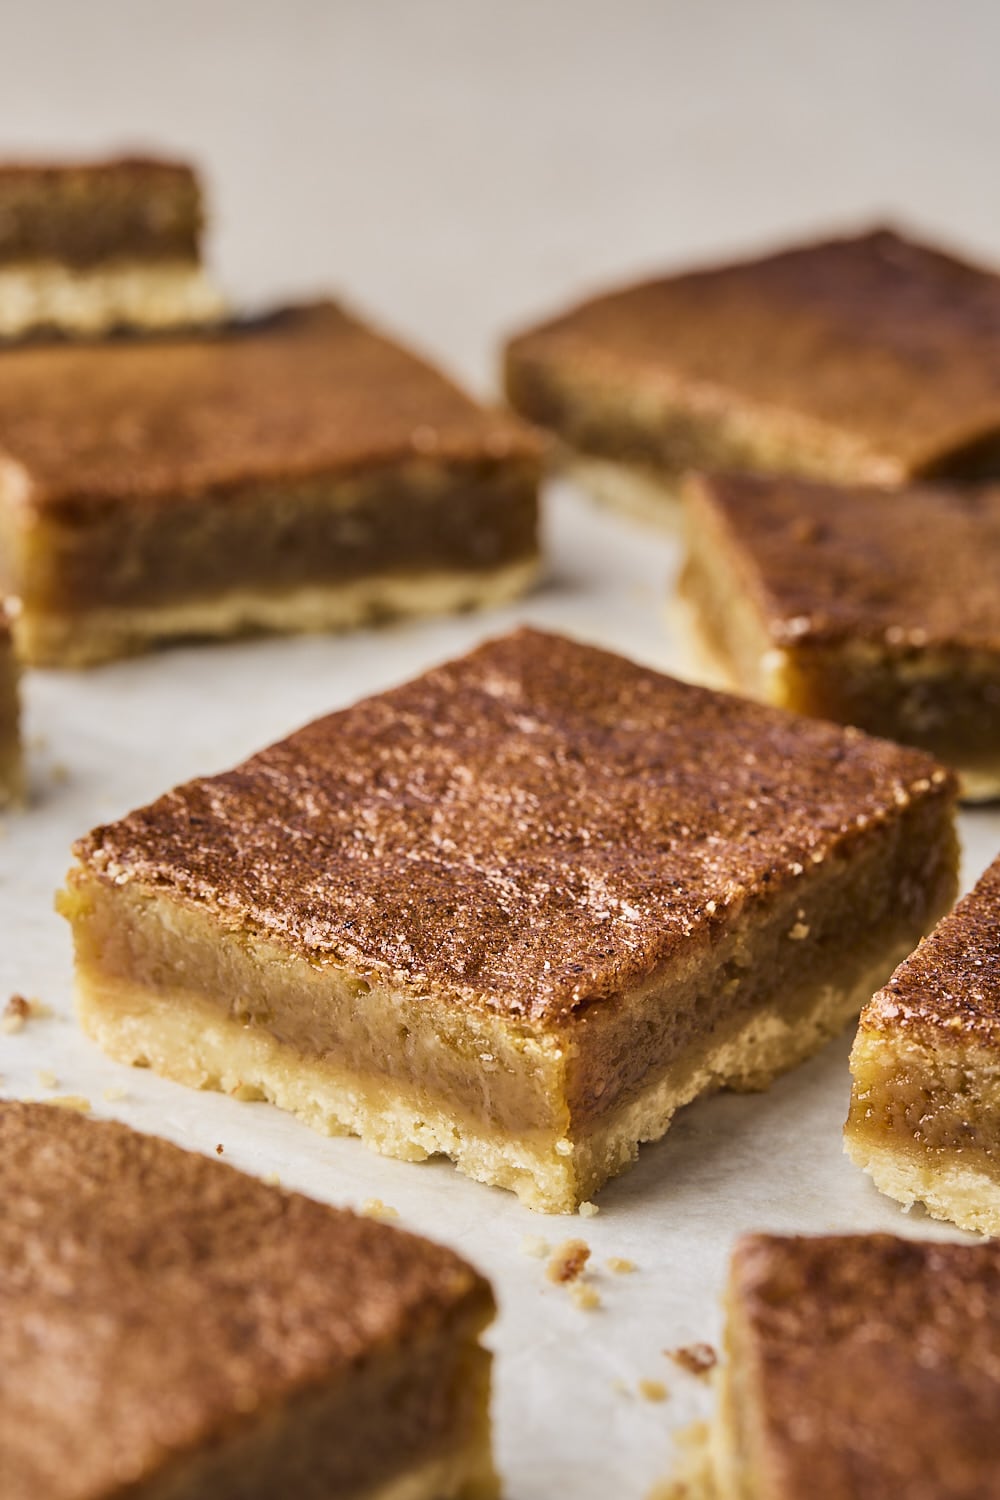
We love traditional butter tarts - they are a classic Canadian treat that we cannot get enough of - but let’s be real, they do take time and effort to make homemade pastry and to shape them and etc - so we make these butter tart bars instead. They are a definite crowd-pleaser and have all the butter tart taste without all the work. Buttery shortbread crust with a creamy sweet butter tart filling. They are easy to make with very few ingredients and are the perfect sweet treat with a strong cup of coffee or tea.

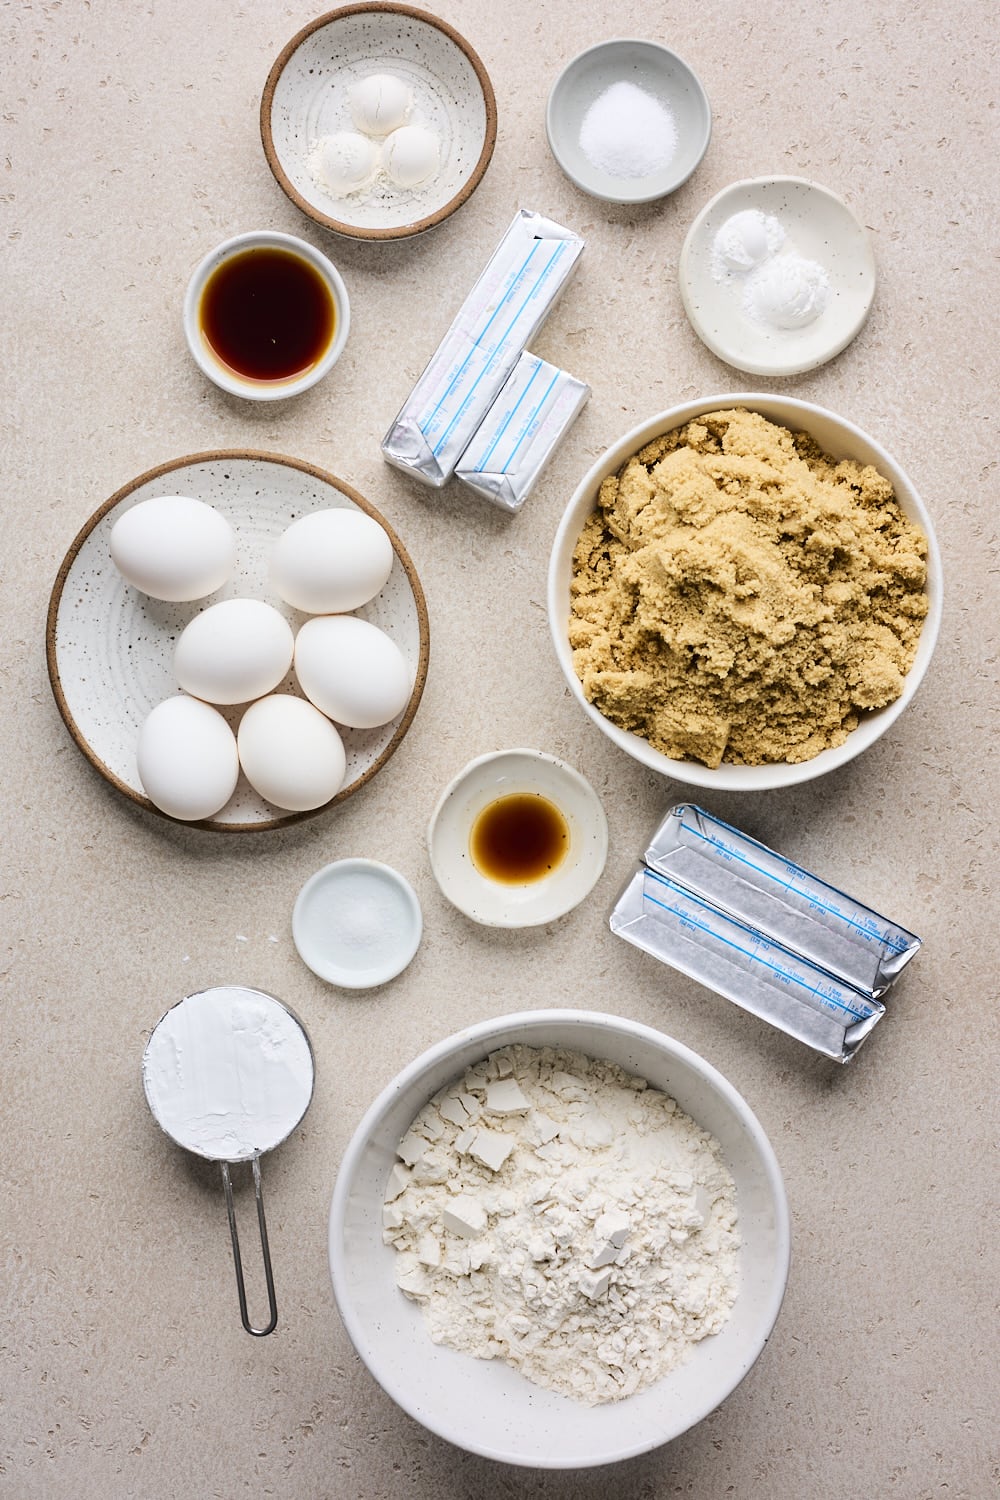
Butter Tart Square Recipe Ingredients
- ALL PURPOSE FLOUR: This will be for the shortbread base, as well as the filling. I use all purpose flour and have not tested these with gluten free flour.
- BUTTER: The crust is a shortbread-style, so you will definitely need butter for that and also for the filling. I use unsalted butter.
- SUGAR: You’ll need icing sugar/powdered sugar for the crust and brown sugar or light brown sugar for the filling
- EGGS: 6 large eggs for the filling
- VANILLA & SALT: Important for flavor. I always use pure vanilla extract for best flavor.
- BAKING POWDER: Adding baking powder helps control overflow of the filling, adding a slight lift and preventing it from getting too dense or collapsing. We want bars that are firm but jammy not runny. When you are making tarts you have a full pastry cup or tart shell to contain the filling not in these bars so you need the filling sturdy, jammy but not too runny or too gooey.
- ADD INS: We are purist when it comes to these bars (and have a very strong preference again raisins in butter tarts and these bars) but if you wanted to add some things to them you could like: raisins / currants, pecans, walnuts - or really any nuts, chocolate chips, toffee chips etc… We typically don’t add in vinegar or lemon juice to these bars because we don’t feel they need it. We also don’t add any maple syrup or corn syrup to these bars. They are simple and uncomplicated and a great version without too many ingredient or additives.
How To Make Butter Tart Squares
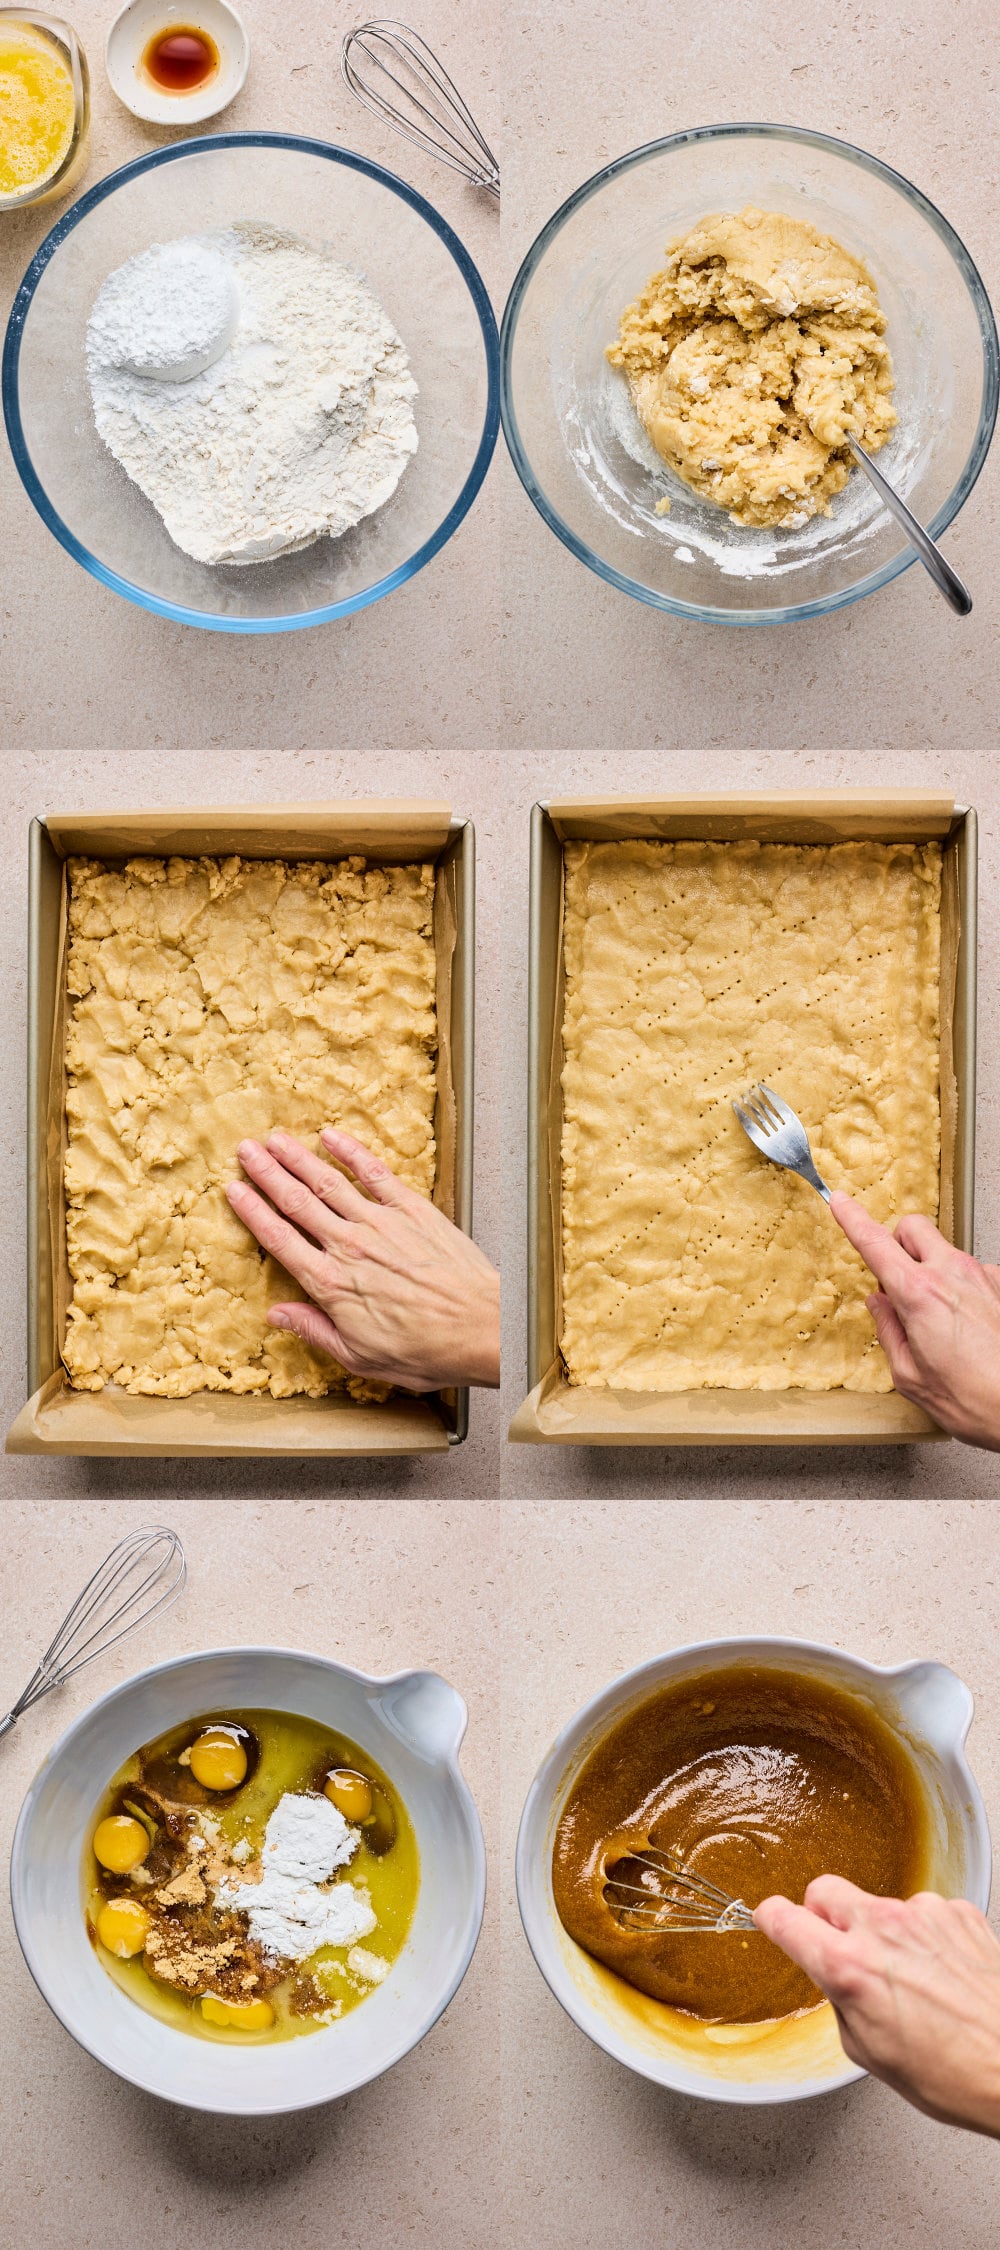
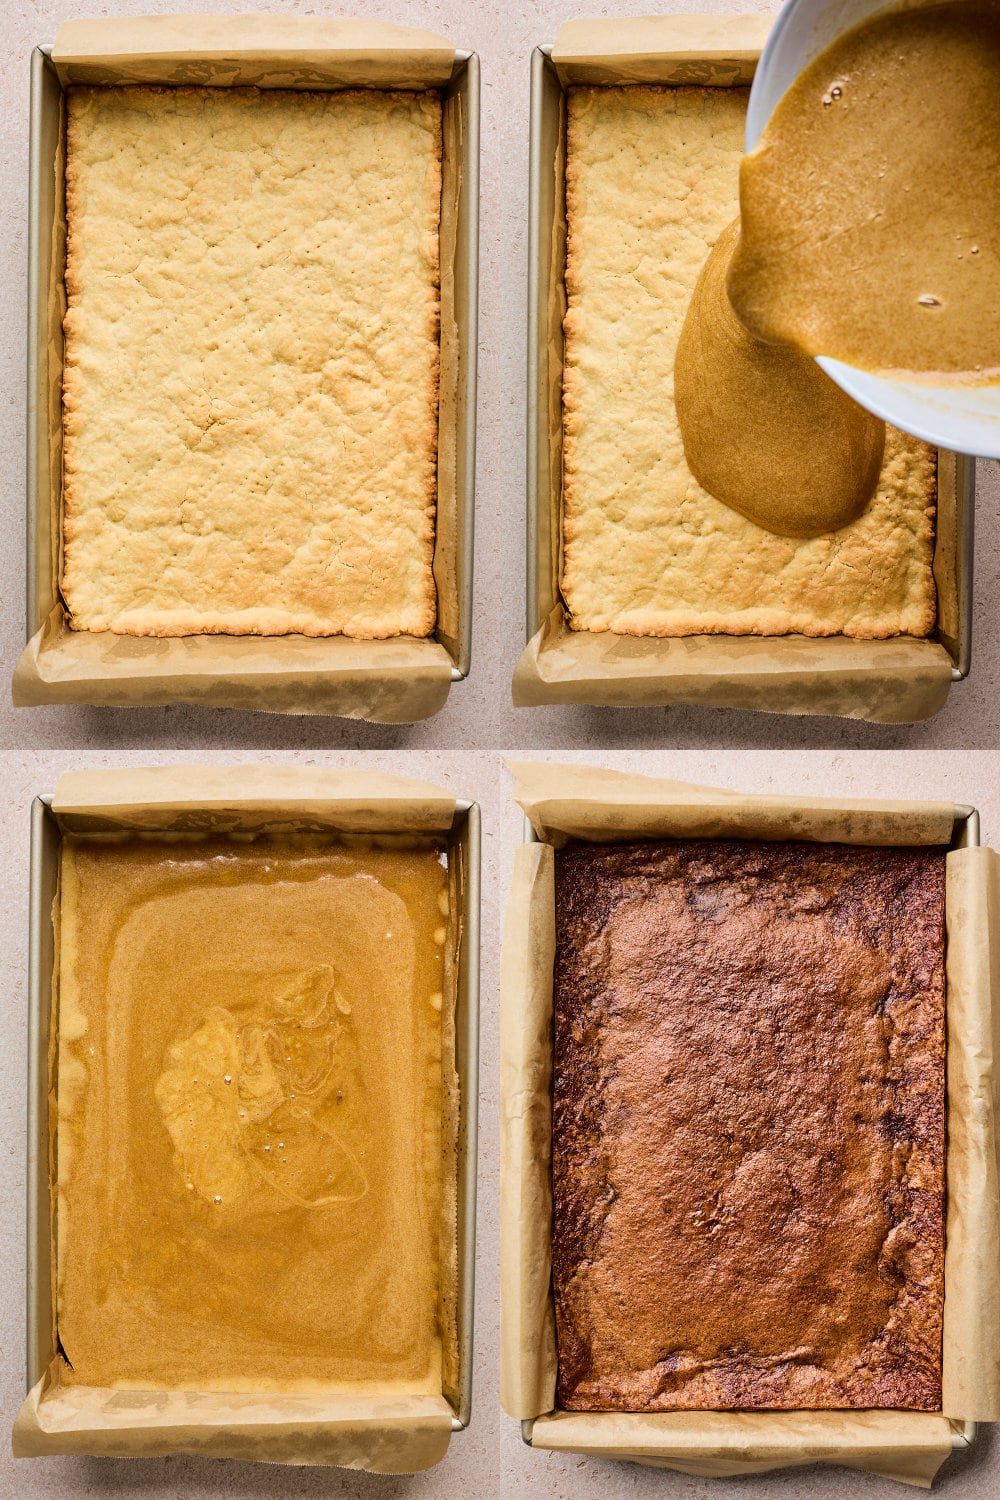
- PREPARE CRUST & BAKE CRUST: Whisk together the crust ingredients except the butter then drizzle in the melted butter and stir until combined. Empty into greased or lined pan and then press it into the base of it. Then bake.
- PREPARE THE FILLING: Combine your brown sugar and your eggs together well until fully combined then whisk in the flour, baking powder, salt, vanilla and the butter. Set aside while crust is baking, and give it one last whisk before pouring it over warm crust.
- POUR FILLING INTO CRUST & BAKE: As soon as the crust is out of the oven immediately pour into warm crust. Carefully transfer back into the oven and bake until set.
- COOL BARS: Let them cool in pan over rack until room temperature then chill for 1-2 hours until fully set before slicing.
Can You Make Butter Tart Bars in Advance?
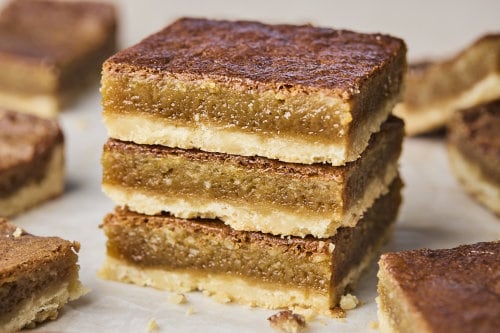
Yes they are perfect for making ahead. I usually make them the night before I am serving them, and leave them in the pan (uncut) and refrigerate. When I’m ready to serve them, I cut them up and arrange them on a platter. I like to use a nice sharp knife to slice through them for nice clean cuts.
Do You Have To Refrigerate Butter Tart Bars?
I do prefer to refrigerate the bars because it makes it easier to cut them up into nice pieces. You could leave them at room temperature and it will be fine, but the filling will get slightly soft. If you prefer them warmed up or served at room temperature that is fine but store them refrigerated. Store in an airtight container in the fridge for up to 4 days.
Can You Freeze These Butter Tart Bars?
Yes you absolutely can either in the pan or individually for up to 1-2 months. Make sure everything is wrapped airtight with plastic wrap before freezing to prevent freezer burn. Allow bars to thaw in the refrigerator or heat in a 300°F oven for about 20 minutes. Tent them with foil to keep the top from over browning. Let them come to room temperature prior to serving or warm them up a little in the microwave or oven.
Butter Tart Bar Tips
- Allow filling to sit after mixing while you bake crust. This gives the filling some time to thicken - you don’t want bars where the filling is almost non existent cause it’s been absorbed by the crust or seeped under it. That would be super disappointing. This gives the flour time to soften and help thicken the top layer.
- Press crust down evenly into pan and I like to create a small lip along the edges to help contain the filling - plus using a fork to poke the top of the crust all over - not only prevents air bubbles while it bakes but also helps the filling stick and hold the crust in place.
- Pour the filling on warm pre-baked crust
- Allow pie bars to fully cool after they bake - I cool them to room temp then chill them for 1-2 hours which makes it easier to slice these guys
Some of The Best Bars On The Blog:
Recipe
Ingredients
For the Shortbread Crust
- 2 cups all purpose flour
- ½ cup icing sugar
- 1 teaspoon vanilla extract
- ½ teaspoon salt
- 1 cup melted butter, (melted and slightly cooled)
Filling
- 6 large eggs
- 3 cups of brown sugar
- 3 teaspoon all purpose flour
- 1½ teaspoon baking powder
- ¾ teaspoon salt
- ¾ cup melted butter, (melted and slightly cooled)
- 1 tablespoon vanilla extract
Directions
- Preheat the oven to 350°F. Coat a 9-by-13-inch baking pan with nonstick cooking spray and line with parchment paper, extending the paper over the edges for easier removal.
For the Crust
- For the crust: in a large bowl, whisk together the flour, icing sugar, vanilla and salt.
- Add the melted butter and stir until combined.
- Press the dough/crust mixture onto the bottom of the prepared pan in an even layer. (I like to press the edges up the side very slightly to create a bit of a lip). Poke the crust with a fork in different locations to prevent air bubbles.
- Bake crust in a preheated oven for 18-20 minutes, until lightly golden.
- Carefully remove the hot pan from the oven.
For Filling
- While crust is baking, in a large mixing bowl whisk together brown sugar and eggs together well until fully combined then whisk in the flour, baking powder, salt, vanilla and the melted butter. Set aside while crust is baking, and give it one last good whisk just before pouring it over warm crust.
Assemble & Bake
- Pour filling over warm crust
- Carefully transfer warm pan to oven and bake until browned, about 30-40 minutes or until golden over the top and filling is set or almost set. The middle will still have a jiggle or will wobble a bit but its shouldn’t be jiggly all over. (start checking doneness at the 20-25 min mark as pans and ovens vary)
- Transfer bars to wire rack to cool to room temperature and then refrigerate 1-2 hours or overnight before slicing.
Recipe Notes
- It is important to note that all baking pans and ovens are different. I baked these in a stainless steal pan which bakes these bars up evenly and quickly. Glass or ceramic pans don’t transfer heat as evenly or as quickly so please start checking the doneness of the bars at the 20-25 minutes mark. This is especially important if you are using a large pan or smaller pan than called for. The original recipe I tested called for using a 13x9 pan with 1/3 less filling which baked up way faster but left me unimpressed with the crust to filling ratio - so these take a list longer to bake cause they are pretty much ½ more filling.
- To get precise squares, trim away the edges and cut when chilled.
- These are not runny or super gooey. The filling sets well and is jammy which is great because they can stand alone without the filling pouring out of them once they are sliced. Classic butter tarts have a pastry shell to contain the sweet gooey filling - bars don’t so the filling needs to stand up to slicing.