Mixed Berry Cobbler Recipe
What is Cobbler and how is it different from Crisps and Crumbles?
Cobblers, crumbles, and crisps are all baked desserts of fresh fruit topped with some kind of pastry on top. The fruit juices bubble up into the pastry as it bakes. They all deliver a crisp and tender top crust with jammy fruit filling underneath, and beg for a scoop of ice cream. A COBBLER is a dessert consisting of a fruit filling poured into a large baking dish and covered with a cake batter, biscuit, or dumpling. CRUMBLES and CRISPS are very similar. They both contain fresh fruit with a streusel-like topping that gets baked until the fruit is cooked. They are all a delicious way to showcase and enjoy in season fruit.
I love all the berry things. I like a Berrry Crisp a Berry Pie, and a Berry muffin. But I really love berry cobbler!! Juicy sweet berries and a buttery rich biscuit topping come together. I used a combination of strawberries, raspberries, and blueberries. Choose a few of your favorite berries, or just stick to one. You never have to make this dessert the same way twice! Just keep the same ratios and you are good.
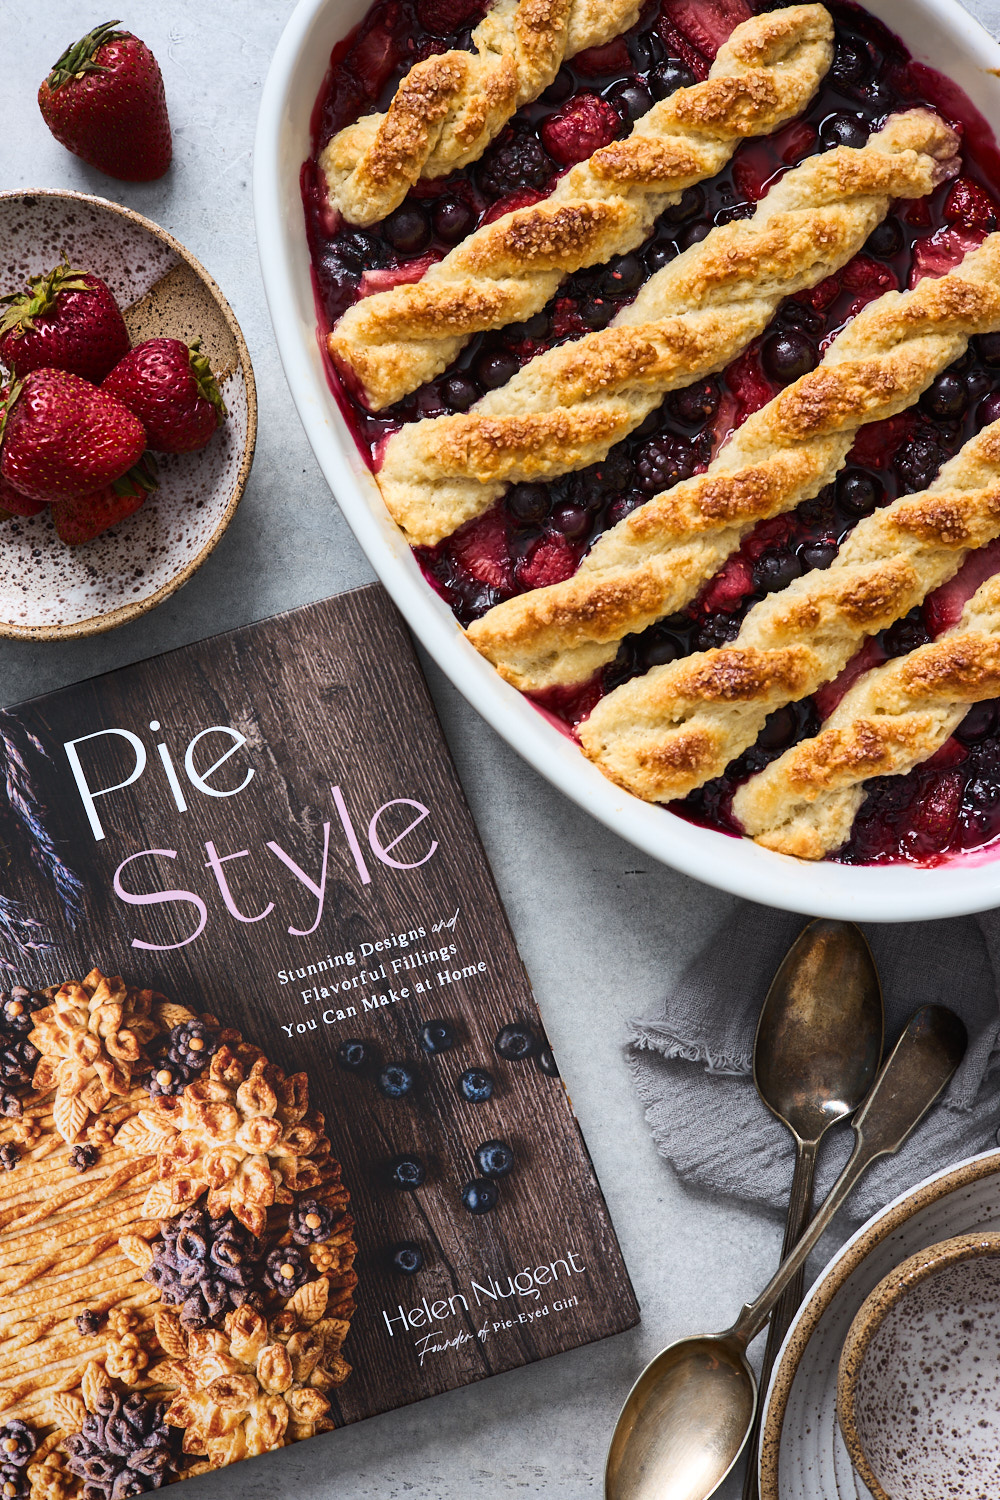
This recipe comes from one of my favourite pie book around by my sweet and talented Instagram friend Helen Nugent (@batterednbaked). Her book is called Pie Style - Stunning Designs and Flavourful Fillings You Can Make at Home. She sent me a copy and I’m so grateful for it. You can get your own copy of Helen’s Cook at Chapters Indigo or Amazon. She is a true baker at heart and like many of us - baking has really helped her cope with the ups and down of life. Whether we are procrastibaking, stress baking - it’s a happy place for many of us and a happy place to sort out feelings for Helen. When you look at her book and her Instagram account you are blown away with her beautiful pie designs. The Intricate looking pie weaving and designs are beautiful and precise. In her book she shares all the secrets to making these beautiful pies. She provides clear directions for each step as if she is there walking through each one with you. She also has excellent step by step pictures so you know exactly what you are doing and in my case what you aren’t doing.
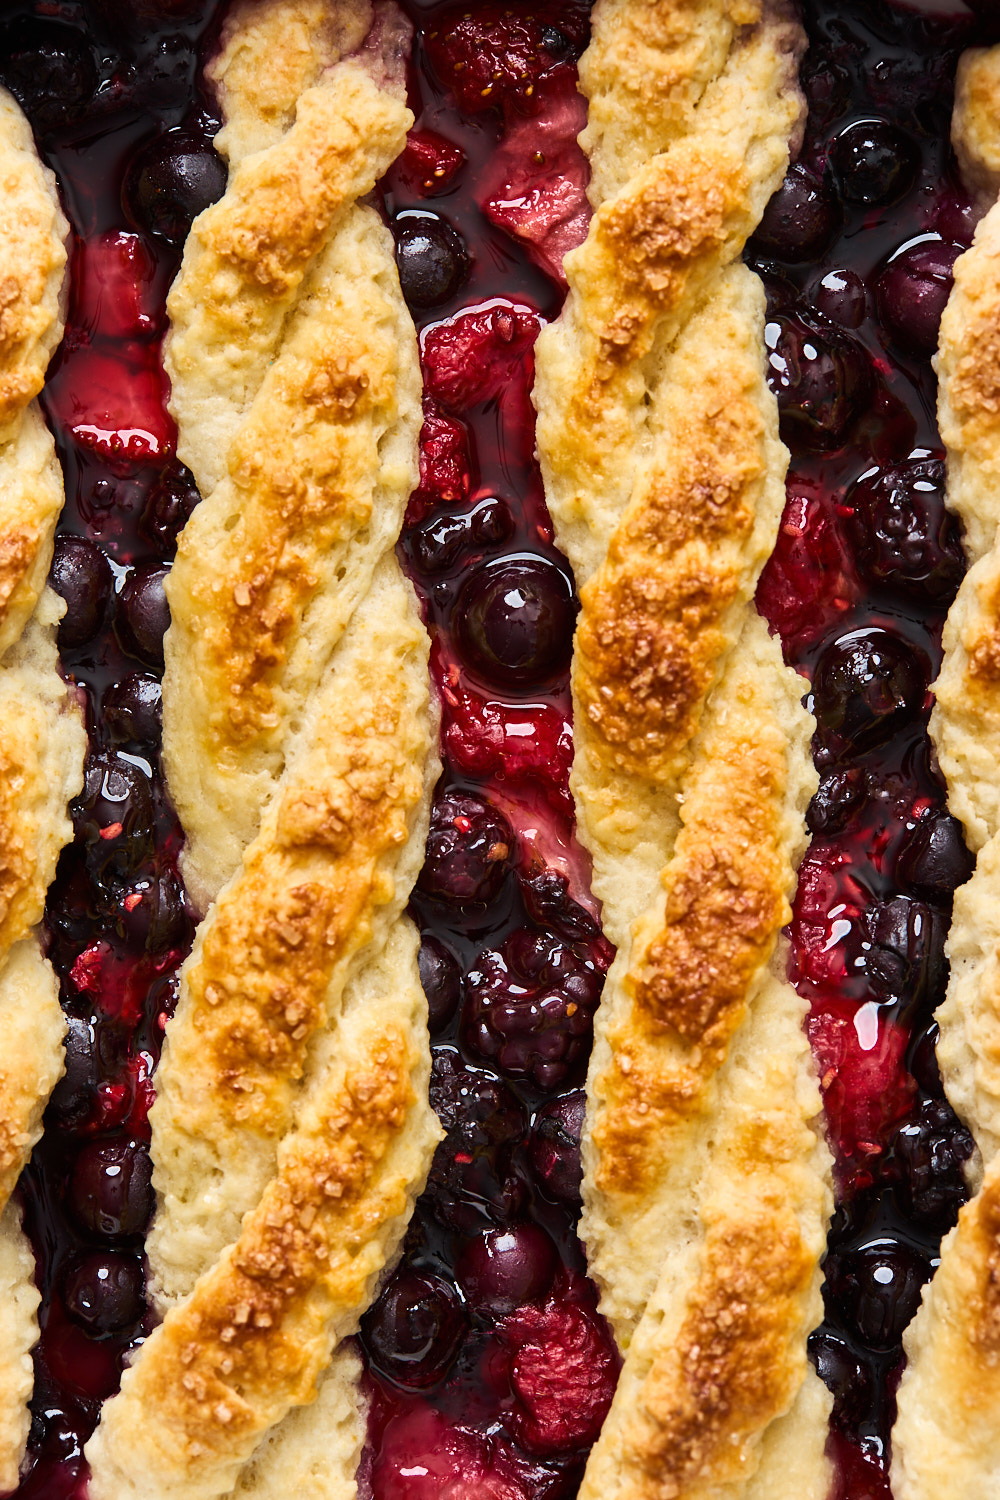
Helen calls making pies a journey and I would have to agree. She has her book laid out in a way that follows that thought too. She starts with all the baking basics like a classic or several classic pie crusts and doughs including coloured doughs - progressively reaching more intricate pie designs and techniques. You build your confidence as you work through her book. My favourite part of the book has to be the Setting Up for Success part of the book because it talks about some important pie baking tips but also Pie Fails and Fixes. It’s basically a guide and also a way to trouble shoot any pie recipe. I love that sort of thing - I like to know where I could go wrong and ways to help prevent it. (I try to include this sort things in my recipe notes as much as possible). This has been my go to guide for pie crusts and dough and inspiration for pie designs - I will keep working on my skills as I work through Helens book. In the meantime I’m sharing one of my favorite desserts from her book that looks stunning and is completely approachable for just about anyone to make. The braid is so fun to make and bakes up beautifully. In Her book Helen has a step by step guide including photos on braiding techniques - I have included a video to demo it. There are instructions below in recipe notes on how to make this cobbler without the braids with a simpler biscuit topping.
How to make Blueberry Cobbler:
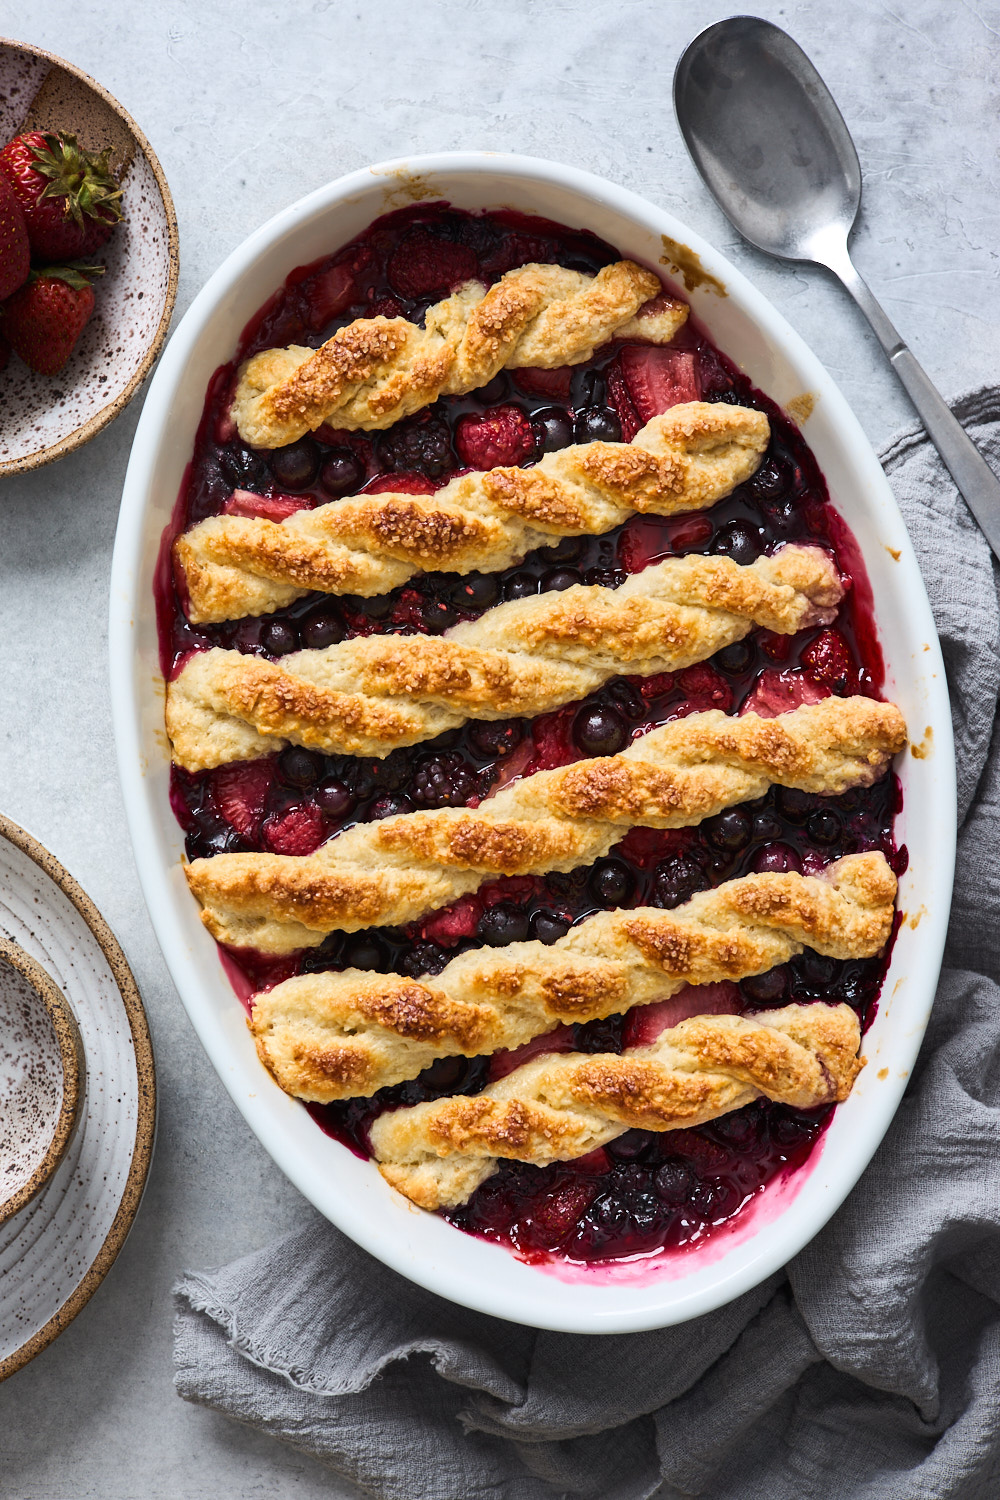
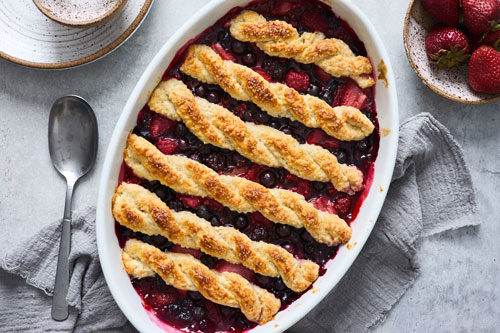
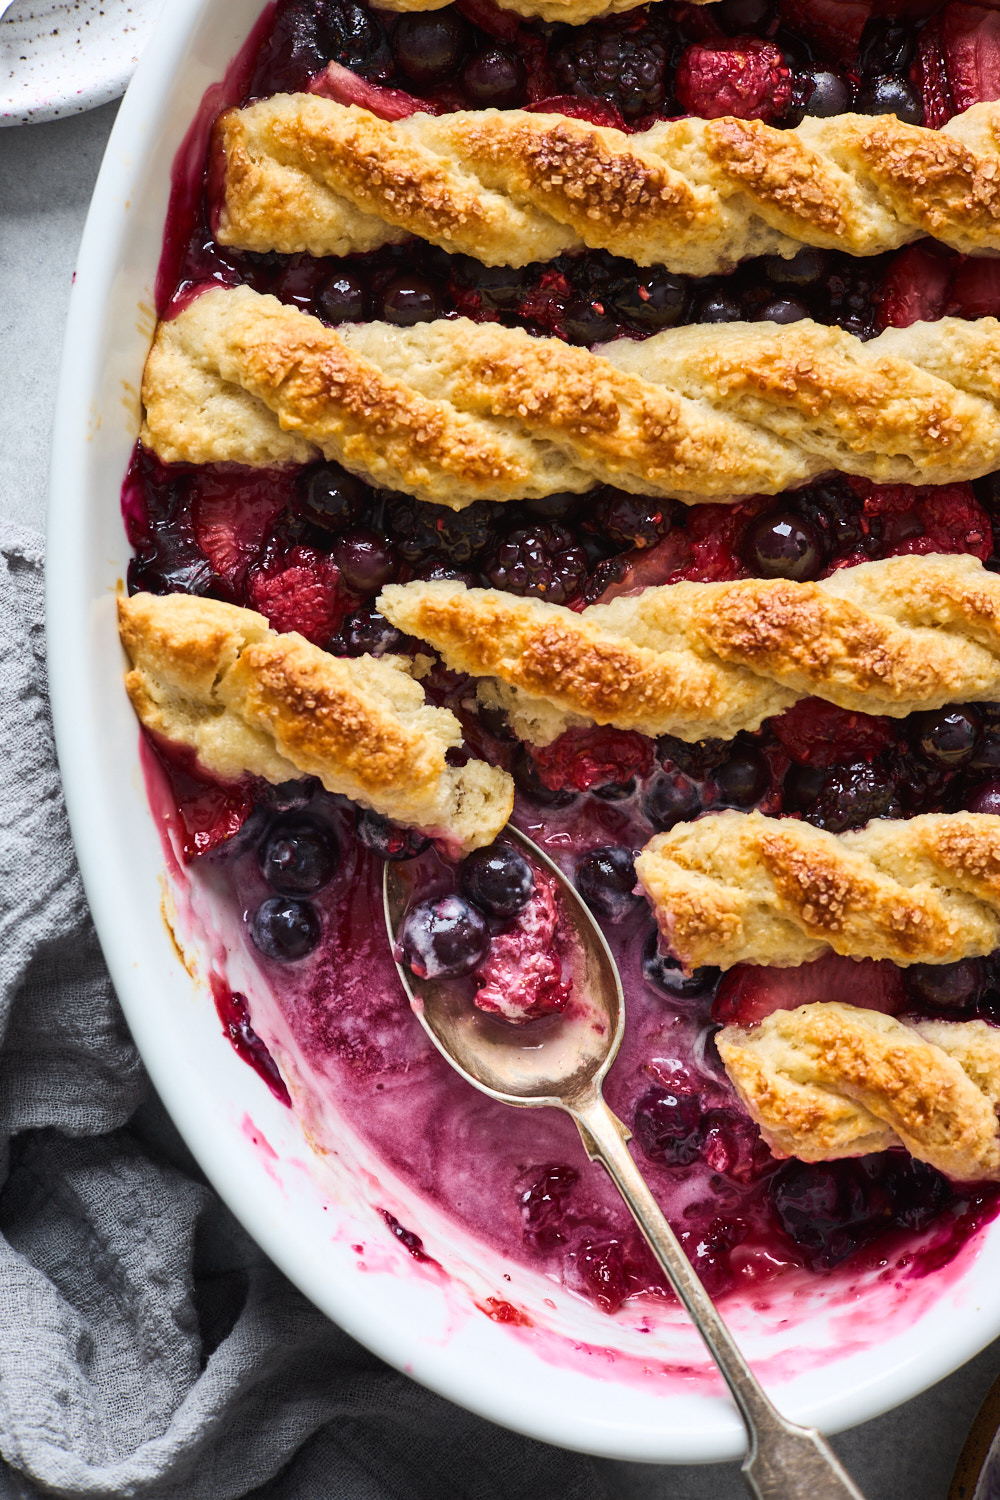
Prepare your pan: Butter/grease your 9×13 inch baking dish. Prepare the blueberries: Add blueberries, sugar and lemon juice and cornstarch to a bowl and stir to combine. Pour into prepared pan. Prepare the batter: Mix the batter ingredients together: flour, sugar, baking powder, lemon zest and salt. Stir in the buttermilk, just until combined. Knead dough a few times then roll and cut into strips to braid or slice into whatever shape you like. Place over berries in pan. Bake: Bake at 375°for about 45-50 minutes, or until golden on top.
Check out other dessert recipes, Some of my favourite fruit desserts include:
Recipe
Ingredients
- 6 tablespoons unsalted butter,chilled and cubed plus more for greasing
- 1 cup + 2 tablespoon of granulated sugar, divided
- ⅓ cup of corn starch or tapioca starch ½ teaspoon salt
- 2 cups blueberries
- 1 cup raspberries
- 1 cup blackberries
- 1 cup strawberries hulled and chopped
- 1 teaspoon lemon zest
- 1 teaspoon lemon juice
- 1 ½ cups all purpose flour
- 2 teaspoons baking powder
- ½ cup + 1 tablespoon buttermilk, chilled and divided
- Coarse sugar for sprinkling (optional)
Directions
Make the fruit filling:
- Whisk together 1 cup of the sugar with the corn starch and pinch of salt in a small bowl.
- In a large bowl toss all the berries with the lemon juice. Sprinkle over the cornstarch mixture and toss the berries to combine. Set the bowl aside. (You could also do this right in the dish you are baking them in)
Make the lemon buttermilk biscuits:
- In medium size bowl add the remaining 2 tablespoons of sugar and the lemon zest. Rub together between finger to infuse the sugar. Whisk in the flour, baking powder and salt.
- Add the butter to bowl and toss well with fork. Press the butter pieces between fingers to flatten them while working them into the dry mixture, until the butter resembles coarse meal (pea sized pieces).
- Drizzle in ½ cup of buttermilk while stirring with a fork. When the dough starts to clump together empty out on to a clean and lightly floured surface and gather it all together into ball. Knead the dough a few times until it comes together but do not overwork.
- Roll out the dough into a rough rectangle approx 6x10 inches. With a pizza cutter or knife and ruler cut the dough lengthwise into 12 ½ inch strips. Braid the pieces 2 strips per braid (see video for complete demonstration) Repeat until you have 5-6 braids. See below for alternative method without braid.
Assembly:
- Preheat oven to 375°F
- Pour fruit filling into greased 9x13 baking dish and smooth the top for one even layer. Place the braided strands evenly over the fruit. Trim the edges as needed. Brush the braided biscuits with remaining butter milk and sprinkle with coarse sugar.
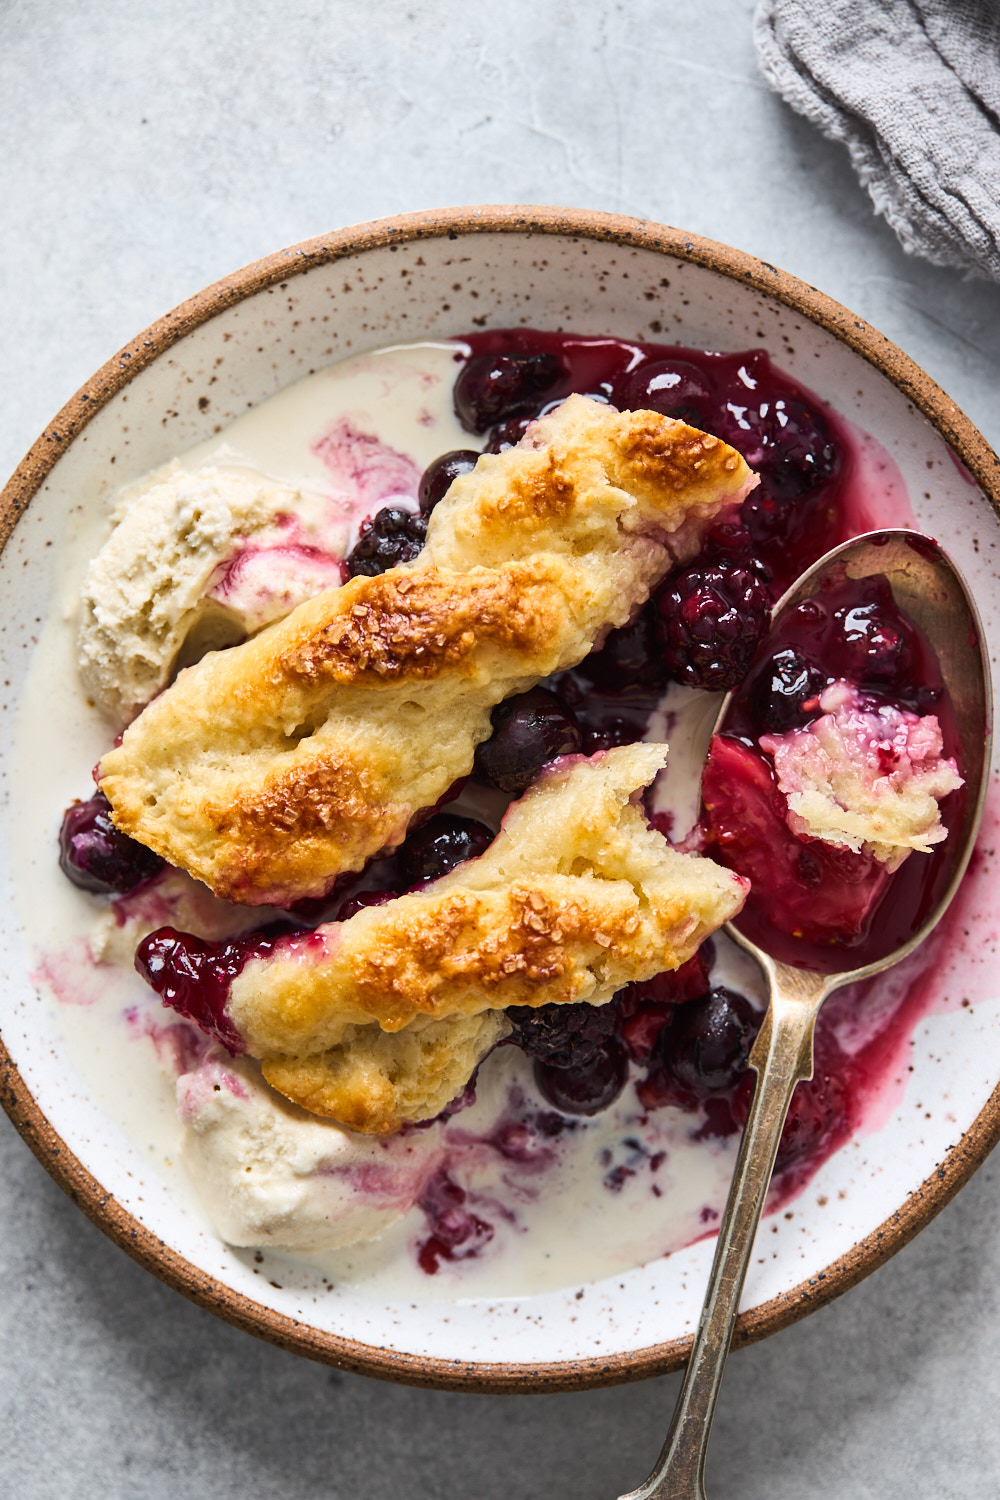
- Bake cobbler for 45 to 50 minutes or until biscuits are golden and filling is bubbling. Cool cobbler for 1-2 hours to ensure the fruit filling is set and then serve with whip cream or icecream. Leftovers can be stored refrigerated for up to 2 days
Recipe Notes
- How to store and reheat blueberry cobbler: I don’t recommend preparing this recipe ahead of time, because the biscuit topping won’t rise as much if it is not immediately baked. You can also freeze the baked cobbler for up to 3 months. Thaw overnight in the refrigerator and warm in the oven before serving.
- Can I use frozen fruit to make cobbler? Use any berries, fresh or frozen (do not thaw). Keep in mind that the juicier the berries (raspberries, strawberries), the more liquid-y the berry layer will be. Frozen berries will produce a more liquid-y layer. This makes for a sweet fruit filling. If you generally prefer yours less sweet feel free to reduce the amount of sugar in the recipe to your liking.
- If you don’t want to braid your biscuit dough simply follow these Instructions: Pat or roll dough into a 9x6” rectangle. Cut dough in half lengthwise, then crosswise 3 times, forming 8 rectangles. Arrange biscuits ½” apart over fruit. Brush tops lightly with milk and sprinkle with sugar. You could also you use a round cutter if you prefer.
This recipe is from the book Pie Style - Stunning Designs and Flavourful Fillings You Can Make at Home by Helen Nugent - found on page 103 of her book