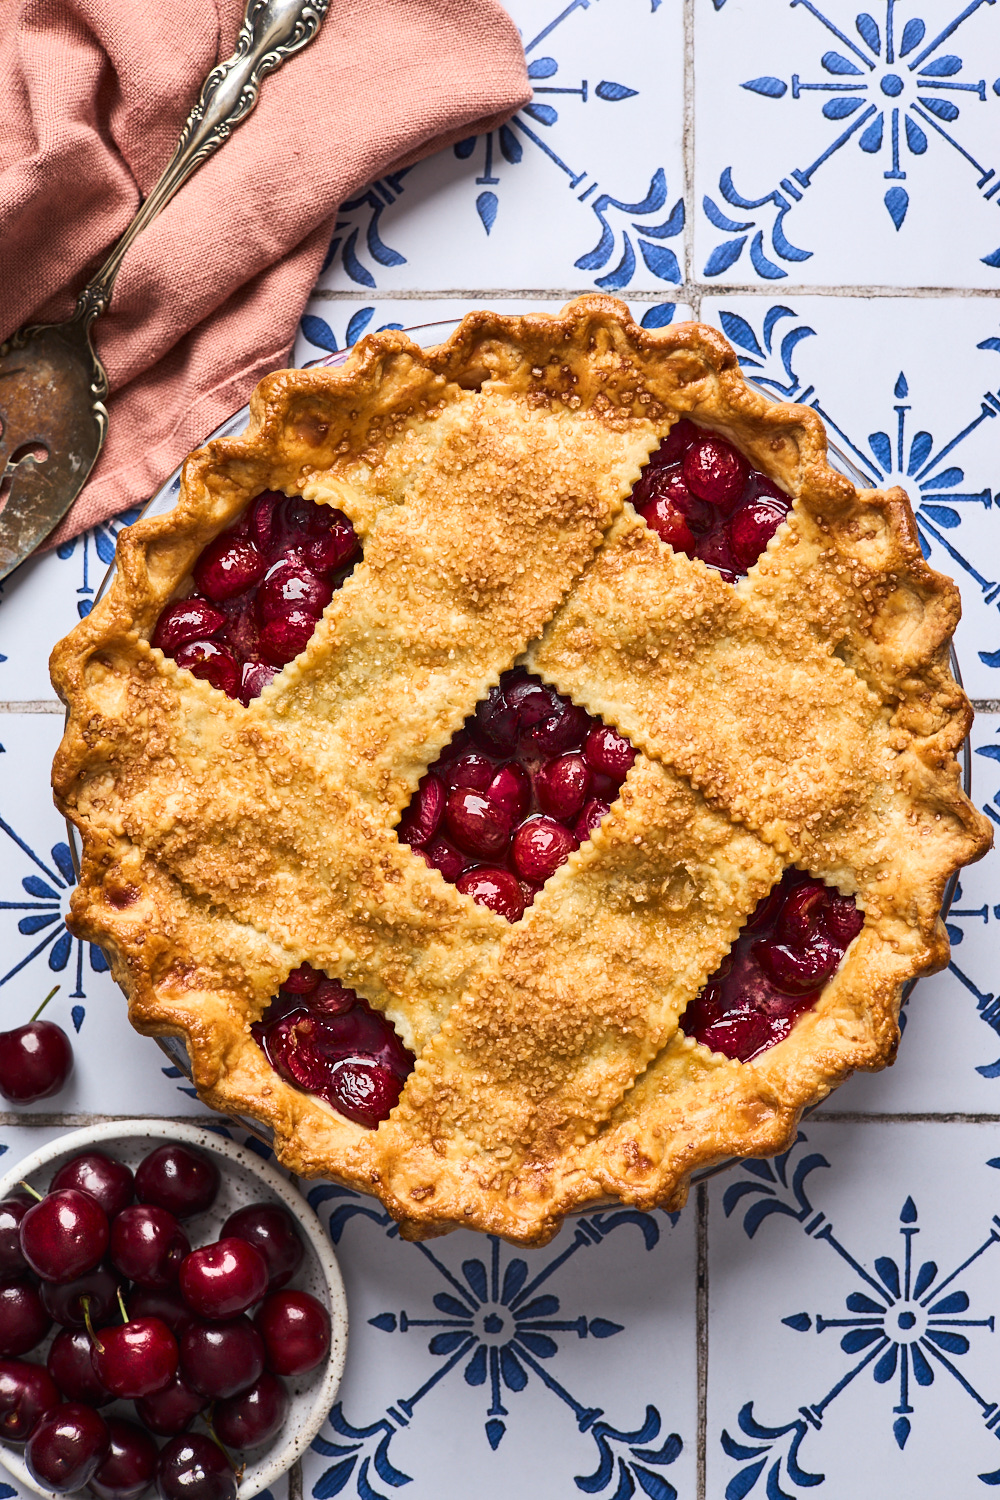
Homemade Cherry Pie
Updated 3rd Aug 2023
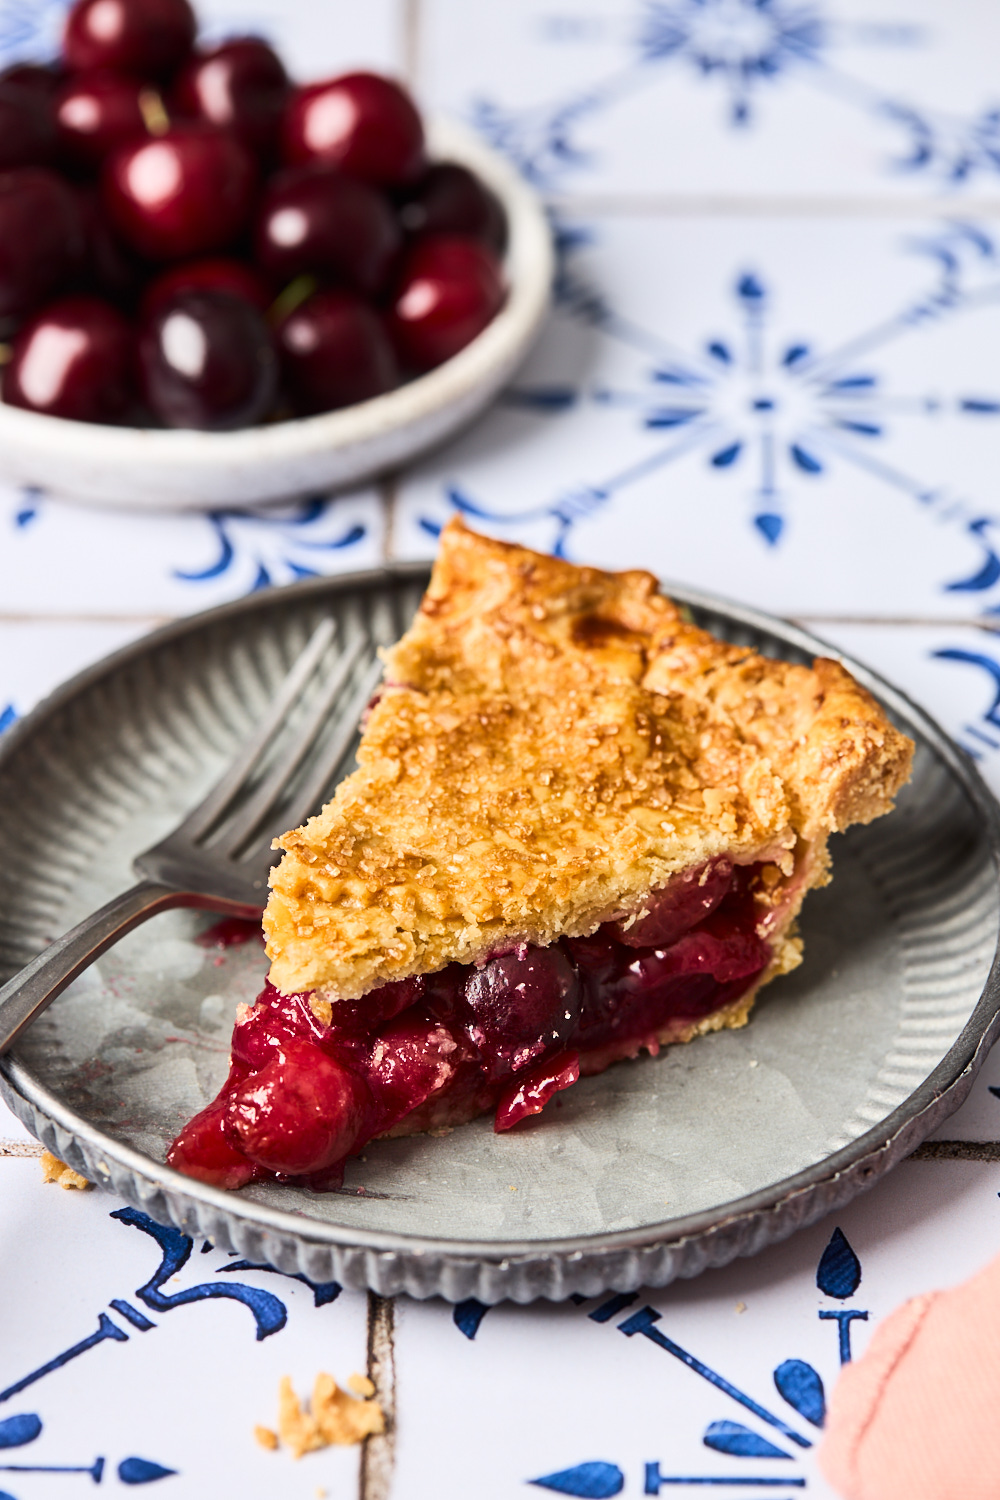
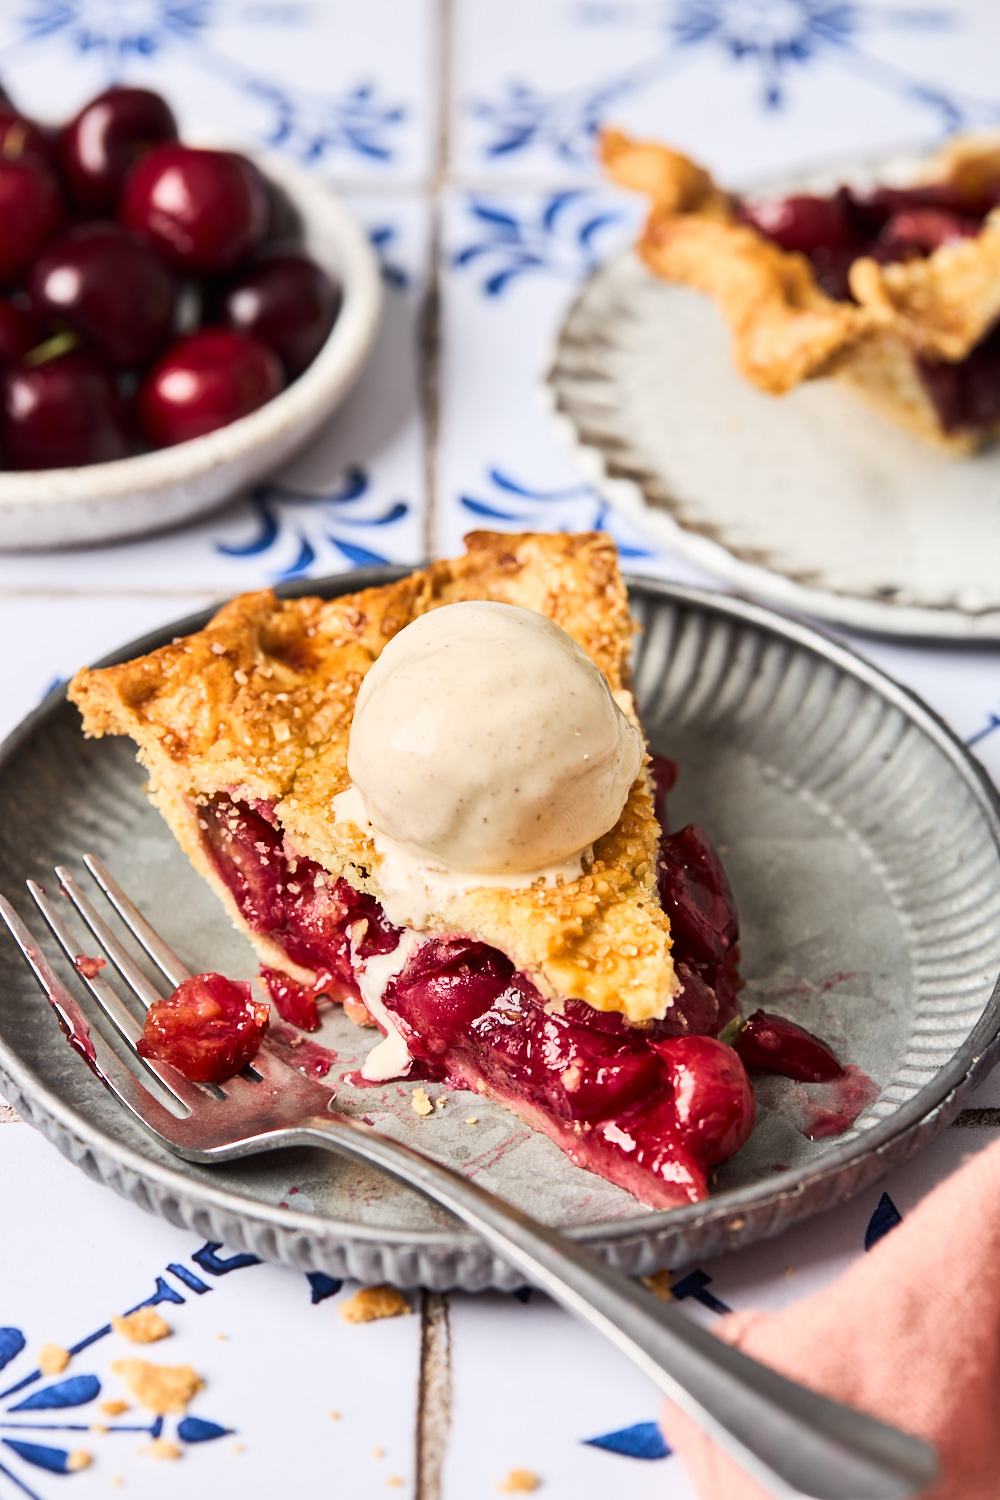
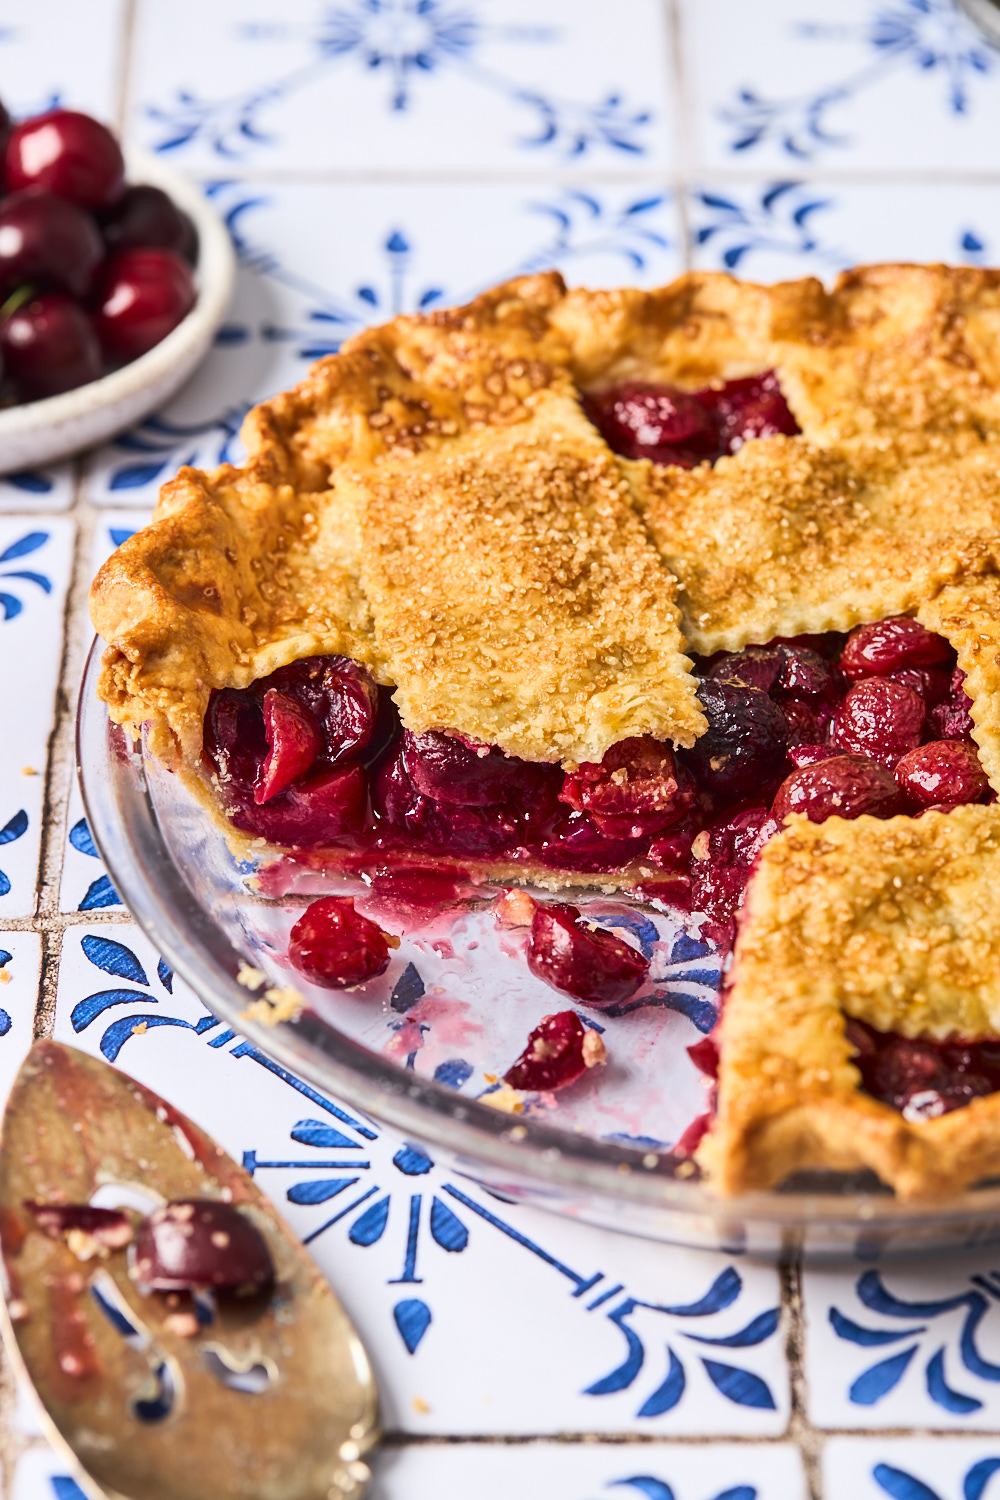
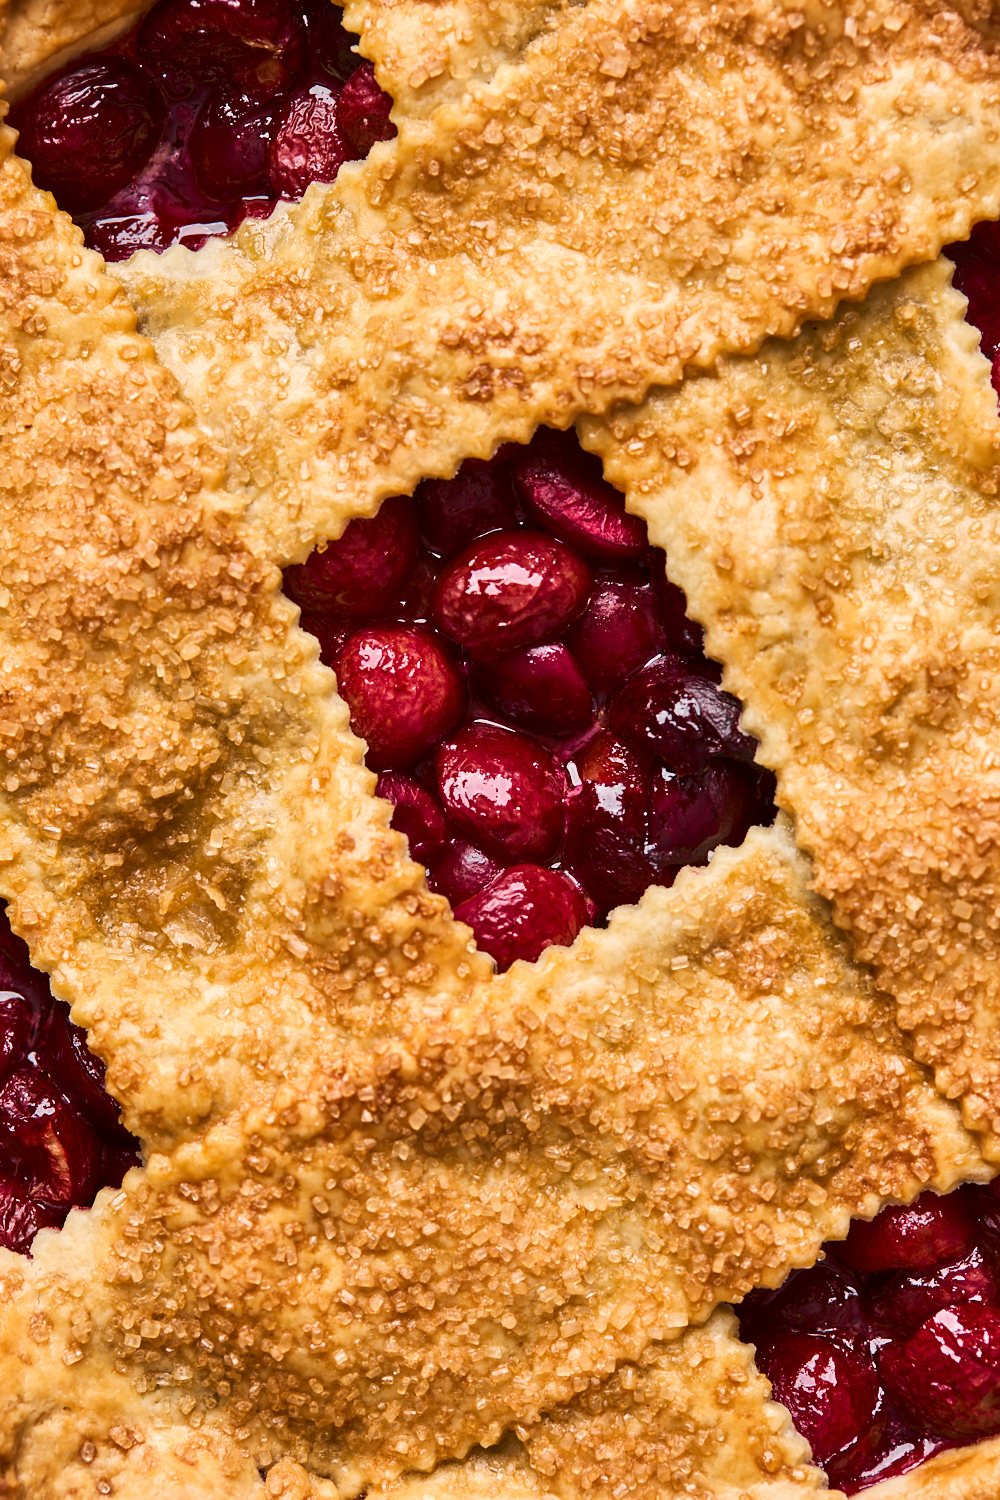
Cherry pie filled with ripe fresh sweet cherries is a Summer favorite and classic that my family loves. This easy pie can be made with fresh cherries or frozen sweet cherries. A touch of almond extract in the filling helps the cherries shine along with the vanilla and pinch of ground cinnamon between buttery layers of crust. There is nothing like a fresh Cherry Pie bubbling through a rich, flaky crust. Once you’ve pitted the cherries, the hard work is behind you and all that’s left is mixing the ingredients together. Pie recipes like this really are my favourite to make while fruit is at its peak - you will love this one - easy and irresistible with a scoop of vanilla ice cream.
Homemade pies are easy to make and so satisfying to eat. We change up the fruit with the seasons and make apple pies in the cooler months, then blueberry pie, strawberry-rhubarb pie, fresh strawberry pie juicy peach pie and of course this sweet cherry pie in Summer.
Cherry Pie Recipe Ingredients
- Cherries: Use any type of cherries - sweet or sour and fresh or frozen. No need to thaw if using frozen just slice and allow to sit - they will thaw while set aside and they might create more juices but they don’t get added to the pie so need to worry about that
- Sugar: Sugar helps balance out the natural tartness of cherries. If using sour cherries, you may need to add more sugar to help balance out the tart flavor. For sweet cherries, start with less sugar.
- Cornstarch: This helps thicken up the sauce and create a smooth, glossy finish.
- Vanilla Extract and Almond Extract: Both bring out the favours of the cherries - the taste of both is not overly pronounced but the perfect addition to the cherry pie filling and they really make pie filling taste delicious
- Cinnamon: Just a pinch of ground cinnamon to add warming flavours - a little ground ginger works well too
- Extra Add Ins: Freshly squeezed lemon juice just a little added to the filling can help brighten up the flavor.
- Double Pie Crust: Store bought or homemade pie crust can be used for this cherry pie recipe - more about that below
All About The Pie crust
I always recommend homemade but if you are going to do store bought I recommend using a good all butter pie dough that you can roll out and trim yourself not the prefab ones in the tin. Those tend not to be as great with fruit pies - the bottom gets too soggy. Don’t be intimidated to make your own. The recipe below is quite basic and works so well with any fruit pie filling. You can use your food processor or use use a pastry cutter, your fingers or two knives to cut the butter in to the flour. The things to remember when making pie dough are:
- Make sure your butter is chilled - I like to cut mine then stick it in the freezer - or you can even freeze your butter before hand then grate it.
- Make sure to not add too much extra water - if you absolutely need to add a little more then the recipe directs do so ½-1 teaspoon at a time. No one wants a sticky dough.
- Do not over work your dough - you want flaky dough that isn’t tough. Once you have a shaggy dough that is enough - hands off, wrap and allow it to rest and hydrate.

How To Make Cherry Pie
This tasty cherry pie is quiet easy to make and here is are the simple instructions (full details in recipe card below)
- Make Pie Dough: You can use store bought pie dough/pie crust for this recipe if you prefer or even use your own recipe. For a tried and tested simple all butter pie dough recipe please refer to the recipe card below - recipe, directions for making dough, rolling it out and lattice design included
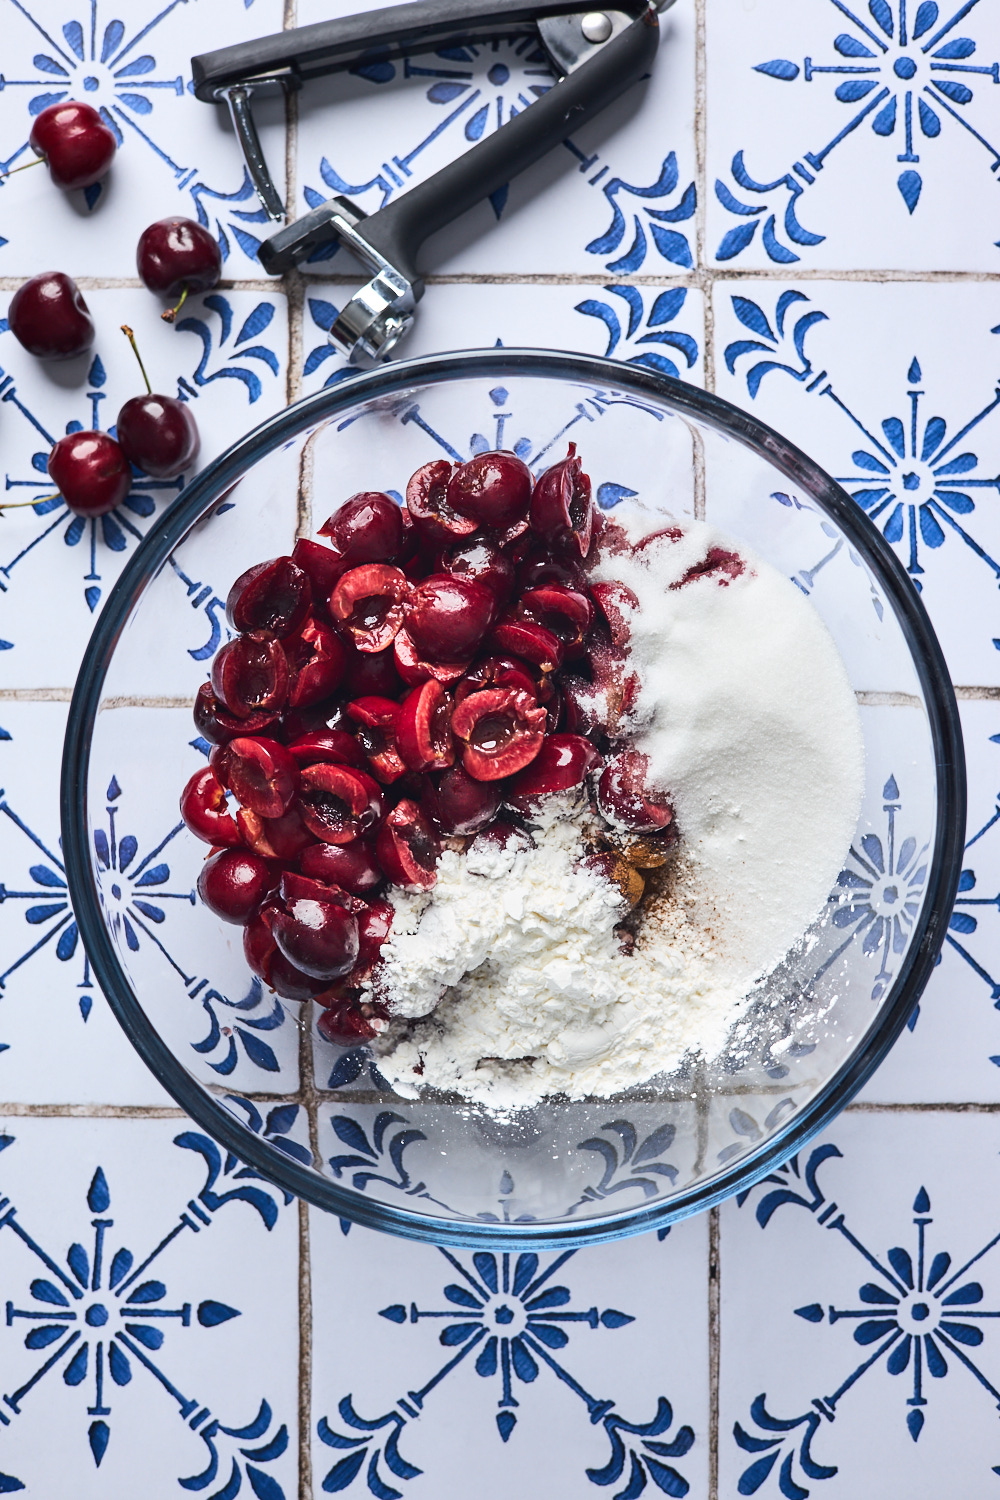
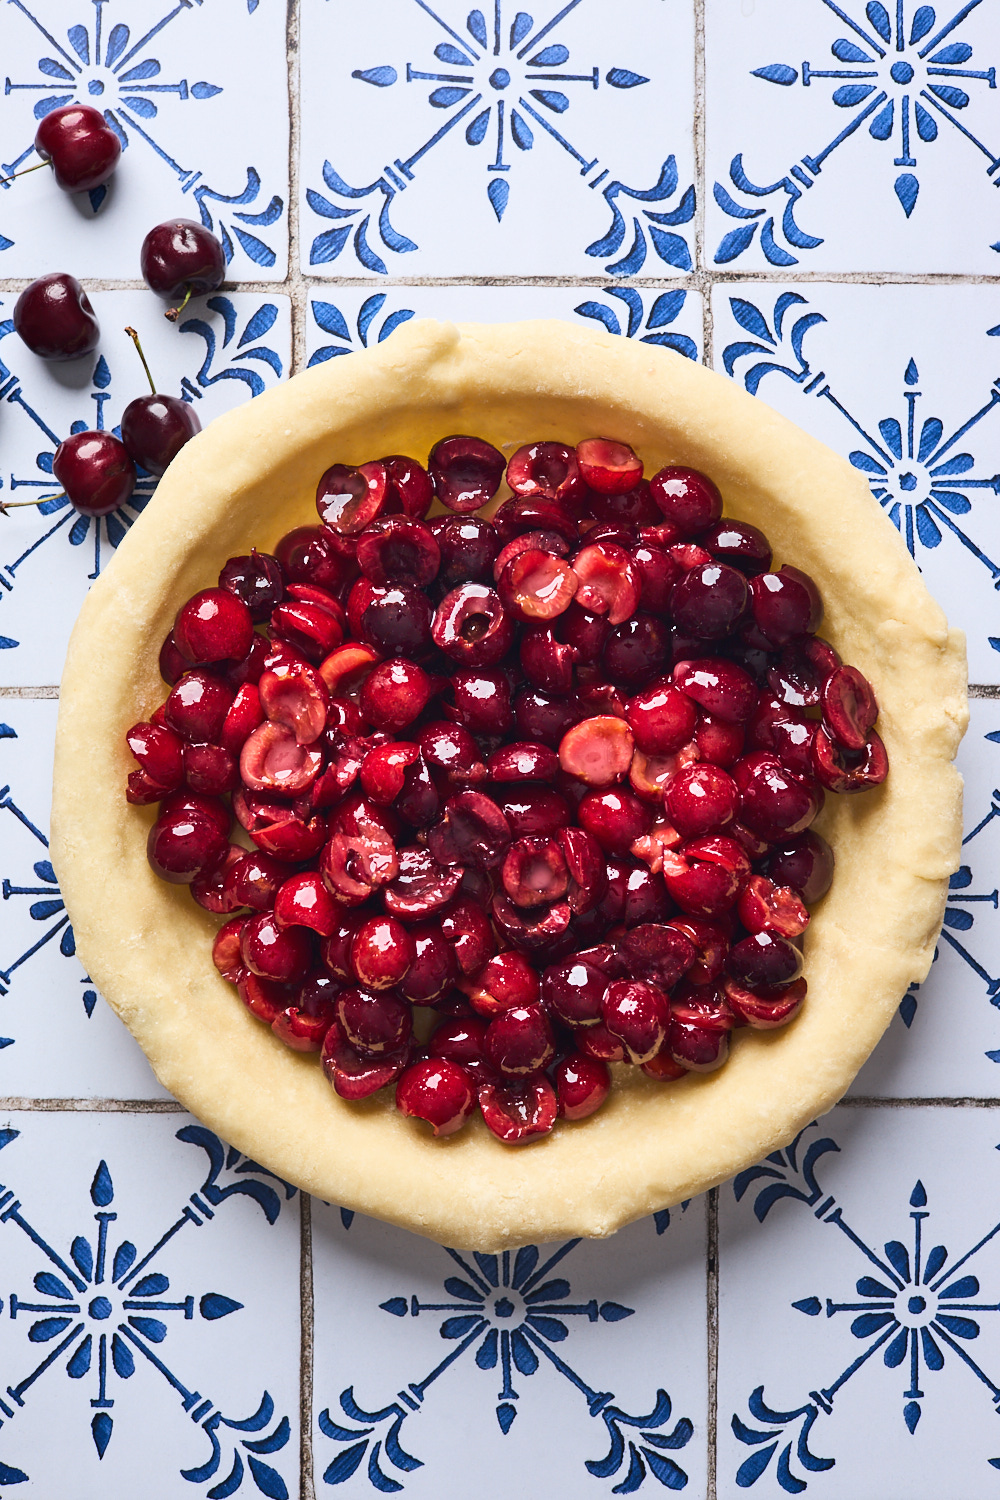
- Prepare Filling: Stir the cherries, sugar, cornstarch, lemon juice, vanilla, cinnamon and almond extract together until thoroughly combined.
- Roll out one disc of pie dough and fit into pie dish: Use a slotted spoon to transfer cherries to crust and discard any leftover juices in the bottom of the bowl.* Dot the pieces of butter on top of the filling.
- Roll out remaining disc of pie dough: Cut out pieces if making lattice or if covering pie with one sheet of pie dough leave as is - top pie with singe layer of pie dough or lattice, trim edges as needed. Fold edges and crimp. Make a few slits into top pie dough if leaving it whole as one sheet
- Brush pie top and edges with egg wash: Sprinkle top with coarse sugar if desired before baking
- Bake: Bake at 400°F for 20 minutes. Keeping the pie in the oven, turn the temperature down to 375°F and bake for an additional 30-35 minutes or until the top crust is golden brown and the fruit’s juices are bubbling. (After the first 20 minutes of bake time, I place a pie shield on top of the pie to prevent the edges from browning too quickly. Foil will also work.)
- Cool: Remove pie from oven when done and allow to cool on cooling rack for 2-3 hours before slicing and enjoying
All About The Cherries
- How to Pit Cherries? I’m not one to collect a whole bunch of kitchen gadgets but if there is one to have - a cherry/ olive pitter is one I definitely recommend. It’s saves you time and frustration. If you don’t have a cherry pitter, there are a whole bunch of other kitchen tricks on the internet to help get the pits out of your cherries.
- Fresh or Frozen Cherries? I always prefer using fresh cherries for the best flavor and texture, but if you can’t no worries just use frozen. Use frozen cherries or a canned jar and drain the juices well. Thaw or leave frozen as they will thaw while they are stirred with the rest of the ingredients and set aside, juices will be left behind.
- What kind of Cherries? For this cherry pie filling recipe, you can use either sweet cherries for a sweet cherry pie or tart cherries for a sour cherry pie. As you’ll see in the recipe, the only difference between them is the amount of sugar and lemon juice. See recipe notes for details. When it’s comes to the actual type of sweet cherries - feel free to use whatever variety you like.
Cherry Pie Make Ahead, Storage & Freezing
- MAKE AHEAD: Fruit- cherries can be piped and sliced 1 day ahead of time and kept in a sealed container in the fridge (only the fruit without all the other ingredients the cherries are tossed with) Pie Dough - can be made in advance and stored wrapped in plastic wrap in the fridge for up to 3 days. It can also be wrapped and frozen for up to three months. Thaw in the fridge overnight and then rollout as directed.
- STORAGE: Wrapped in foil, leftover pie will keep up to 2-3 days at room temperature; and in the fridge for another 2 days, warm 10 minutes in a 350°F oven to revive crust before serving. I usually store mine wrapped tight in the fridge right off the bat as it keeps better and longer chilled.
- FREEZING UNBAKED PIE: Prepare pie as directed up until you have to bake it. After it has chilled for half hour wrap the pie with a couple of layers of plastic wrap then a layer of foil. Place the wrapped pie into a freezer-safe storage bag, squeezing out any excess air. Use a permanent marker to label the kind of pie as well as the date. Store in the freezer (be careful not to set anything on top of the pie while it is freezing). It can be frozen for up to 3 months. Remove from freezer when ready to bake, unwrap and set on countertop while oven preheats. Bake from frozen same as directed in recipe.
- FREEZING BAKED PIE: Bake and cool pie as directed. Place your pie into the freezer to allow it to initially freeze, for 1-2 hours or preferably overnight. Then, wrap your frozen pie in a layer of plastic wrap, followed by a layer of aluminum foil. Place the wrapped pie into a freezer-safe storage bag, squeezing out any excess air. Use a permanent marker to label the kind of pie as well as the date. Store in the freezer for up to 4 months. Thaw it by moving it to the fridge overnight (or up to 24 hours). Remove wrappings and reheat your pie if you like! Once thawed, simply pop it in the oven at 350°F until the filling is bubbling. If your crust begins to brown, you can loosely place foil over the top.
Extra tips for making a great Homemade Cherry pie
There are a few things of note when assembly the pie:
- I like to keep everything cold while I’m putting the pie together. While I’m working on the pie crust I will keep my cherries chilled. And once the whole pie is put together and brushed with egg wash I like to chill the whole pie in the fridge or freezer for at least 15 minutes. This is totally optional but cold butter/dough is the key to a flaky pie crust, and it’s probably a bit too warm after you’ve rolled out the dough, poured in the filling, and crimp the edges. Throwing it in the freezer first is your flaky dough insurance. If you are going to do this I recommend preheating the oven while pie is chilling no earlier.
- Another step that is optional but recommended is dusting the base pie crust with a pinch of flour and sugar before pouring herb the filling. It’s just a small amount but helps prevent a soggy bottom crust. It’s helps any extra juices from the cherrie to thicken up.
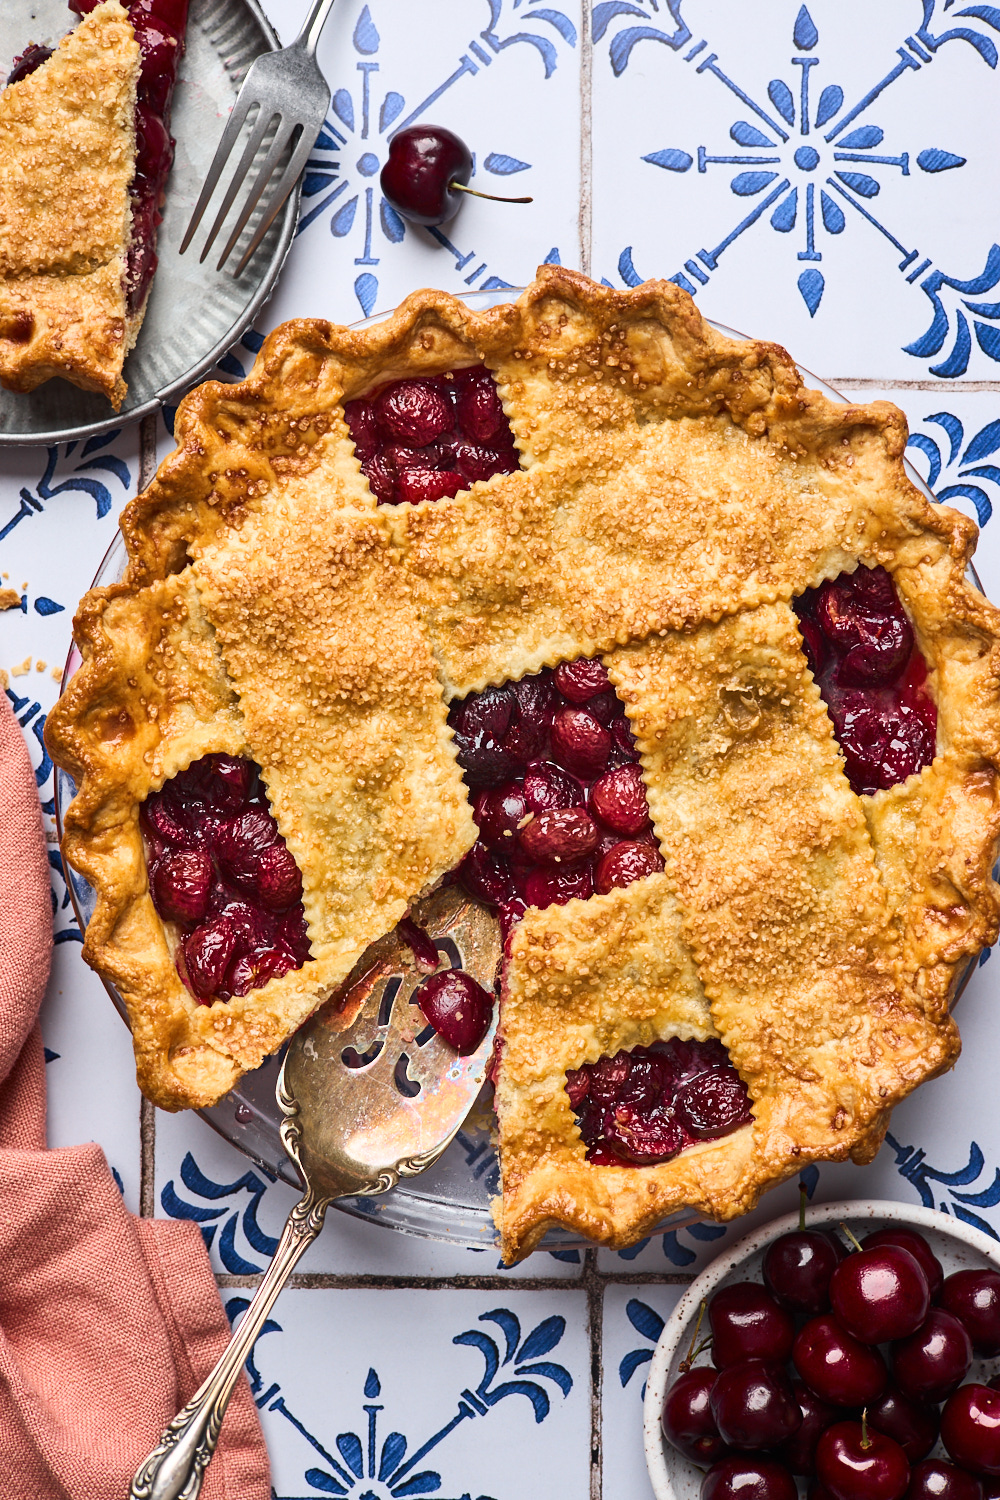
- Lastly and this is the hardest part of all, especially if you have zero patience like me; let the pie cool almost to room temperature so the juices thicken. This will make it easier to slice and serve. If you slice into a hot pie, the filling will slide out. It will be a mess! A happy and delicious mess but if you are serving it to company you might want to plan ahead accordingly.
More cherry recipes:
Recipe
Ingredients
For the pie crust
- 2½ cups all purpose flour plus more for dusting
- ½ tablespoon granulated sugar
- ½ teaspoon salt
- ½ lb COLD unsalted butter (2 sticks) diced into ¼” pieces
- 7 tablespoons ice cold water (7 to 8 Tbsp)
For the filling
- 4½ cups halved pitted fresh cherries (fresh or frozen)
- ⅔ cup granulated sugar
- ¼ cup cornstarch
- 1 tablespoon lemon juice
- 1 teaspoon pure vanilla extract
- ¼ teaspoon almond extract
- Pinch of cinnamon
- 1 tablespoon cold unsalted butter, cut into small cubes
- egg wash: 1 large egg beaten with 1 Tablespoon milk or water
- Coarse sugar for sprinkling on crust (optional)
- Mixture of 1 Tsp flour and 1 Tsp sugar for base of crust ( optional but recommended)
Directions
Make pie crust
- Place flour, sugar and salt into the bowl of a food processor and pulse a few times to combine. (Feel free to do this all by hand as well)
- Add cold diced butter and pulse the mixture until coarse crumbs form with some pea-sized pieces then stop mixing. Mixture should remain dry and powdery
- Add 7 Tbsp ice water and pulse just until moist clumps or small balls form. Press a piece of dough between your finger tips and if the dough sticks together, you have added enough water. If not, add more water 1 teaspoon at a time. Be careful not to add too much water or the dough will be sticky and difficult to roll out.
- Transfer dough to a clean work surface, and gather dough together into a ball (it will not be smooth but shaggy) Divide dough in half and flatten to form 2 disks. Cover with plastic wrap and refrigerate 1 hour before using or overnight.
Make filling
- Make the filling: In a large bowl, stir the cherries, sugar, cornstarch, lemon juice, vanilla, cinnamon and almond extract together until thoroughly combined.
- Set cherry mixture aside in the refrigerator as the oven preheats. *
Assemble pie
- Preheat oven to 400°F (204°C).
- Roll out the chilled pie dough: On a floured work surface, roll out one of the discs of chilled dough using a rolling pin lightly dusted wth flour until you have a 12 inch circle. Carefully place the dough into a 9×2 inch pie dish/pie pan. Sprinkle over the flour sugar mixture over base if using. Use a slotted spoon to transfer cherries to crust and discard any leftover juices in the bottom of the bowl.* Dot the pieces of butter on top of the filling.
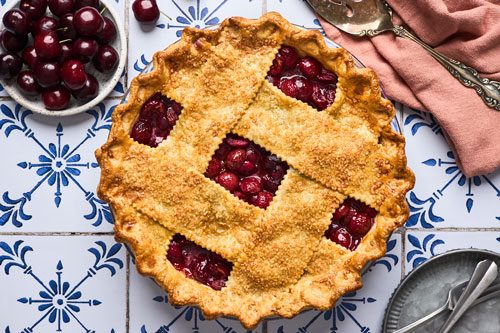
- Arrange the lattice crust or top part of pie: Remove the other disc of chilled pie dough from the refrigerator. Roll the dough into a circle that is 12 inches diameter. Using a pastry wheel, sharp knife, or pizza cutter, cut strips of dough– I cut just 3 pieces for mine but you can cut as many as you wish. Carefully thread the strips over and under one another, pulling back strips as needed to weave. Press the edges of the strips into the bottom pie crust edges to seal. Use a small paring knife to trim off excess dough. Flute or crimp the edges with a fork, if desired.
- Lightly brush the top of the pie crust with the egg wash. Sprinkle the top with coarse sugar, if using.
- Place the pie onto a large baking sheet and bake for 20 minutes. Keeping the pie in the oven, turn the temperature down to 375°F and bake for an additional 30-35 minutes or until the top crust is golden brown and the fruit’s juices are bubbling. (After the first 20 minutes of bake time, I place a pie shield on top of the pie to prevent the edges from browning too quickly. Foil will also work.)
- Allow the pie to cool for 3 full hours at room temperature before serving to allow filling to set completely. Cover leftovers tightly and store in the refrigerator for up to 5 days.
Recipe Notes
- Keep the dough, filling, and prepared (unbaked) pie as cold as possible. If possible I recommend refrigerating (or freezing) the prepared pie for a least 15 min before baking for up to 1 hour. Refrigerate the filling before you need it too.
- If you would prefer not to discard the leftover cherry juices, you can pour the juice leftover after transferring the cherries out in to a small saucepan pan and place over low heat to medium heat and cook stirring until it reduces into a thick syrup. Once it’s cool you can stir it back into the cherries and add it to the pie to ramp up the filling a bit more. This is totally optional and the pie is absolutely delicious either way.
- For sour cherry version: Since sour cherries are more tart, use 1 cup of sugar instead of ⅔ of a cup.
- Using Frozen Cherries: Halve/quarter them while they’re frozen, thaw or leave frozen and then toss with other filling ingredients as directed in recipe. Reduce or remove the juices as instructed as well.
- If you prefer to use cherry pie filling feel free to use my homemade cherry pie filling